Managing Users and User Groups
Manage Users
You can define which users have the right to access your Nium account through the Nium portal. Users can be added, viewed, and managed on the User Management page.
- Access this page by selecting Users > Manage Users.
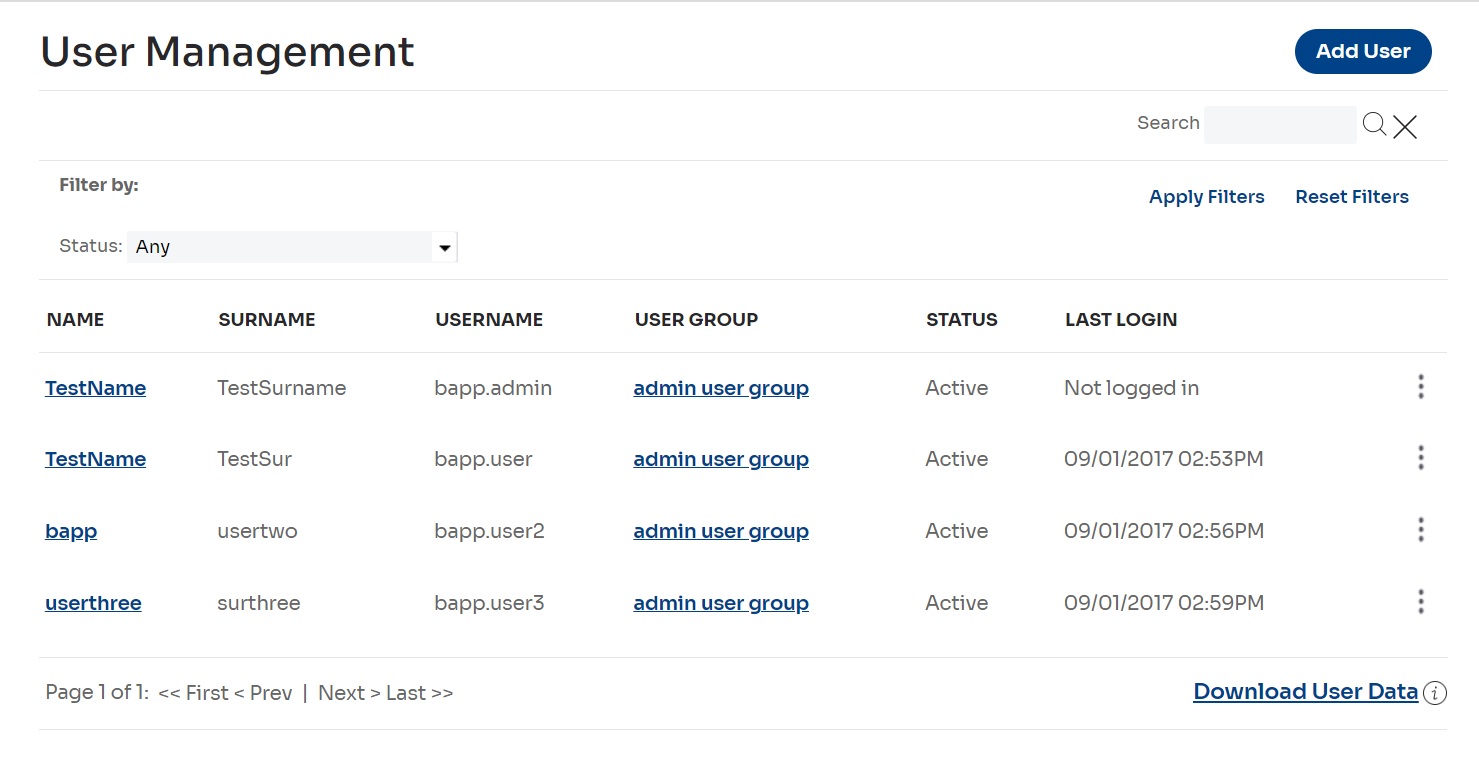
- The User Management page displays a list of all users. You can perform actions on each user from here by selecting the vertical three dots icon.
📘 NOTE
For extra security, Nium can generate an invite verification code whenever a new user is invited. If you enable this feature, each new user must provide their verification code when they accept the invitation to register. You must provide the verification code directly new users using a secure channel.
You can enable or disable this feature on the Account Settings page. Select your Username > Account Settings.
Add a new user
To add a new user to your Nium account, you must send them an invitation to register.
- Select Users > Manage Users.
The User Management page is displayed. - Select the Add User button.
The Add User page is displayed.
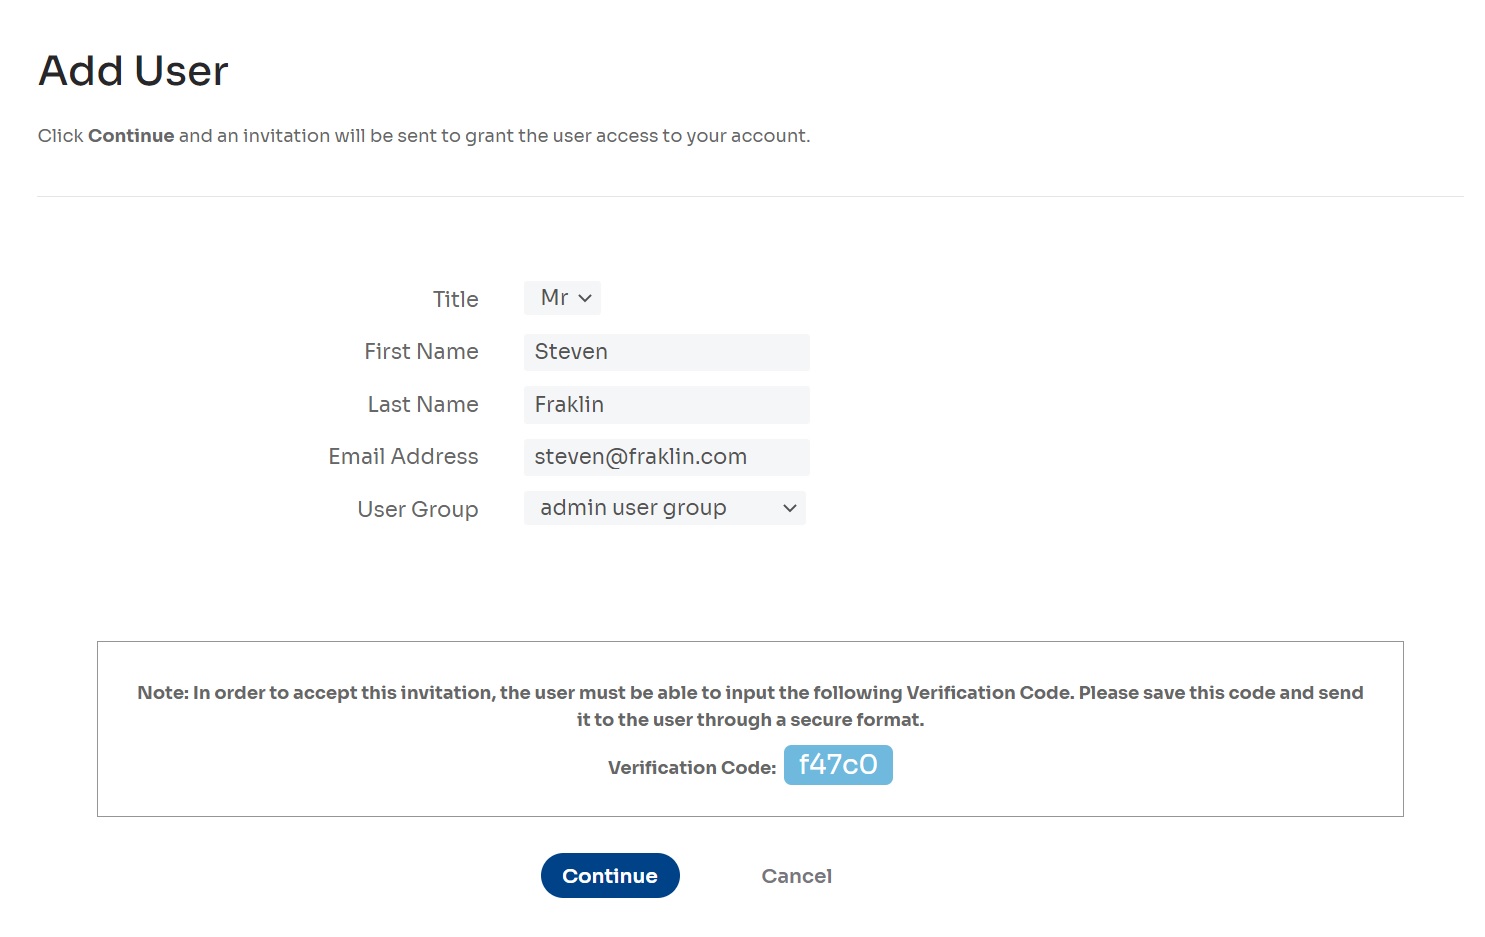
- Enter the new user's details: Title, First Name, Last Name, and Email Address.
Make sure that the email address is correct. This is the address to that we’ll send a registration invitation. - Select an existing user group in the User Group field or select the option to create a new user group.
If you select the Create New User Group option, you will be redirected to the Add User Group page. For more information, see Manage user groups. - If you have enabled the verification code option (see Manage users), a verification code is displayed. Please take note of this verification code; you must send it to the new user via a secure channel. They cannot register without providing this code.
- Select the Continue button to save and create a registration invitation for the new user.
The invitation is sent to the provided email address. You will receive a confirmation message on the User Invited page. - Select the Close button on the User Invited page.
The User Management page is displayed.
After you create a new user, you can edit or view their details, activate or deactivate them, cancel their registration invitation or reset their verification code. To perform these actions, select the vertical three dots icon for the user on the User Management page.
Manage your personal details
You can verify and update personal details associated with your user account.
- Select your
username> Personal Details.
The Personal Details page is displayed.
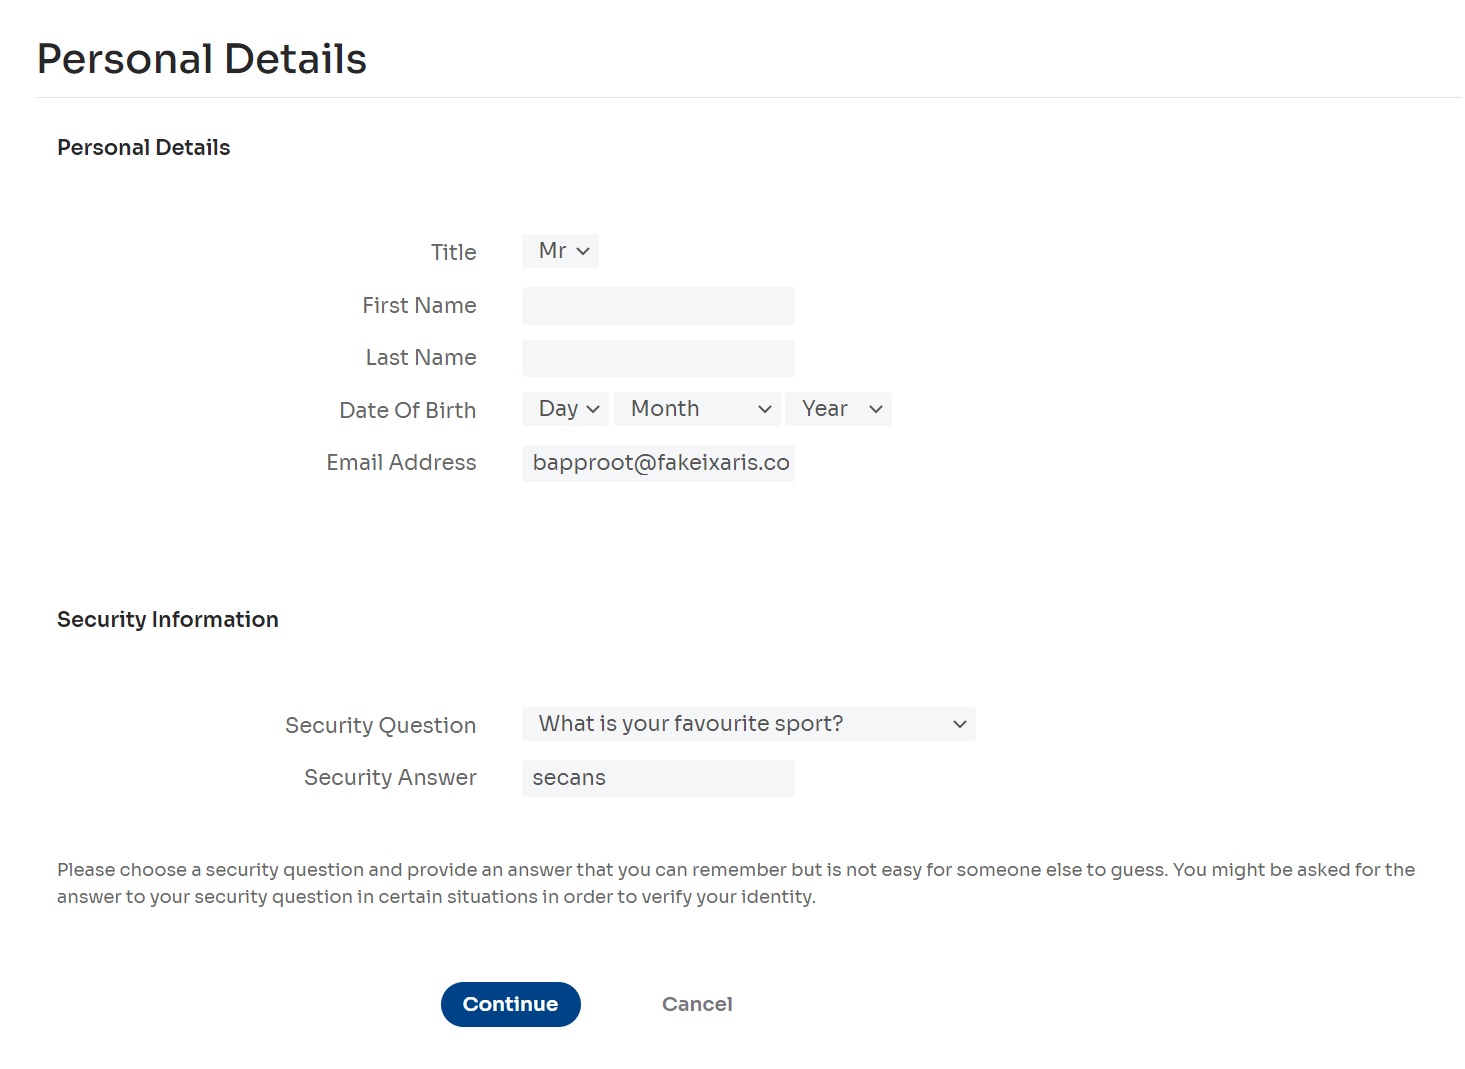
- Update your details as needed and select the Continue button to save.
The Personal Details Updated page is displayed.
Change your password
You can change your personal password to access the Nium Portal.
- Select Manage Security > Change Password.
The Change Password page is displayed.
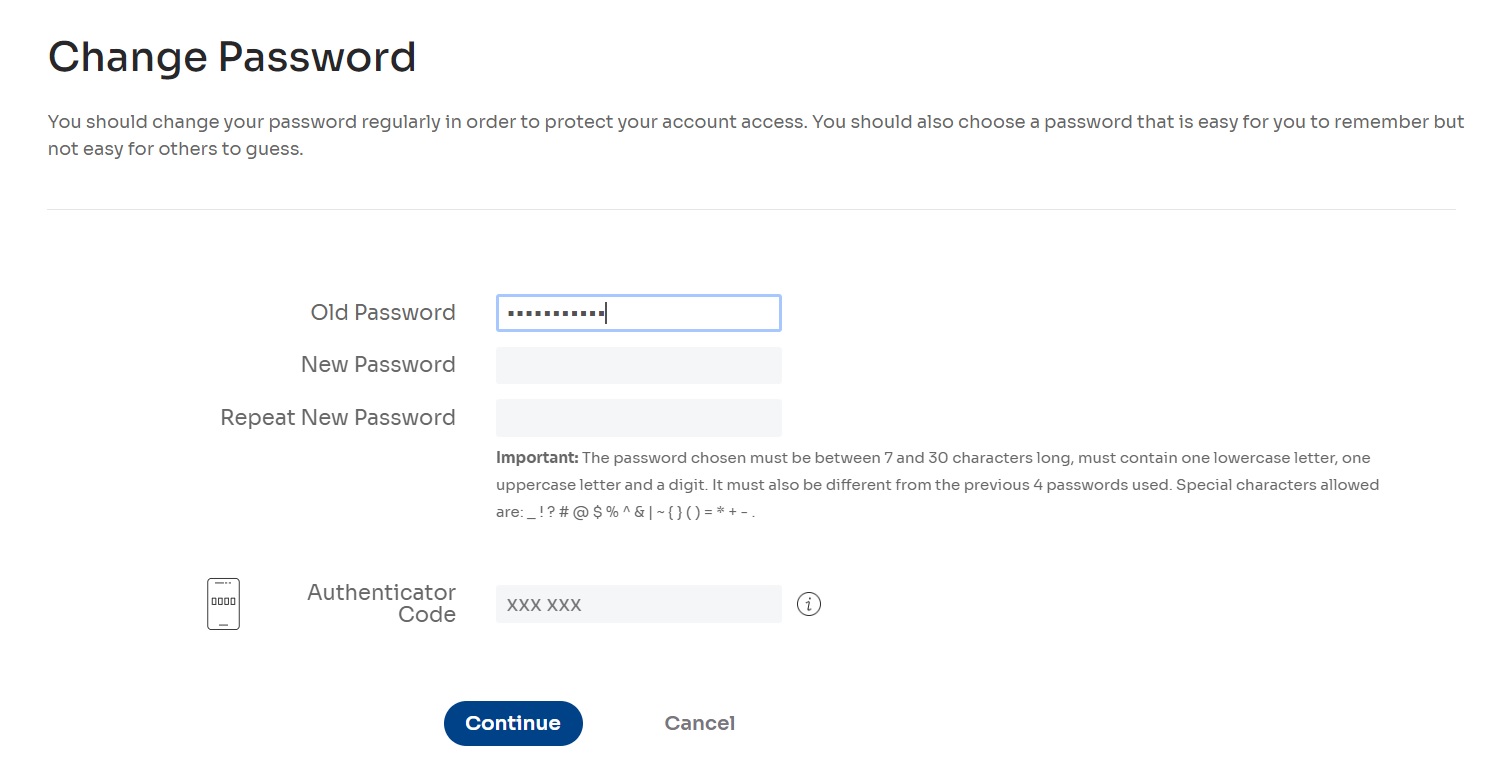
- Enter your new password in the New Password and the Repeat New Password fields.
- Enter the 6-digit code generated by your TOTP authenticator application and select the Continue button to save.
The Password Updated page is displayed.
You should now use your new password to sign in to the Nium Portal.
📘 NOTE
If your new password is not accepted, check that it meets the requirements described on the page and that it is not the same as one of your previous passwords.
📘 NOTE
The personal password and the API Key password (see Appendix A: Resetting the API key password and Appendix B: Phasing out the API key password) are different.
Your personal password is only associated with your user account. You use your personal to access the Nium Portal. The API Key password is a single password for your entire Nium account - it is not used in the web app, it is only used for API calls.
Appendix: Reset the API Key Password
To reset the API key password in Nium:
- Sign in to the Nium Portal
- Select your
username> API Settings
The API Key Settings page is displayed. - Select the icon in the Active Password row.
The action menu is displayed.
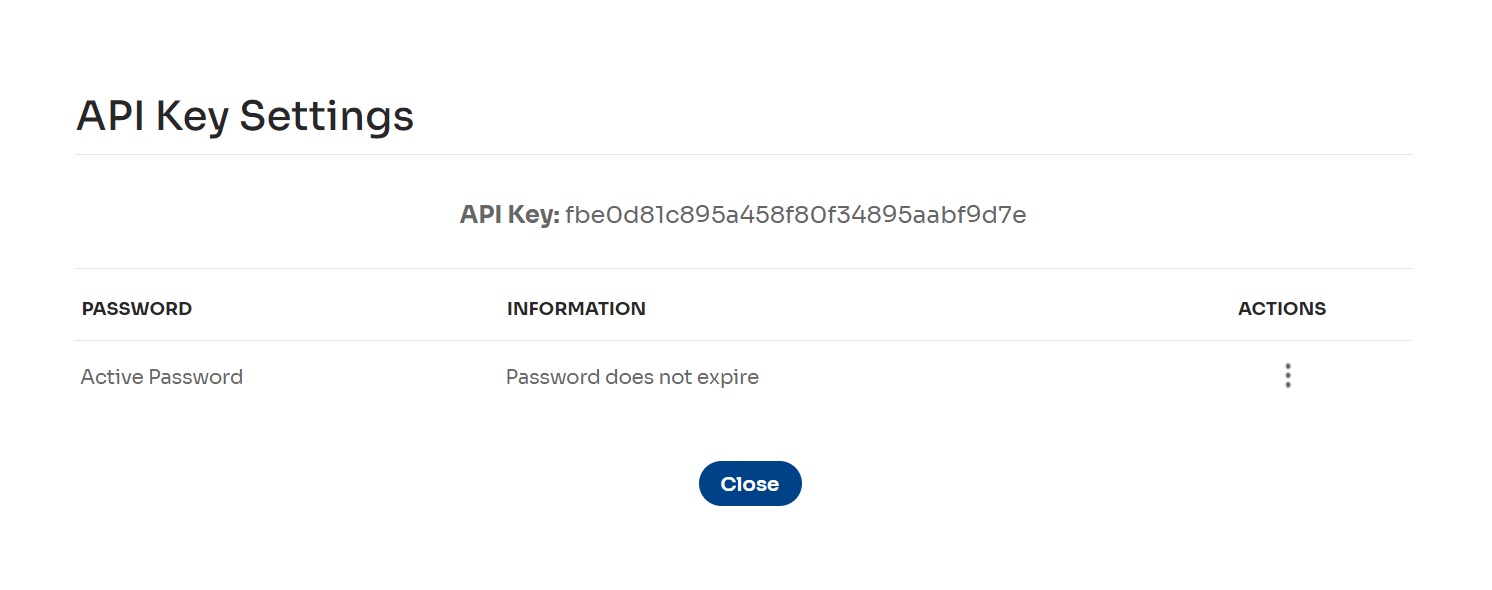
- Select the Replace Password option in the Actions drop-down menu.
A confirmation window is displayed. - Select the Confirm button in the confirmation window.
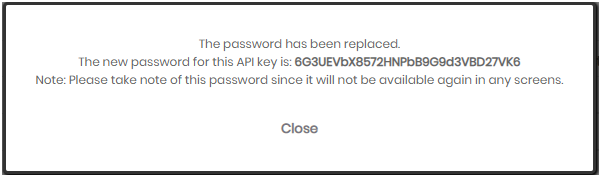
The new API key password is displayed in a window.
👍 IMPORTANT
It is important that you take note of the API key password. You will not be able to access it later. If you lose this password, you will have to replace it again.
Appendix: Phase out the API Key Password
You can use the Nium Portal to phase out the API key password.
When a password is phased out, it remains valid for a designated number of days. At the same time, the new password is also valid. After the designated period is over, the old password becomes invalid.
📘 NOTE
The availability of this phase-out functionality depends on how your API keys are set up and may be unavailable in your Nium setup.
To phase out the API key password:
- Sign in to the Nium Portal.
- Select your
username> API Settings
The API Key Settings page is displayed. - Select the icon in the Active Password row.
The action menu is displayed.
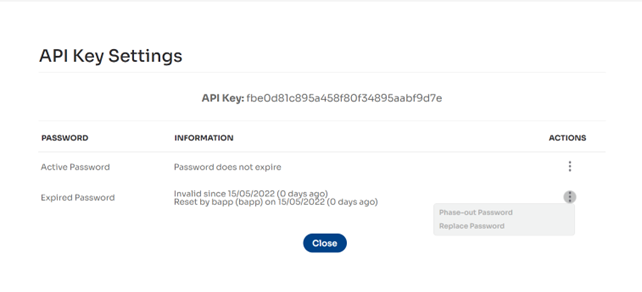
- Select the Phase-out Password option in the Actions drop-down menu.
A confirmation window is displayed. - Select the Confirm button in the confirmation window.
The new API key password, and information about the phase-out period, are displayed in a window.
👍 IMPORTANT:
It’s important that you take note of the API key password. You will not be able to access it later. If you lose this password, you will have to replace it again.

Manage 2-factor authentication paired device
Two-factor authentication is tied to a specific device (browser, mobile etc). If you’ve replaced your device or would like to change the device that you use with Nium, follow these steps:
- Select your Manage Security > Manage 2-Factor Authentication
The Manage 2-Factor Authentication page is displayed.
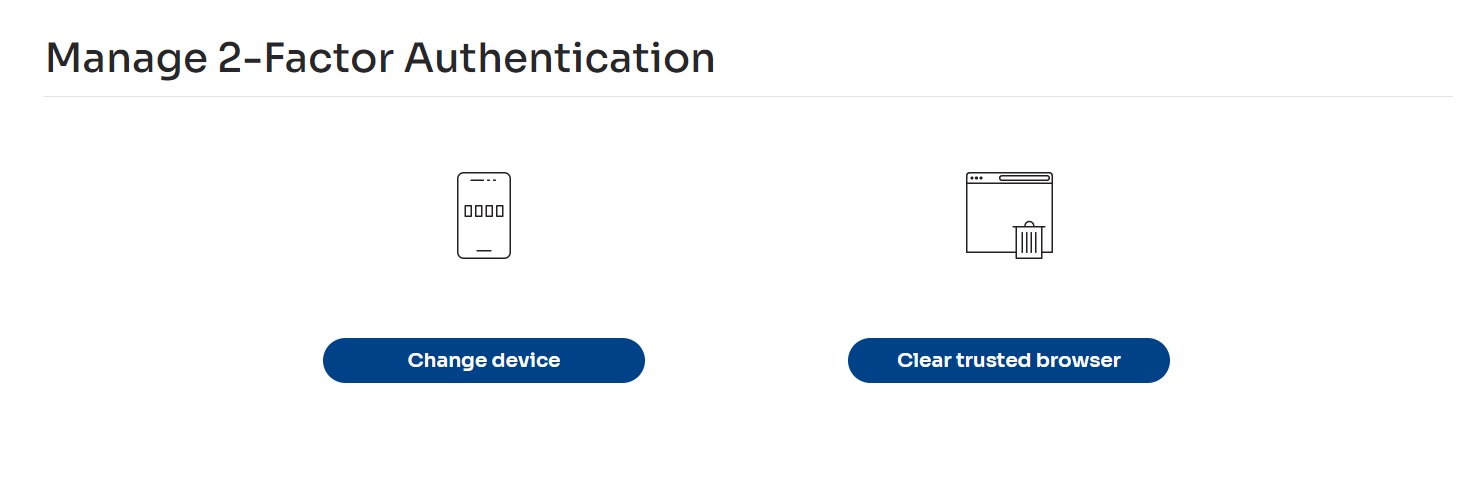
- Select the Change Device option.
The Confirm Password page is open.
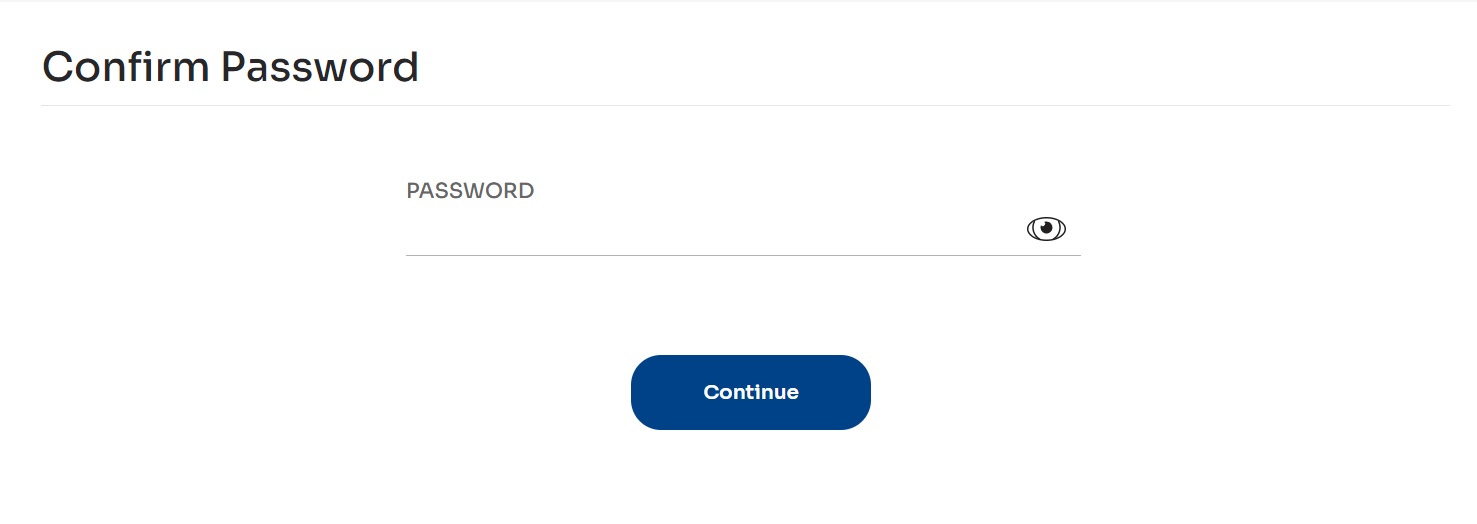
- Enter your password, and select Continue.
The 2-Factor Authentication setup page opens. - Follow the steps to set up your new device. See Appendix G: Setting 2-factor authentication.
- Enter the new authenticator code.
- Select Enable to confirm the new device.
Manage 2-factor authentication trusted browsers
Nium allows you to mark browsers as Trusted so you don’t have to enter the 6-digit password every time you access your account. You can mark a browser as trusted for 90 days. Following this period, the 6-digit password will be required again. However, you can repeat the below process to mark the browser as Trusted.
Trusted browsers can also be cleared from your account. To clear a trusted browser, follow these steps:
- Select your Manage Security > Manage 2-Factor Authentication.
The Manage 2-Factor Authentication page is displayed.

- Select the Clear trusted browser option.
The Clear Trusted Browser confirmation is displayed.
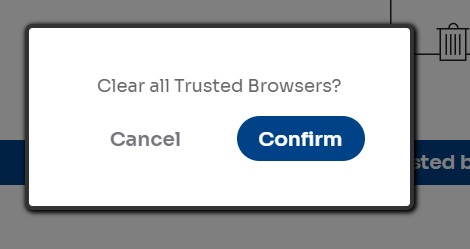
- Select Confirm. The Trusted Browsers are cleared
Appendix: Setting 2-factor authentication
Two-factor authentication (2FA) is a security layer required to access financial accounts from the European Union’s Second Payment Services Directive (PSD2).
Two-factor authentication means that, in addition to your username and password, you’ll have to enter a one-time, 6-digit authentication code when you sign in to the Nium Portal.
We support Time-Based One-Time-Use passwords (TOTP) generated from authentication apps, like the Google Authenticator app. We suggest using the Google Authenticator app, but we also support other applications, including FreeOTP, Microsoft Authenticator, and Authy. Nium account, we’ll guide you through the set-up process:
- Sign in to the Nium Portal
The 2-Factor Authentication setup page is displayed.
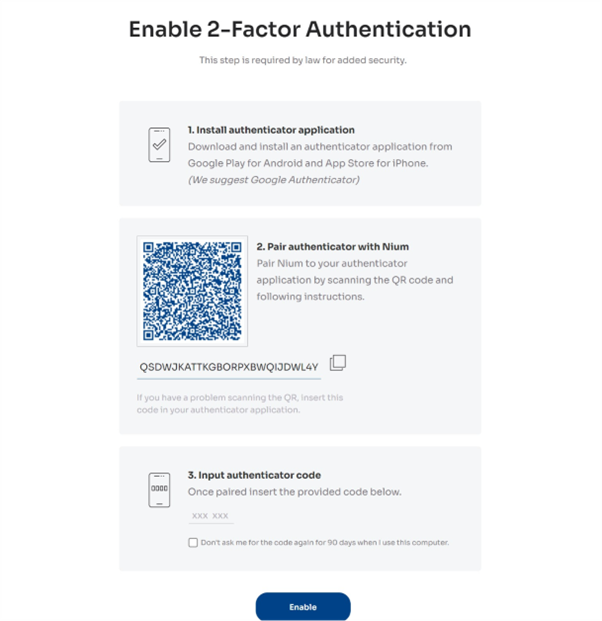
- Install a TOTP authenticator app on your mobile device, as a browser plugin, or as a desktop application (we suggest Google Authenticator).
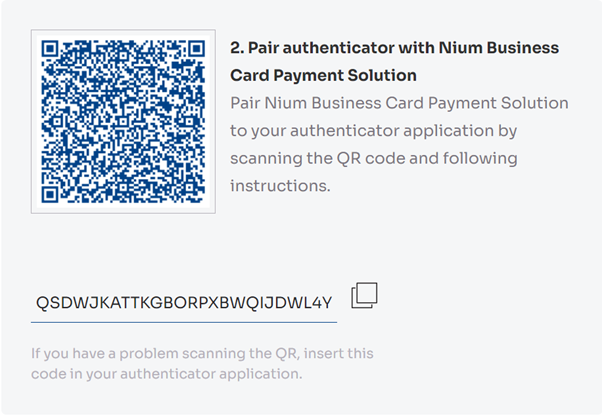
- Pair the TOTP authenticator application by scanning the QR code
📘 NOTE
NOTE: If you encounter issues with scanning the QR code, select Having trouble? Try manual input link and input the secure key manually in the TOTP authenticator application
- Enter the 6-digit code generated by your TOTP authenticator
- Select Enable
Manage user groups
With user groups, you can control users' actions in the Nium.
User groups have a hierarchical structure: a group can have many child groups that have a subset of rights of the parent group.
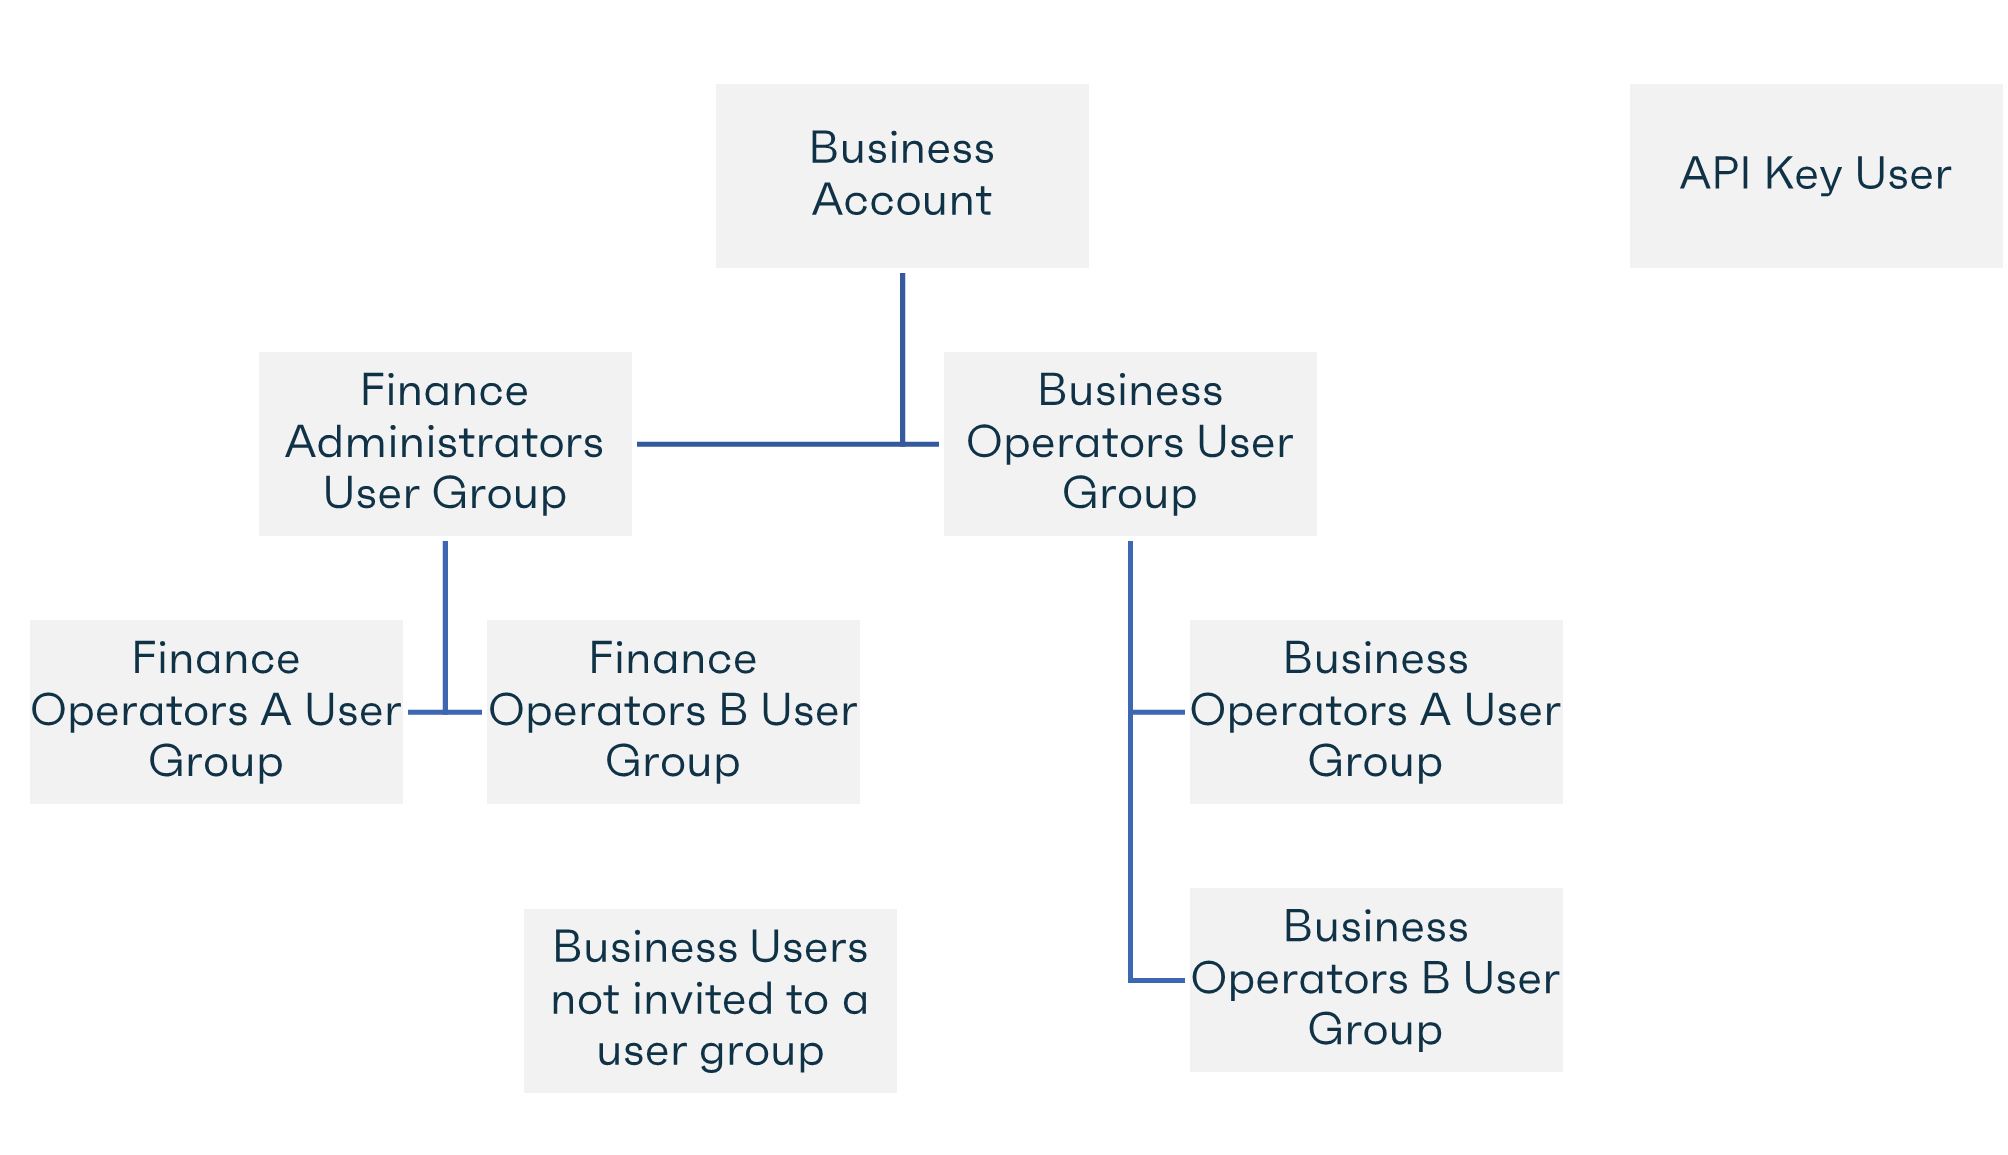
The following rules apply to user groups:
-
The primary user of the web app:
- Is the root user of the application
- Cannot be assigned to any user groups
- Can perform all actions available in the Nium Portal
-
Any user other than the primary user:
- Can be assigned to only one user group
- Must be assigned to a user group to use the Nium Portal
- Can only perform operations defined in their assigned user group
- Can only manage child groups of their assigned group (if that group has the right to manage groups)
- Can only manage users in their child groups or users who are not assigned to any groups (if their group has the rights to manage users)
-
A user group can contain the following:
- All the rights of the parent group
- or a subset of the rights of a parent group
-
All child user groups are deleted if you delete a user group. All assigned users of all deleted user groups are left with no user group and must be re-assigned to continue using the Nium Portal.
View and manage user groups
Go to the User Group Management page to view, add, delete, and perform other operations for user groups.
- Select Users > Manage User Groups.
The User Group Management page is displayed.
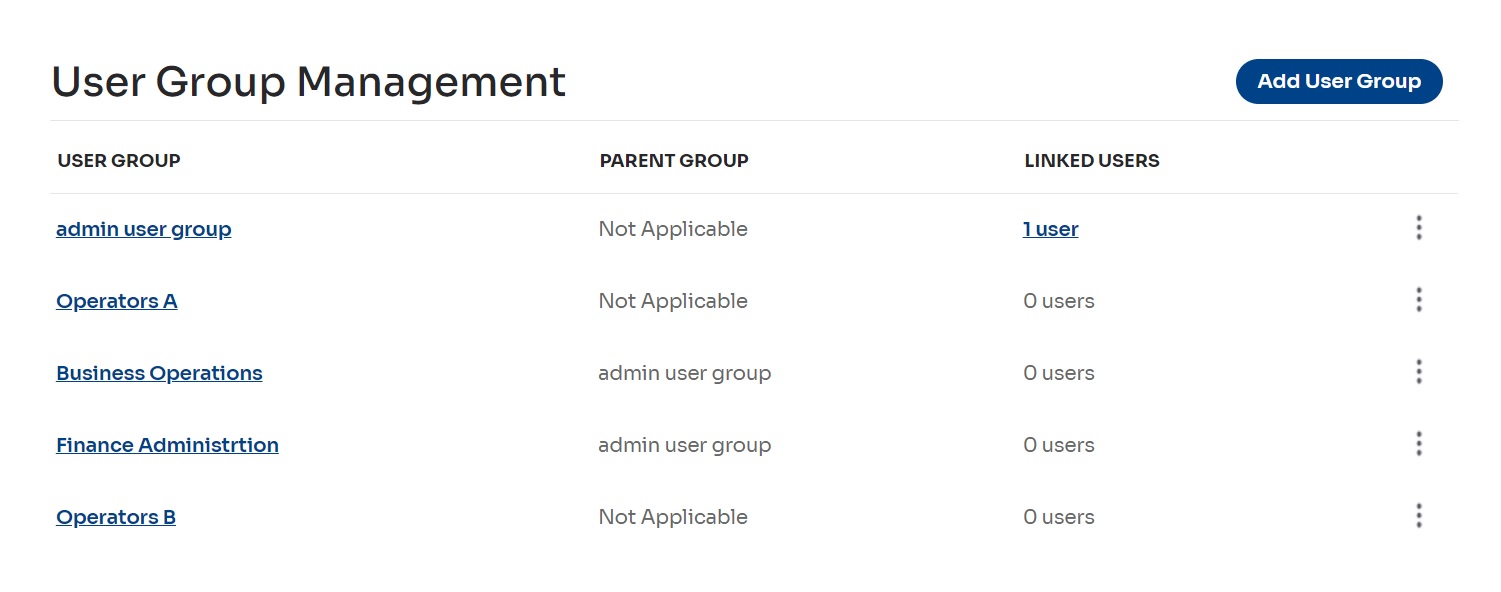
- Select the icon for the selected user group.
The action menu is displayed. - Select the operation you want to perform.
Appendix: View user group rights
This section provides more detailed explanations related to the User Group Rights section of the View User Group and Edit User Group pages.
Account Management
| Permission | Description |
|---|---|
| Manage the business details | This permission activates the following menu options: • username > Business Details (Business Details page)• Users > User History (User History page) Users with this permission can view key business information for the account and all activities performed by other users on the account. This permission should only be assigned to administrators. For more information, see Managing your company account. |
| Manage the business account settings | This permission activates the following menu options: • username > API Settings (API Key Settings page)• username > Account Settings (Account Settings page)• Funds > Funding Account Settings (Funds Settings page) Users with this permission can configure various settings for the Nium Portal, including API key passwords, default funding accounts, and whether an invite verification code is required. This permission should only be assigned to administrators. For more information, see Manage users: Appendix A: Resetting the API key password, Appendix B: Phasing out the API key password |
Business Users
| Permission | Description |
|---|---|
| View a user's details | This permission activates the following menu options: • Users > Manage Users (User Management page) Users with this permission can view user details but cannot modify any data. For more information, see Manage users |
| View a user group's details | This permission activates the following menu options: • Users > Manage User Groups (User Group Management page) Users with this permission can view user group details, but they cannot modify any data. For more information, see View and manage user groups. NOTE: When you activate this permission, the permission is automatically activated. |
| Manage a user group | This permission activates the following options: • The Add User Group button on the User Group Management page • Actions on the User Group Management page: Copy User Group, Edit User Group, Manage Linked Users, Delete User Group. Users with this permission can add and modify user groups (including user group rights) and link users to user groups. This permission should only be assigned to administrators. For more information, see Add a new user group, Edit a user group, Clone a user group and Delete a user group. NOTE: When you activate this permission, the View the details of a user group and View the details of a permissions are automatically activated. |
| Create a new user | This permission activates the following options: • The Add User button on the User Management page • Actions on the User Management page: Resend user invitation, Reset verification code, Cancel pending user invitation Users with this permission can add new users and manage new user invitations (resend and cancel invitations and reset verification codes if these are enabled). This permission should only be assigned to administrators. For more information, see . NOTE: When you activate this permission, the Manage user groups, View the details of a user group and View the details of a user permissions are automatically activated. |
| Activate or deactivate a user | This permission activates the following options: • Actions on the User Management page: Activate user, Deactivate user Users with this permission can activate and deactivate existing users. This permission should only be assigned to administrators. For more information, see Manage users. NOTE: When you activate this permission, the View the details of a user permission is automatically activated. |
| Update the details of a user | This permission activates the following options: • Actions on the User Management page: Edit user details Users with this permission can modify users' personal information, email, and user group assignments. This permission should only be assigned to administrators. For more information, see Manage users. NOTE: When you activate this permission, the View the details of a user permission is automatically activated. |
Funding Accounts
| Permission | Description |
|---|---|
| View the details and statement of a funding account | This permission activates the following options: • Funds > Funding Accounts > Manage Funding Accounts menu option (Funding Accounts page) • Actions on the Funding Accounts page: View Funding Account Statement • Funds > Funding Accounts > Funding Account History menu option (Funding Account History page) Users with this permission can view funding account details (including statements and the full history of operations performed on all funding accounts) but cannot modify any data. For more information, see Managing funding accounts. |
| Manage the funding accounts | This permission activates the following options: • Actions on the Funding Accounts page: View/Edit • The Add Account button on the Funding Accounts page Users with this permission can add new funding accounts and edit funding account details but cannot perform any financial operations related to funding accounts. For more information, see Managing funding accounts and Creating a funding account. NOTE: When you activate this permission, the View the details and statement of a funding account permission is automatically activated. |
| Export the statement of a funding account | This permission activates the following options: • Actions on the Funding Accounts page: Export transactions to CSV Users with this permission can export the full history of transactions to an external file but cannot modify any data. For more information, see Managing funding accounts. NOTE: When you activate this permission, the View the details and statement of a funding account permission is automatically activated. |
Bank Cards and Bank Accounts
| Permission | Description |
|---|---|
| View the details and statement of the bank cards and bank accounts | This permission activates the following menu options: • Funds > Linked Bank Accounts (Linked Bank Accounts page) Users with this permission can view bank account details but cannot modify any data. For more information, see Linking a bank account. NOTE: Bank card functionality is available only in custom deployments. |
| Export the statement of a bank card or bank account | This permission only applies to bank cards and is available only in custom deployments. NOTE: When you activate this permission, the View the details and statement of the bank cards and bank accounts permission is automatically activated. |
| Manage the bank cards and bank accounts of the business account | This permission activates the following options: • Actions on the Linked Bank Accounts page: Unlink bank account • The Link Account button on the Linked Bank Accounts page Users with this permission can link new bank accounts and unlink existing linked bank accounts but cannot perform any financial operations related to bank accounts. For more information, see Linking a bank account. NOTE: When you activate this permission, the View the details and statement of the bank cards and bank accounts permission is automatically activated. |
Fund Transfers
| Permission | Description |
|---|---|
| Load Cards from Funding Accounts in different currencies | Users with this permission can load funds from funding accounts to cards if different currencies are selected for the source and destination. For example, from an EUR funding account to a GBP card. Don't forget — these kind of loads involve Forex fees. For more information, see Loading a card. |
| Withdraw funds from a funding account to a bank account | This permission activates the following options: • Actions on the Funding Accounts page: Withdraw to bank account • Actions on the Linked Bank Accounts page: Withdraw to bank account Users with this permission can withdraw money from funding accounts to linked bank accounts but cannot transfer money between different funding accounts or deposit money from linked bank accounts to funding accounts. In other words, they can only take money out of Nium, depositing it in a linked bank account. For more information, see Withdrawing money to a bank account. NOTE: When you activate this permission, the View the details and statement of a funding account and View the details and statement of the bank cards and bank accounts permissions are automatically activated. |
| Deposit funds from a bank card or bank account to a funding account | This permission activates the following options: • Actions on the Linked Bank Accounts page: Deposit from bank account Users with this permission can deposit money from linked bank accounts to funding accounts but cannot transfer money between different funding accounts or withdraw money from funding accounts to linked bank accounts. For more information, see Adding money from a bank account. NOTE: When you activate this permission, the View the details and statement of a funding account and View the details and statement of the bank cards and bank accounts permissions are automatically activated. |
| Transfer funds between funding accounts | This permission activates the following options: • Actions on the Funding Accounts page: Transfer funds Users with this permission can transfer money between different funding accounts but cannot deposit money from linked bank accounts to funding accounts or withdraw money from funding accounts to linked bank accounts. For more information, see Transferring money between funding accounts. NOTE: When you activate this permission, the View the details and statement of a funding account permission is automatically activated. |
Nium Portal
| Permission | Description |
|---|---|
| Transfer funds to/from a card | This permission activates the following menu options: • Cards > Load Cards > Single (Load Card page) • Cards > Load Cards > Batch (Load Cards page) • Actions on the Manage Cards page: Load Card and Unload Card Users with this permission can load money from funding accounts to cards and can unload (or empty) cards back to funding accounts. For more information, see Loading a card, and Unloading funds from a card. |
| View the details of a card | This permission activates the following options: • Cards > Card Batches menu option (Card Batches page) • Cards > Card History menu option (Card History page) • Cards > Manage Cards menu option (Manage Cards page) • Actions on the Manage Cards page: View Card Statement Users with this permission can view all card operations, including detailed statements but cannot modify any data. For more information, see Viewing the card statement. |
| Freeze or thaw a card | This permission activates the following options: • Actions on the Manage Cards page: Freeze Card and Thaw Card • The Freeze and Thaw buttons on the Manage Cards page Users with this permission can freeze (deactivate) or thaw (reactivate) cards. For more information, see Freezing cards. NOTE: When you activate this permission, the View the details of a card permission is automatically activated. |
| Create a new card | This permission activates the following menu options: • Cards > Create Card > Single (Create Card page) Users with this permission can create new cards individually but cannot create cards in batches. For more information, see Creating a card. NOTE: When you activate this permission, the View Card permission is automatically activated. |
| Create new cards in batches | This permission activates the following menu options: • Cards > Create Card > Batch (Create Cards page) Users with this permission can create new cards in batches. For more information, see Creating a card. NOTE: When you activate this permission, the View the details of a card and Create a new card permissions are automatically activated. |
| Delete an existent card | This permission activates the following options: • Actions on the Manage Cards page: Delete Card • The Delete button on the Manage Cards page Users with this permission can delete existing cards. For more information, see Deleting cards. NOTE: When you activate this permission, the View the details of a card permission is automatically activated. |
| Print or save to a file the details of a card | This permission activates the following options: • The Save and Print buttons on the Card Details page NOTE: To access the Card Details page, select the value in the Card Reference column on the Manage Cards page. Users with this permission can save or print detailed card information. NOTE: When you activate this permission, the View the details of a card permission is automatically activated. |
Add a new user group
To add a new user group anywhere in the user group hierarchy:
- Select Users > Manage User Groups. The User Group Management page is displayed.
- Select the Add User Group button.
The Add User Group page is displayed.
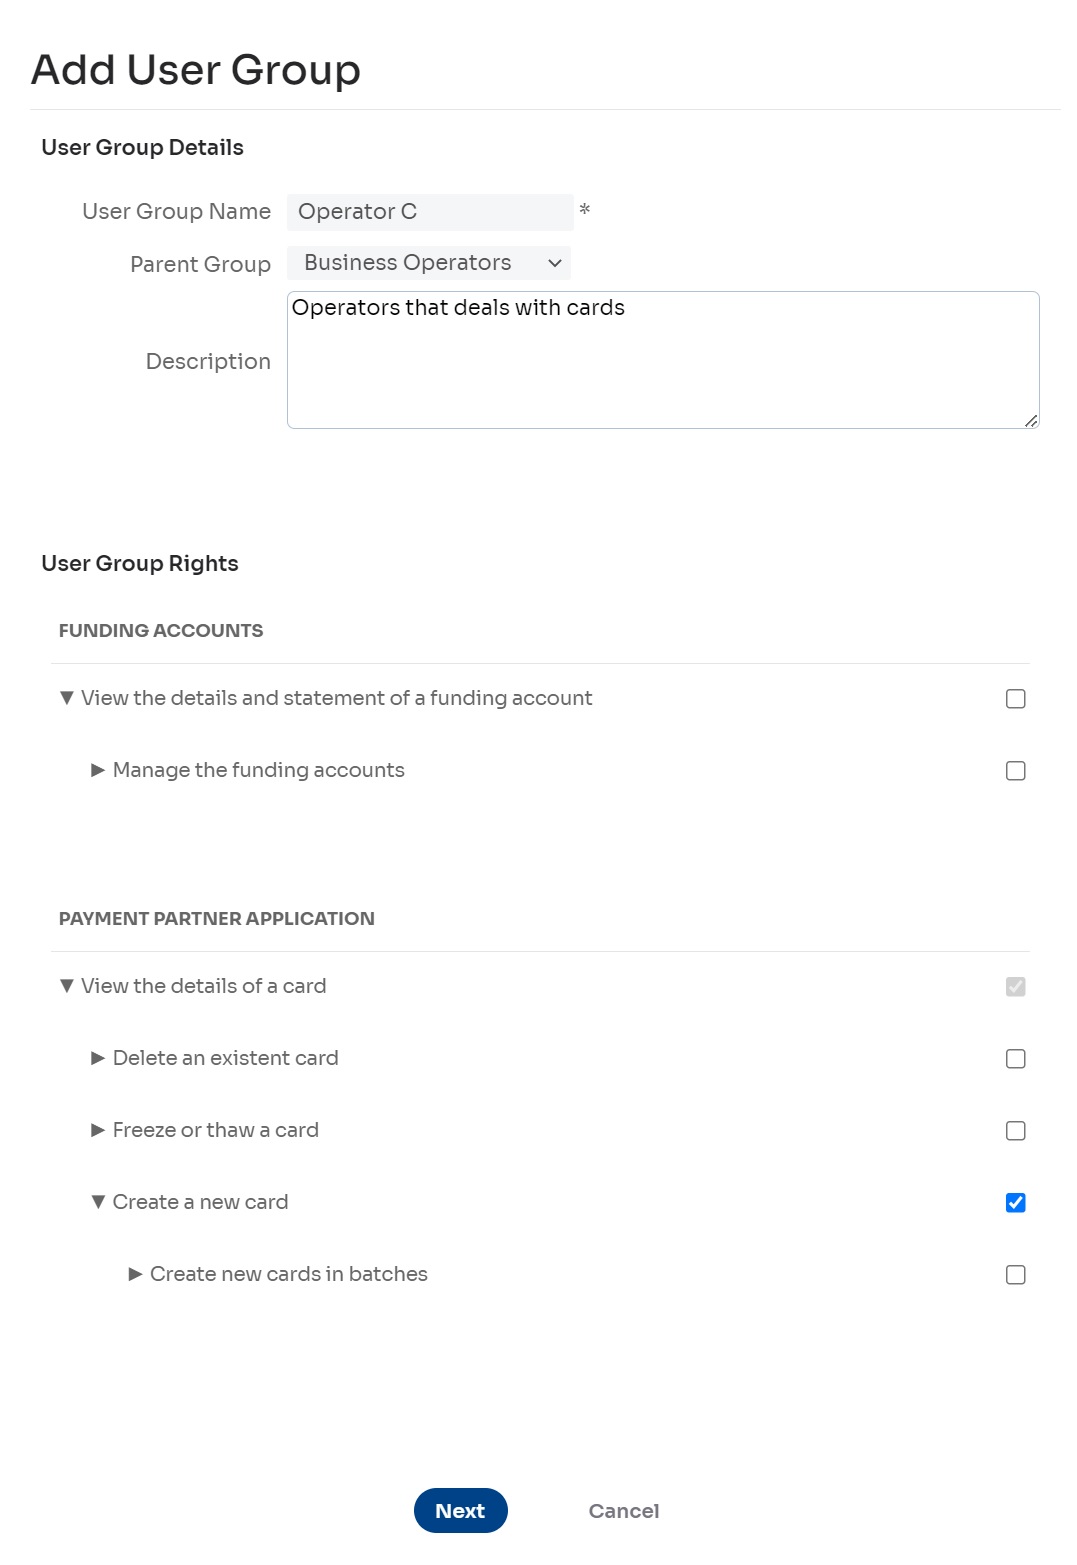
- Enter the User Group Name and the Description.
- Select an existing user group as the Parent Group.
If you select an empty value from the drop-down list, the new group will have no parent group. - Select the checkboxes next to the list of available user group rights to assign those rights to the new user group. The parent group’s rights limit the list of displayed rights.
- Select the Next button.
- If you selected the right to Transfer funds to/from a card: the Add User Group – Card Transfer Limits page is displayed.
- On the Add User Group – Card Transfer Limits page, enter the limits for fund transfers to/from cards and select the Next button.
- If you did not select the right to Transfer funds to/from a card: the Add User Group – Link Users page is displayed.
- On the Add User Group – Link Users page, select the users you want to assign to the newly created group and choose the Save User Group button.
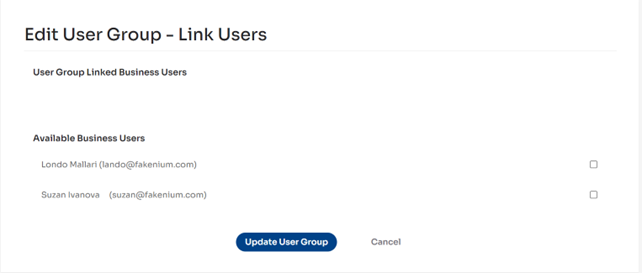
The user group is created, and the User Group Management page is displayed.
If no users are visible on this page, all users are assigned to user groups.
Edit a user group
To edit the data of an existing user group:
- Select Users > Manage User Groups.
The User Group Management page is displayed. - Select the ⋮ icon in the row of the user group you want to delete.
The action menu is displayed. - Select one of the action icons to edit the user group:
- Select Manage Transfer Limits to display the Edit User Group – Card Transfer Limits page and enter limits for fund transfers to/from cards.
- Select Edit User Group to display the Edit User Group page, edit user group data, and select the rights for the user group.
- Select Manage Linked Users to display the Edit User Group – Link Users page and select users you want to assign to the group.
Clone a user group
To create a user group that is an exact copy of another user group:
- Select Users > Manage User Groups.
The User Group Management page is displayed. - Select the ⋮ icon in the row of the user group you want to clone.
The action menu is displayed. - Select Copy User Group.
The Clone User Group window is displayed. - Enter the New User Group Name and the New User Group Description and select the Confirm button.
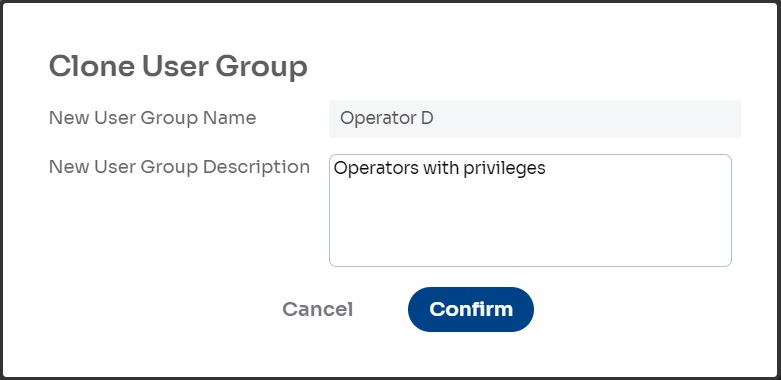
A copy of the selected user group is created.
No users are assigned to the cloned user group. For more on assigning users, see View and manage user groups.
Delete a user group
Before you delete a user group, you should know all of its child user groups will be deleted too. All the users assigned to the group and child user groups are unassigned. You will need to assign them to a user group so they can continue using the Nium Portal.
To delete a user group:
- Select Users > Manage User Groups.
The User Group Management page is displayed. - Select the icon in the row of the user group you want to delete.
The action menu is displayed. - Select Delete User Group.
The User Group Delete confirmation window is displayed. - Select the Confirm button to delete the user group.
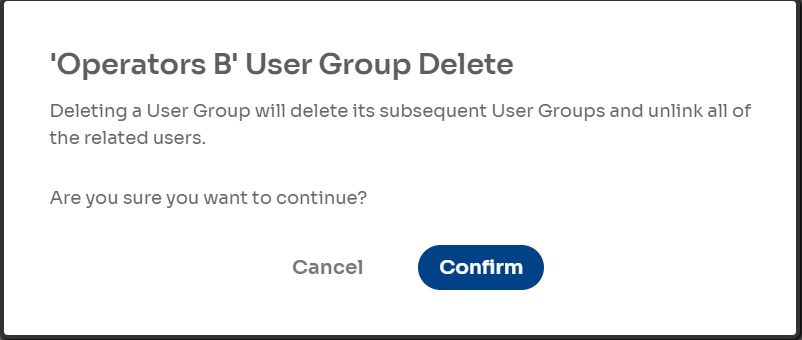
The user group is deleted. All its child user groups are also deleted. All users assigned to the user group and its child user groups are unassigned.