Managing Balances
📘 NOTE
Feature availability may vary based on the region and the applicable balanceless model. This includes:
- Balance Creation
- Transfer between Balance instruments
- Withdrawal of funds
What Is a Balance and How It Works
A Balance is where funds are deposited and stored before being linked to a Virtual Card, which enables you to make payments. During onboarding and implementation, Nium will provide you with one Balance instrument for each currency enabled on your account.
Through the Nium Portal, you can create new Balances, transfer funds between Balance instruments of the same currency (for example, EUR to EUR), and modify or delete existing Balance instruments. You can choose to have a single Balance instrument per currency (e.g. EUR), where all EUR cards are linked to the same Balance. Alternatively, you may opt to create multiple Balances for different purposes, such as specific expense types (e.g. travel, advertising) or departments within your company (e.g. Finance, Marketing).
After a Balance instrument is created, you can:
- Deposit funds using the assigned unique Virtual IBAN (vIBAN)
- Transfer funds from another Balance instrument
- View associated Virtual Cards
- View Balance statement
- View or edit Balance details
- Block or unblock the Balance
When the Balance contains funds, you can:
- Withdraw funds from your Balance to a linked bank account
- Transfer funds from one Balance to another
The available balance is the amount you can use or withdraw. It reflects your actual balance minus any pending transactions, such as card authorisations or holds. The actual balance is the total amount of funds in your account at a given time. It includes all fully settled transactions, both credits and debits.
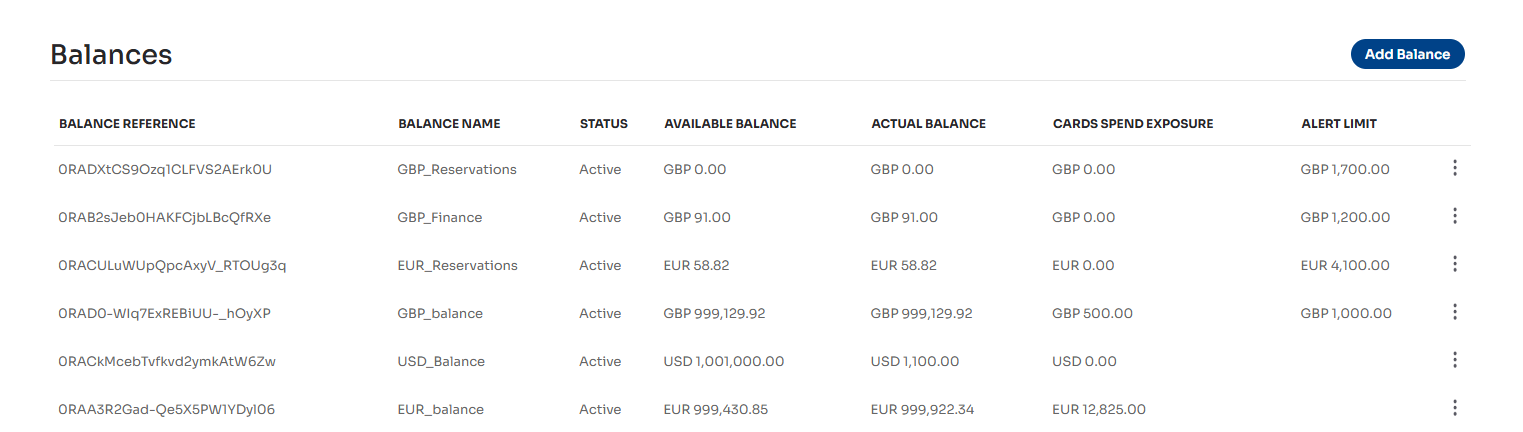
Creating a Balance
- Navigate to Funds > Manage Balances.
- On the Balances page, select the Add Balance button located in the top-right corner.
The Add a New Balance page will be displayed.
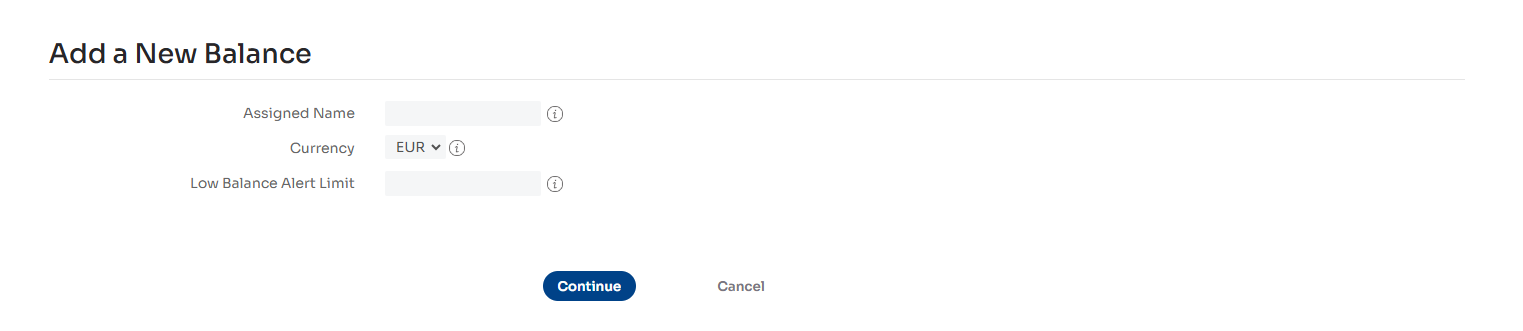
- In the Assigned Name field, enter a unique name for the Balance. In the Currency field, select the desired currency.
📘 NOTE
Available currency options depend on your account configuration.
- Select the Continue button to save.
- Select the Close button on the New Balance Added page, which displays the details of the newly created Balance.
📘 NOTE
The New Balance Added page includes a vIBAN, which you can use to transfer funds from your bank account to your Balance.
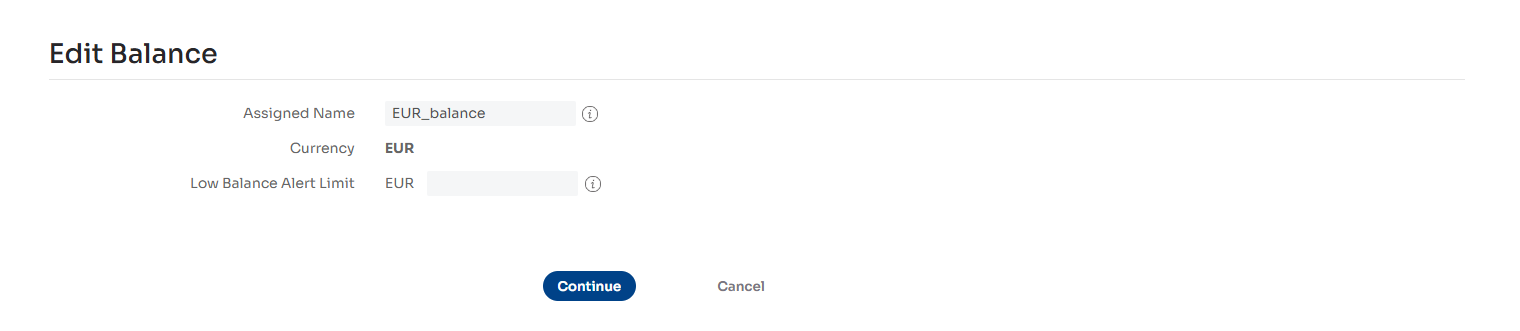
Viewing and Editing a Balance
To view or edit Balance details, select the View/Edit option from the ⋮ menu for the Balance chosen. Through this screen you will be able to:
- View the vIBAN that is assigned to the Balance instrument
- Modify the name of the Balance instrument
- Set up a Balance Alert Limit
What Is a Balance Alert Limit
The balance alert limit is a threshold set on a Balance instrument. When the available balance drops below this threshold, a notification is automatically sent either to a specified email address (or set of addresses) or to a configured webhook endpoint.
📘 NOTE
To set up this notification, please contact our Client Support team at clientsupport@nium.com and provide the email addresses and/or webhook endpoint that should receive the alerts.
Transferring Funds Between Balances
- Navigate to Funds > Manage Balances.
- On the Balances page, locate the Balance you want to transfer funds to.
- Select the ⋮ icon to open the context menu. The context menu will be displayed.
- In the context menu, select Transfer funds.
![]()
The Transfer Money Between Balances page is displayed.
- Select the source (where the funds will be transferred from) in the Transfer From field and enter the amount in the Amount field.
📘 NOTE
The Transfer To field shows the Balance selected in the first step, but you can change it if needed.
- Select the Confirm button to complete the transfer between Balances.
- Select the Close button on the confirmation page that contains data about the transfer.
The Balances page is displayed.
Viewing a Balance's Associated Cards
- Navigate to Funds > Manage Balances.
- On the Balances page, locate the Balance you want to view associated cards for.
- Select the ⋮ icon to open the context menu.
The context menu will be displayed. - Select View Associated Cards.
The Manage Cards screen will be displayed, showing all cards associated with that particular Balance.
Viewing a Balance Statement
- Navigate to Funds > Manage Balances.
- On the Balances page, locate the Balance you want to view the statement for.
- Select the ⋮ icon to open the context menu. The context menu will be displayed.
- From the context menu, select View Balance Statement.
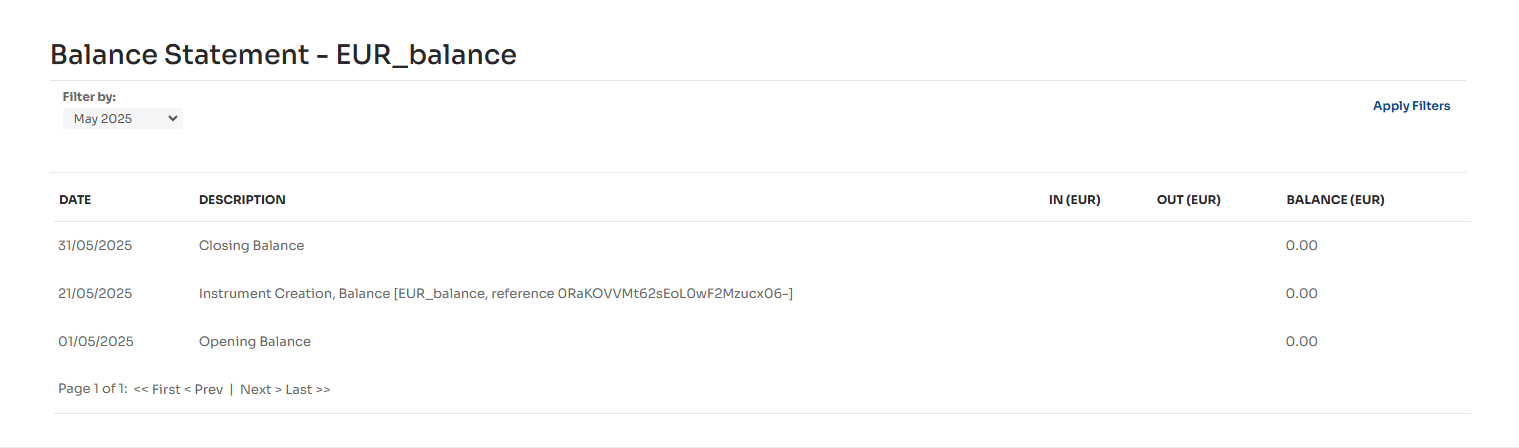
- You can use the Filter by dropdown to filter for the relevant transactions during a particular month
- Select the Apply Filters button located in the top-right corner. The transactions for that Balance during the selected month will be displayed.
Linking a Bank Account
Linking a bank account to your Nium Portal will allow you to request a withdrawal of funds from any of your Balance instruments to the bank account of your choice.
- Navigate to Funds > Link Bank Accounts
- Select the Link Account button in the top-right corner The Link Bank Account page will be displayed.
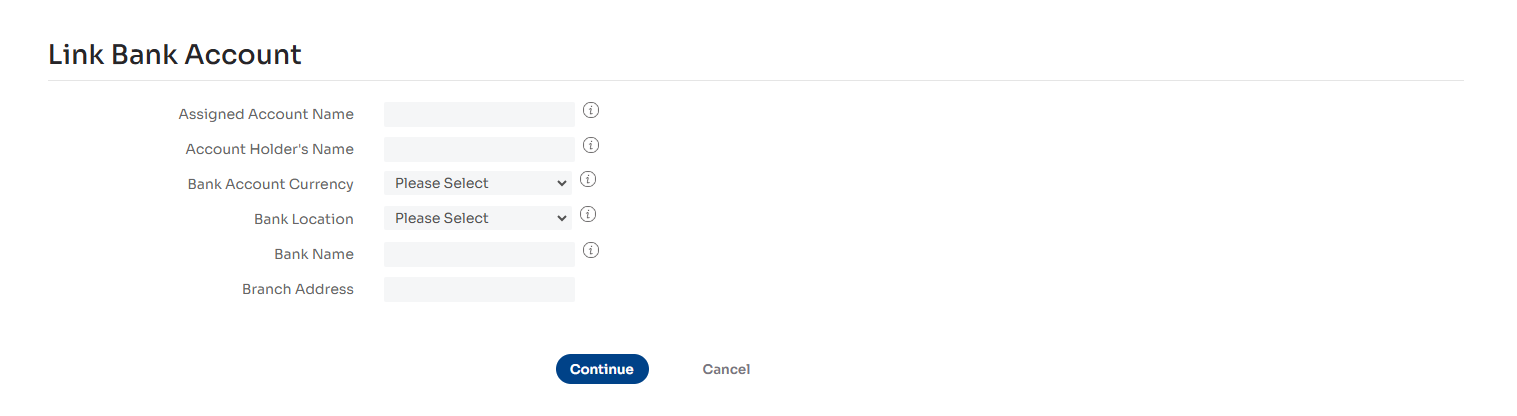
-
Enter all the required information on the page.
📘 NOTE
Additional information is required depending on your bank account’s country of registration.
-
Select the Continue button to finalise linking your bank account.
-
Select the Close button on the Bank Account Linked page.
The Linked Bank Accounts page will be displayed.
Withdrawing Funds to a Bank Account
📘 NOTE
A bank account must be linked before you can request a withdrawal of funds, if you haven’t already done so.
Please refer to the Linking a Bank Account section for guidance.
- Navigate to Funds > Manage Balances.
- On the Balances page, locate the Balance you want to withdraw funds from.
- Select the ⋮ icon to open the context menu. The context menu will be displayed.
- From the context menu, select Withdraw Funds to a Bank Account. The Withdraw Funds From Balance page will be displayed.
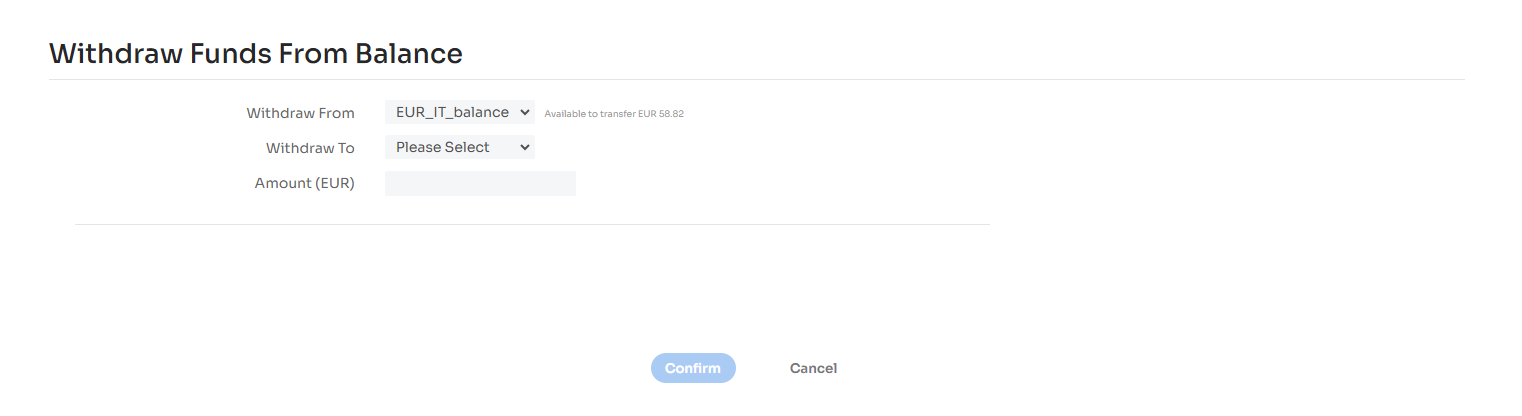
- The Withdraw From field will be pre-filled with the Balance instrument selected in step 2, but you can change it if needed.
- In the Withdraw To field, select the bank account you want to withdraw funds to.
- Enter the amount you would like to withdraw in the Amount field.