Tax Forms
Tax Forms are secure, Nium-hosted forms that collect tax information from your beneficiaries or recipients — linking verified tax records directly to their Nium beneficiary account without requiring you to build or maintain a custom tax collection experience.
This form is helpful for clients that:
- Operate platforms that pay out to beneficiaries or recipients subject to US tax reporting (for example, 1099 filing)
- Need to collect W-9 (US persons) or W-8 (non-US persons) information at scale
- Want Nium to handle tax form selection, validation, and data submission
- Have already onboarded beneficiaries using Beneficiary Forms
Overview
To collect tax information using Tax Forms, clients:
- Register a filer entity in Nium to act as the tax filer on behalf of beneficiaries.
- Create a session using the Nium API, providing the beneficiary's details and redirect URIs.
- Redirect the beneficiary to the Nium-hosted Tax Form using the returned session URL.
- The beneficiary selects their tax form (W-9, W-8BEN, or W-8BEN-E) and completes a guided 5-step flow.
- Nium links the tax information to the beneficiary's existing Nium record.
- The beneficiary is redirected to the client's success URL.
Key features
Tax Forms guide the beneficiary through form selection and all required fields — covering taxpayer information, federal classification, tax identification number, certification, and delivery preferences. W-9 is recommended for US persons; W-8BEN and W-8BEN-E are available for non-US individuals and entities respectively.
Other benefits of using Tax Forms include:
- No frontend build required — Nium hosts and maintains the form.
- Beneficiary-driven tax form selection — W-9, W-8BEN, or W-8BEN-E.
- Secure session-based access — each session is single-use and short-lived.
- Configurable redirect URIs for success, cancellation, and session expiry outcomes.
Responsibilities
| Feature | Client | Nium |
|---|---|---|
| Filer registration | X | |
| Session creation | X | |
| Beneficiary redirect | X | |
| Tax form selection (W-9 or W-8) | X | |
| Form experience and field validation | X | |
| Tax record creation and linking | X | |
| Outcome handling and redirect | X |
Branding
You can add your organization's logo to the Tax Form for a consistent customer experience.
Your logo appears at the top left corner of the form, replacing the Nium logo shown in the default view. Provide your logo to your Nium account manager during initial setup.
Prerequisites
Tax Forms have two hard dependencies. Both must be in place before you create a session.
1. Beneficiary must exist
The beneficiary must have already completed a Beneficiary Form. Tax Forms link tax information to an existing Nium beneficiary record — if no record exists, the session request fails with a BENEFICIARY_REQUIRED error.
2. Filer must be registered
A filer entity represents your organisation as the tax filer for your beneficiaries. You need a filerHashId before initiating any Tax Form session.
To register a filer, use the Create Filer endpoint:
curl --request POST "https://gateway.nium.com/api/v1/client/{clientHashId}/filers" \
  --header "Content-Type: application/json" \
  --header "x-api-key: {x-api-key}" \
  --data '{
    "customerHashId": "{customerHashId}",
    "name": "Acme Corp",
    "taxResidentCountryCode": "us",
    "tin": {
      "number": "123456780",
      "type": "ein"
    },
    "address": {
      "type": "residence",
      "line1": "123 Main St",
      "city": "San Francisco",
      "state": "CA",
      "countryCode": "us",
      "postalCode": "94560"
    },
    "contact": {
      "name": "Jane Smith",
      "departmentTitle": "Tax Department",
      "phoneNumber": {
        "number": "4155551234",
        "countryCode": "us"
      }
    }
  }'
A successful response returns a filerHashId. Store this — you need it for every Tax Form session.
3. Client account and Hosted Components enabled
Your client account must be onboarded in Nium with a clientHashId, clientSecret, and API key. Hosted Components must also be enabled for your account. Contact your Nium account manager or Nium Support to enable and configure this feature.
Create a Tax Form session
Step 1: Request access
Contact your Nium account manager or Nium Support to enable Tax Forms for your account.
Step 2: Create a session
Use the Initiate Pre-built Form request to generate a sessionId.
Request example
curl --request POST "https://gateway.nium.com/api/v1/client/{clientHashId}/prebuilt-forms-init" \
  --header "Content-Type: application/json" \
  --header "x-api-key: {x-api-key}" \
  --data '{
    "clientSecret": "{clientSecret}",
    "modules": ["tax"],
    "referenceId": "{your-beneficiary-reference-id}",
    "userDetails": {
      "name": "Jane Smith",
      "email": "jane.smith@example.com",
      "entityType": "individual"
    },
    "customerHashId": "{customerHashId}",
    "redirectUris": {
      "success": "https://yourplatform.com/tax/success",
      "cancel": "https://yourplatform.com/tax/cancel",
      "refresh": "https://yourplatform.com/tax/refresh"
    }
  }'
| Field | Type | Required | Description |
|---|---|---|---|
clientSecret | String | Required | Client secret for authentication. Keep this server-side — never expose in frontend code. |
modules | Array | Required | Set to ["tax"] for Tax Forms. |
referenceId | String | Required | Your internal identifier for the beneficiary. Must match the referenceId used in the Beneficiary Form session. |
userDetails.name | String | Required | Full name of the beneficiary. |
userDetails.email | String | Required | Email address of the beneficiary. |
userDetails.entityType | String | Required | individual or business. |
userDetails.mobile | String | Optional | Mobile number of the beneficiary. |
customerHashId | String | Required | Unique identifier of the customer acting as remitter. |
redirectUris.success | String | Required | URL to redirect the beneficiary after successful completion. |
redirectUris.cancel | String | Required | URL to redirect the beneficiary if they cancel. |
redirectUris.refresh | String | Required | URL to redirect the beneficiary if the session expires. |
Successful response
{
  "status": "SUCCESS",
  "sessionId": "3060f802-535c-444b-853d-6fabf540e833",
  "redirectUrl": "https://onboard.sandbox.nium.com?code=3060f802-535c-444b-853d-6fabf540e833",
  "expiresInSeconds": 30,
  "error": null
}
| Field | Description |
|---|---|
sessionId | One-time session code. Expires after 30 seconds — redirect immediately. |
redirectUrl | The full hosted form URL with the session code appended. |
expiresInSeconds | Time in seconds before the session expires. |
Step 3: Open the form
Redirect the beneficiary to the redirectUrl returned in the session response. The session expires after 30 seconds — initiate the redirect immediately after receiving a successful response.
The form can be opened as a full-page redirect or embedded in an iframe. The beneficiary selects their residency status and tax form — W-9 is recommended for US persons; W-8BEN and W-8BEN-E are available for non-US individuals and entities.
The redirectUrl in sandbox responses points to the sandbox environment. Your Nium account manager will confirm the production URL during onboarding.
Step 4: Handle outcomes
When the beneficiary completes, cancels, or lets the session expire, Nium redirects them to the URI you provided in the session request.
| Outcome | Redirect target | Query parameters |
|---|---|---|
| Completed | redirectUris.success | ?taxPayerHashId={id} |
| Cancelled | redirectUris.cancel | — |
| Expired | redirectUris.refresh | — |
Form walkthrough
The following shows the W-9 flow. The W-8BEN and W-8BEN-E flows follow the same structure with form-specific fields.
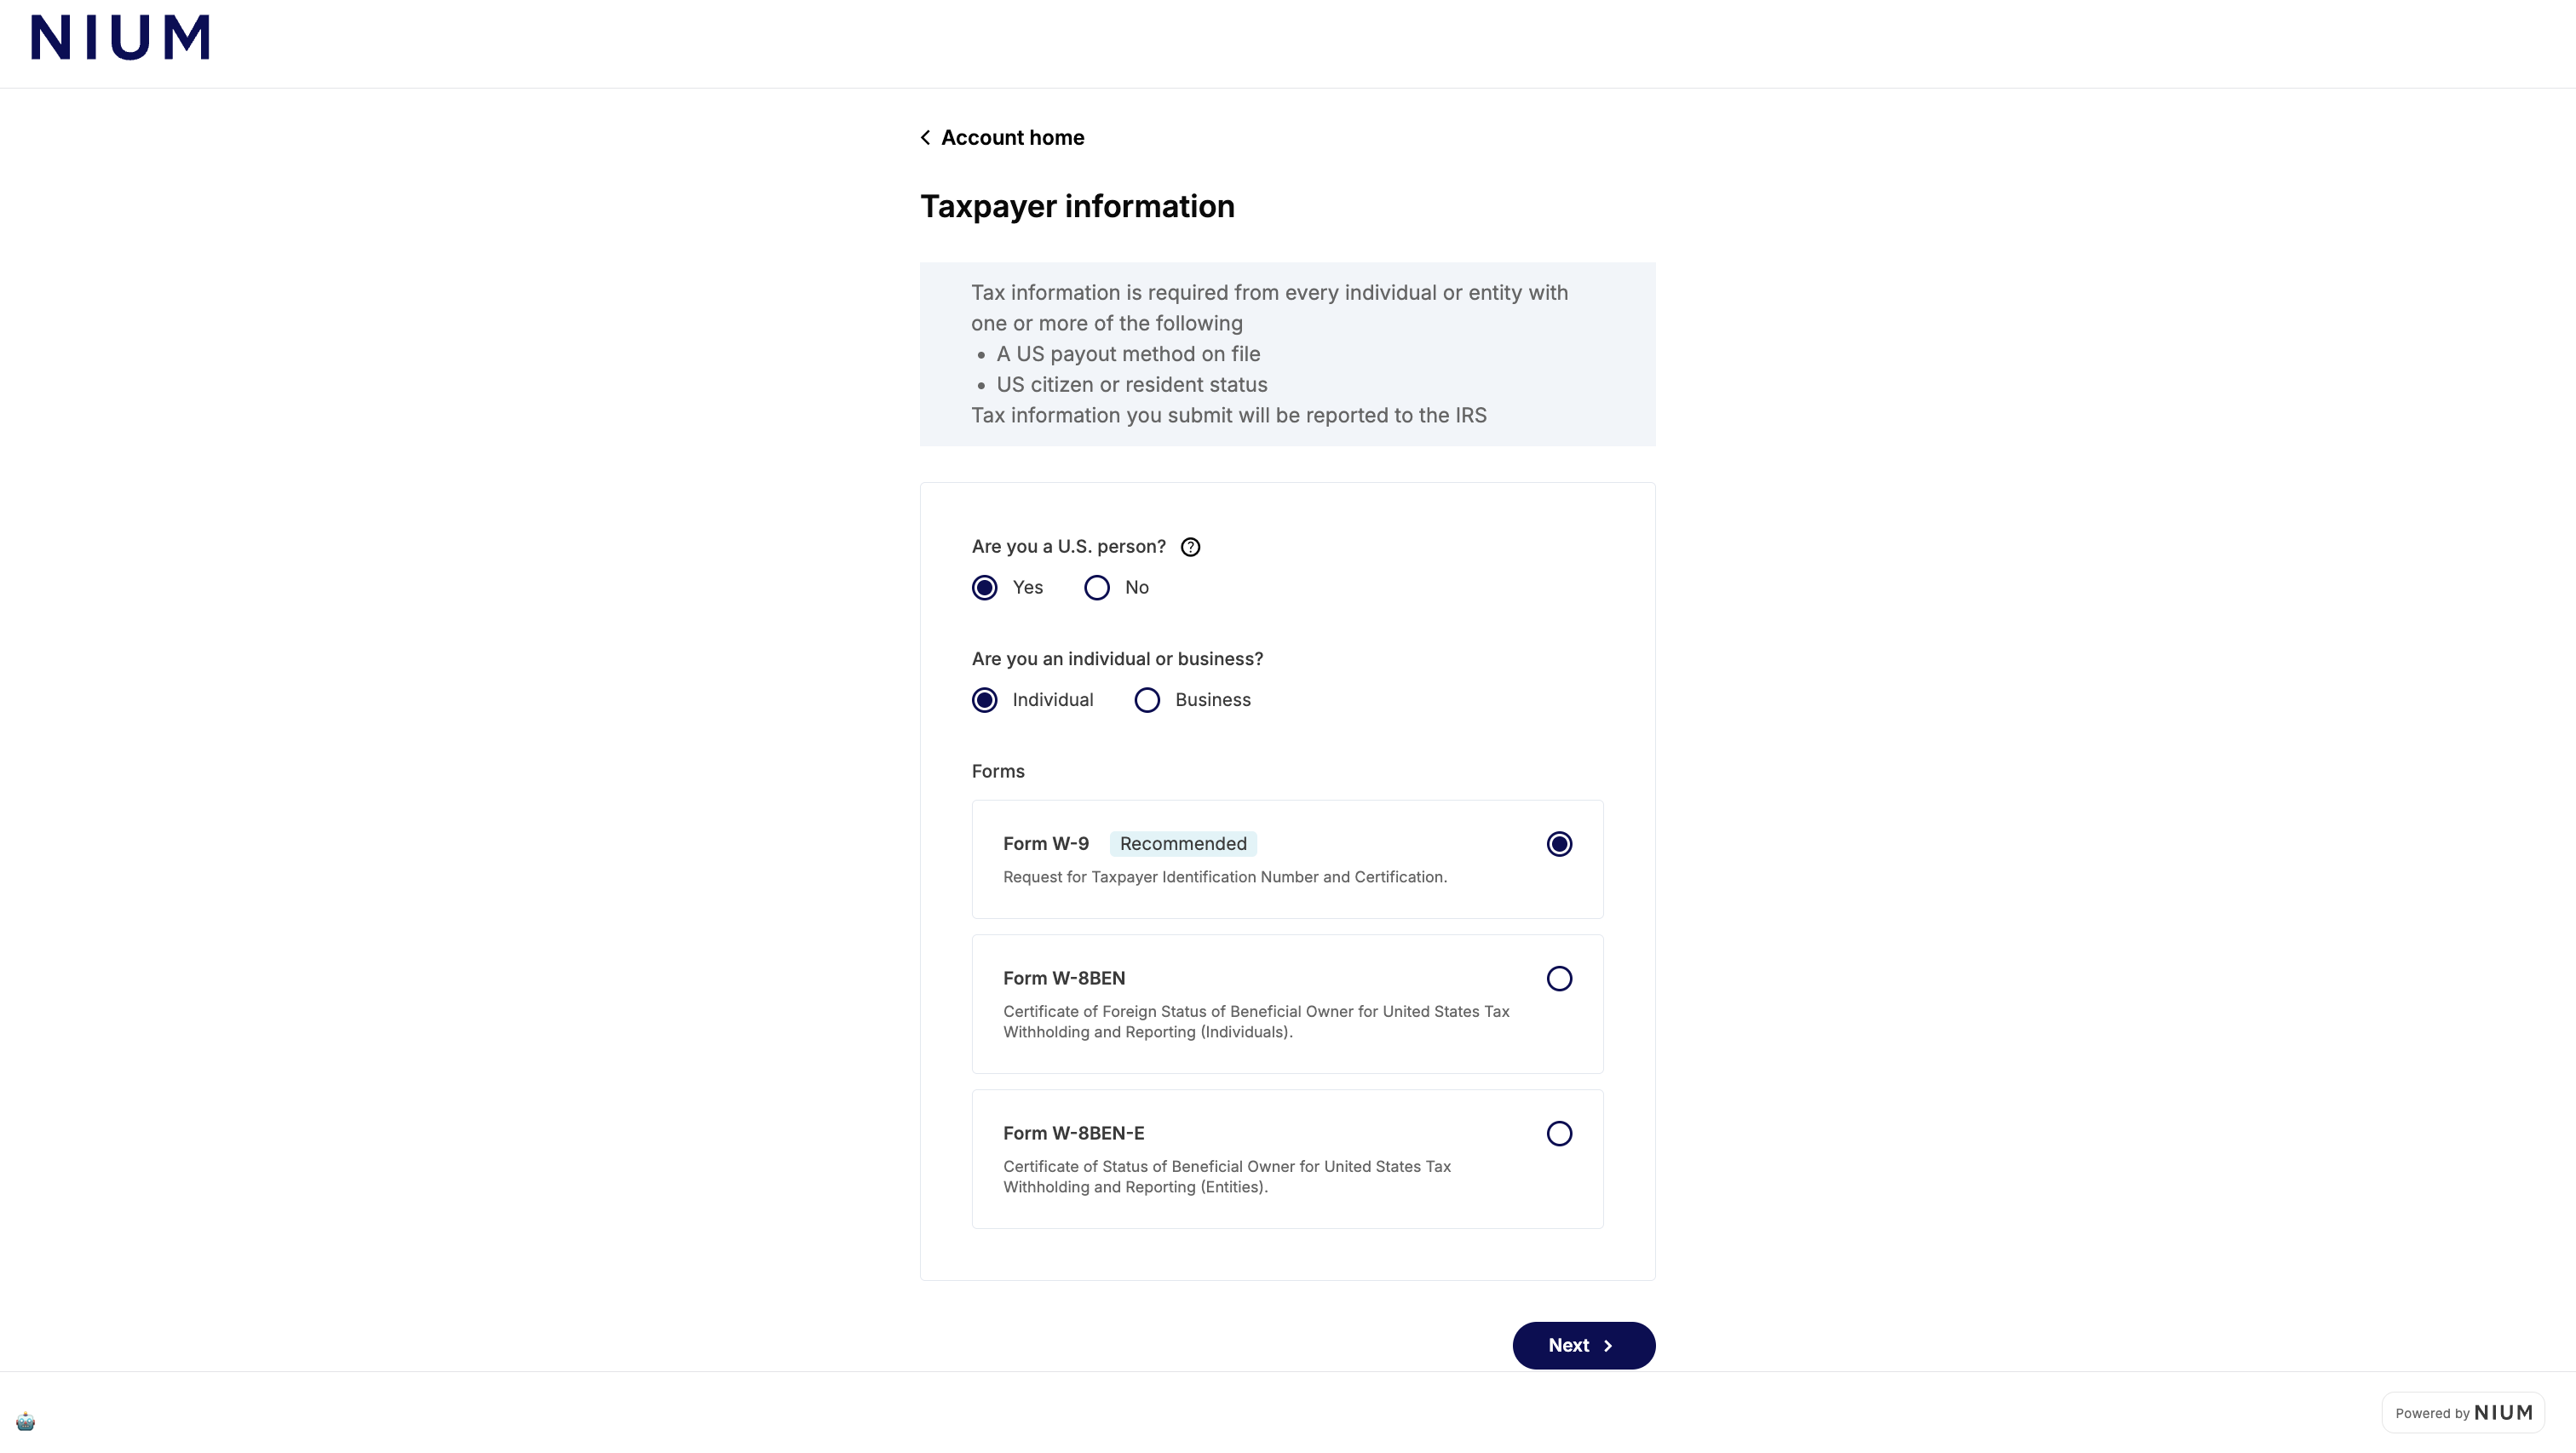
Form selection
The beneficiary confirms whether they are a US person and selects their entity type. Based on their answers, the form recommends the appropriate tax form — W-9 for US persons, W-8BEN for non-US individuals, or W-8BEN-E for non-US entities. The beneficiary can also select a different form if needed.
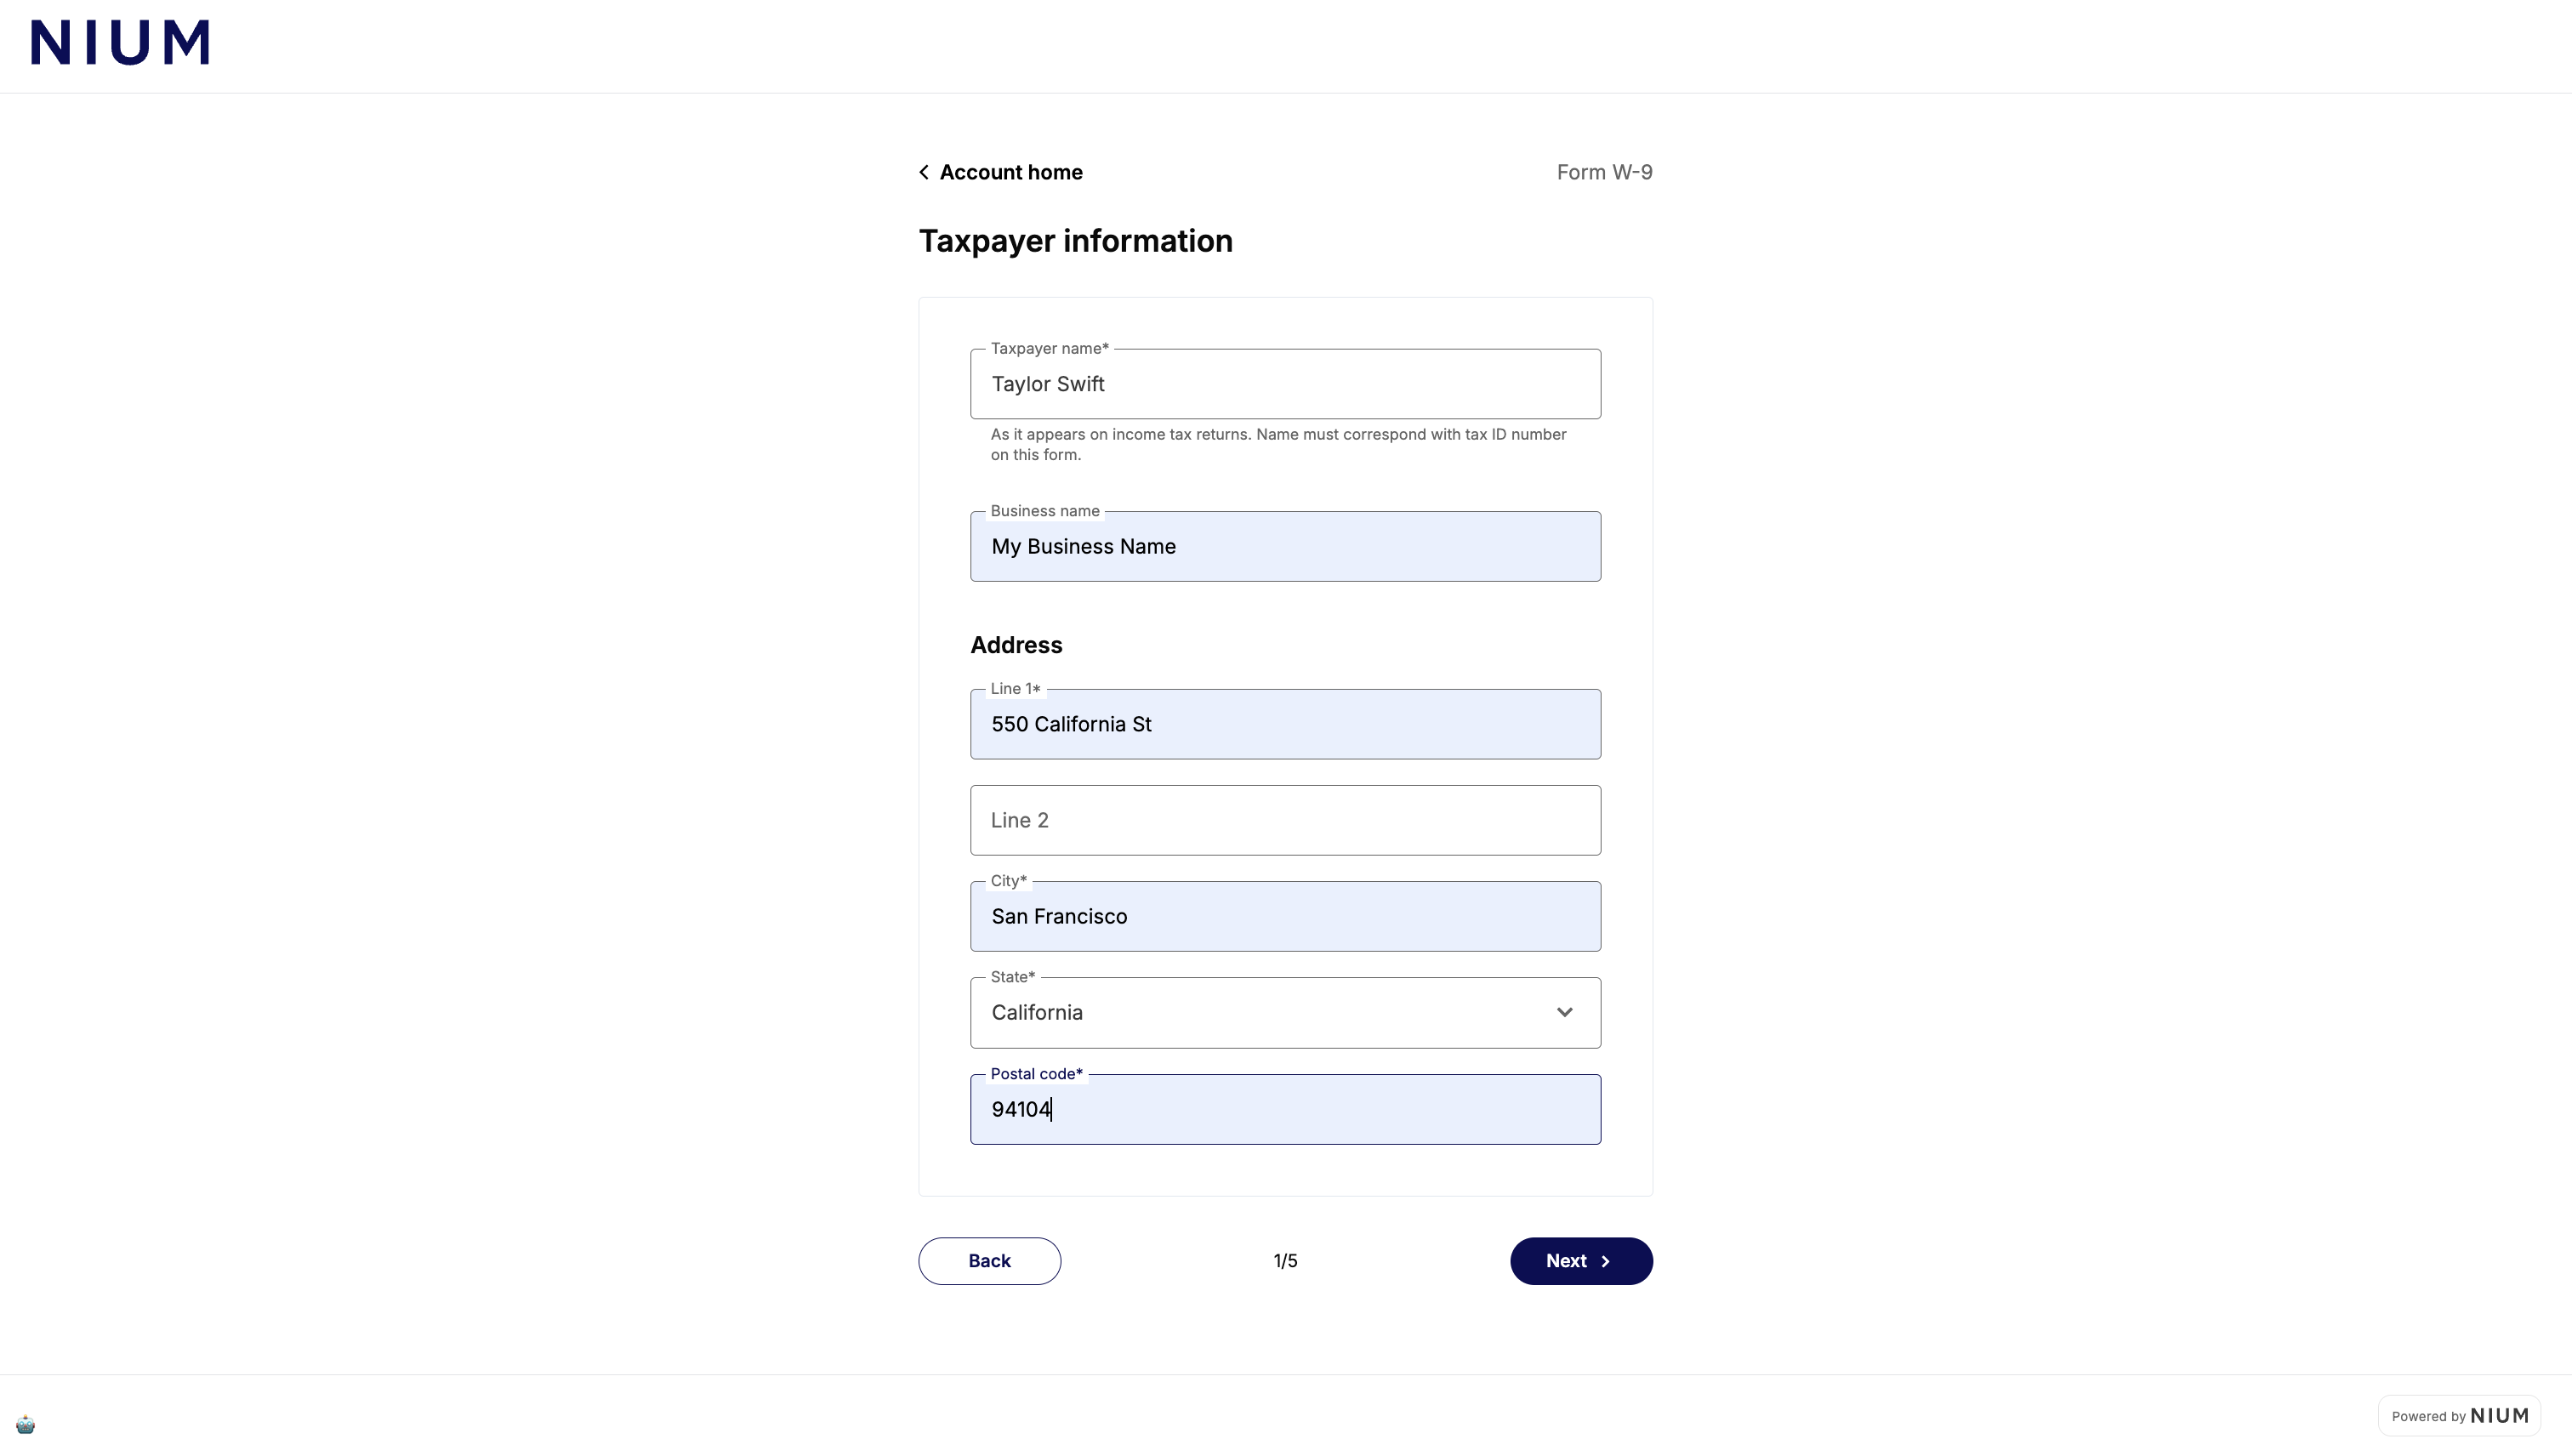
Step 1 of 5: Taxpayer information
The beneficiary enters their name as it appears on their tax return, their business name (if applicable), and their mailing address.
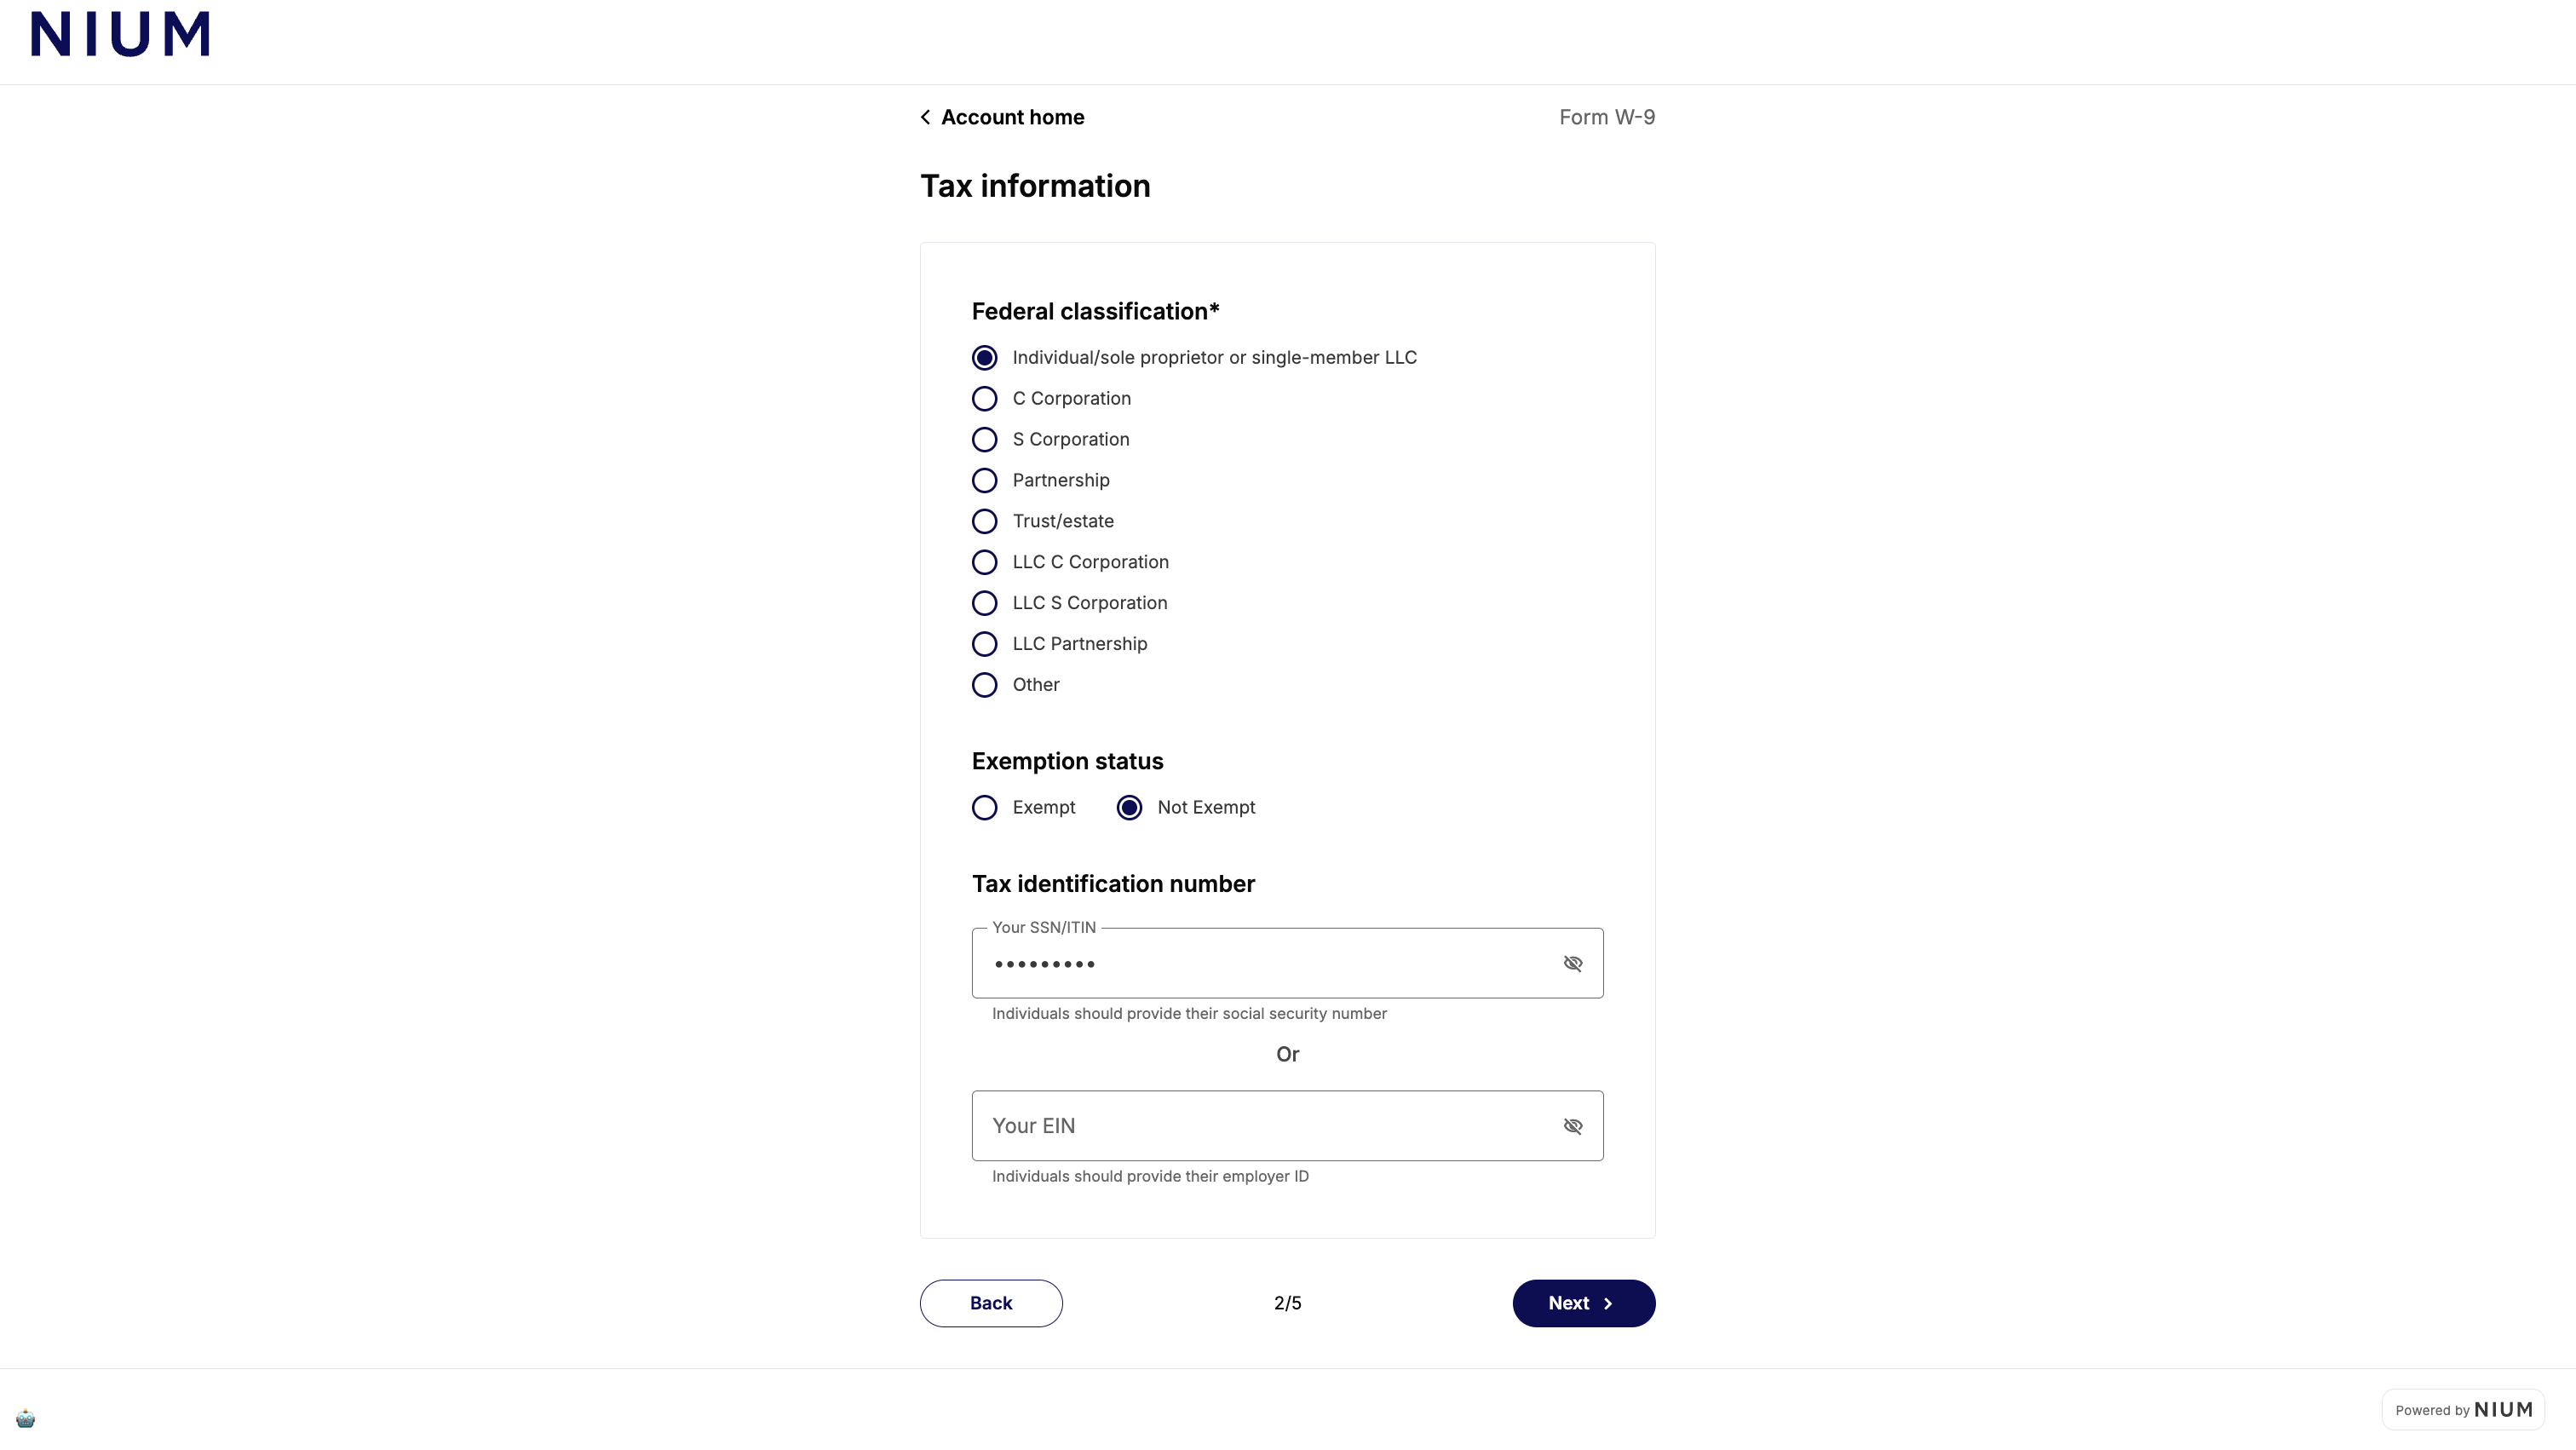
Step 2 of 5: Tax information
The beneficiary selects their federal tax classification, exemption status, and enters their tax identification number — either SSN/ITIN or EIN.
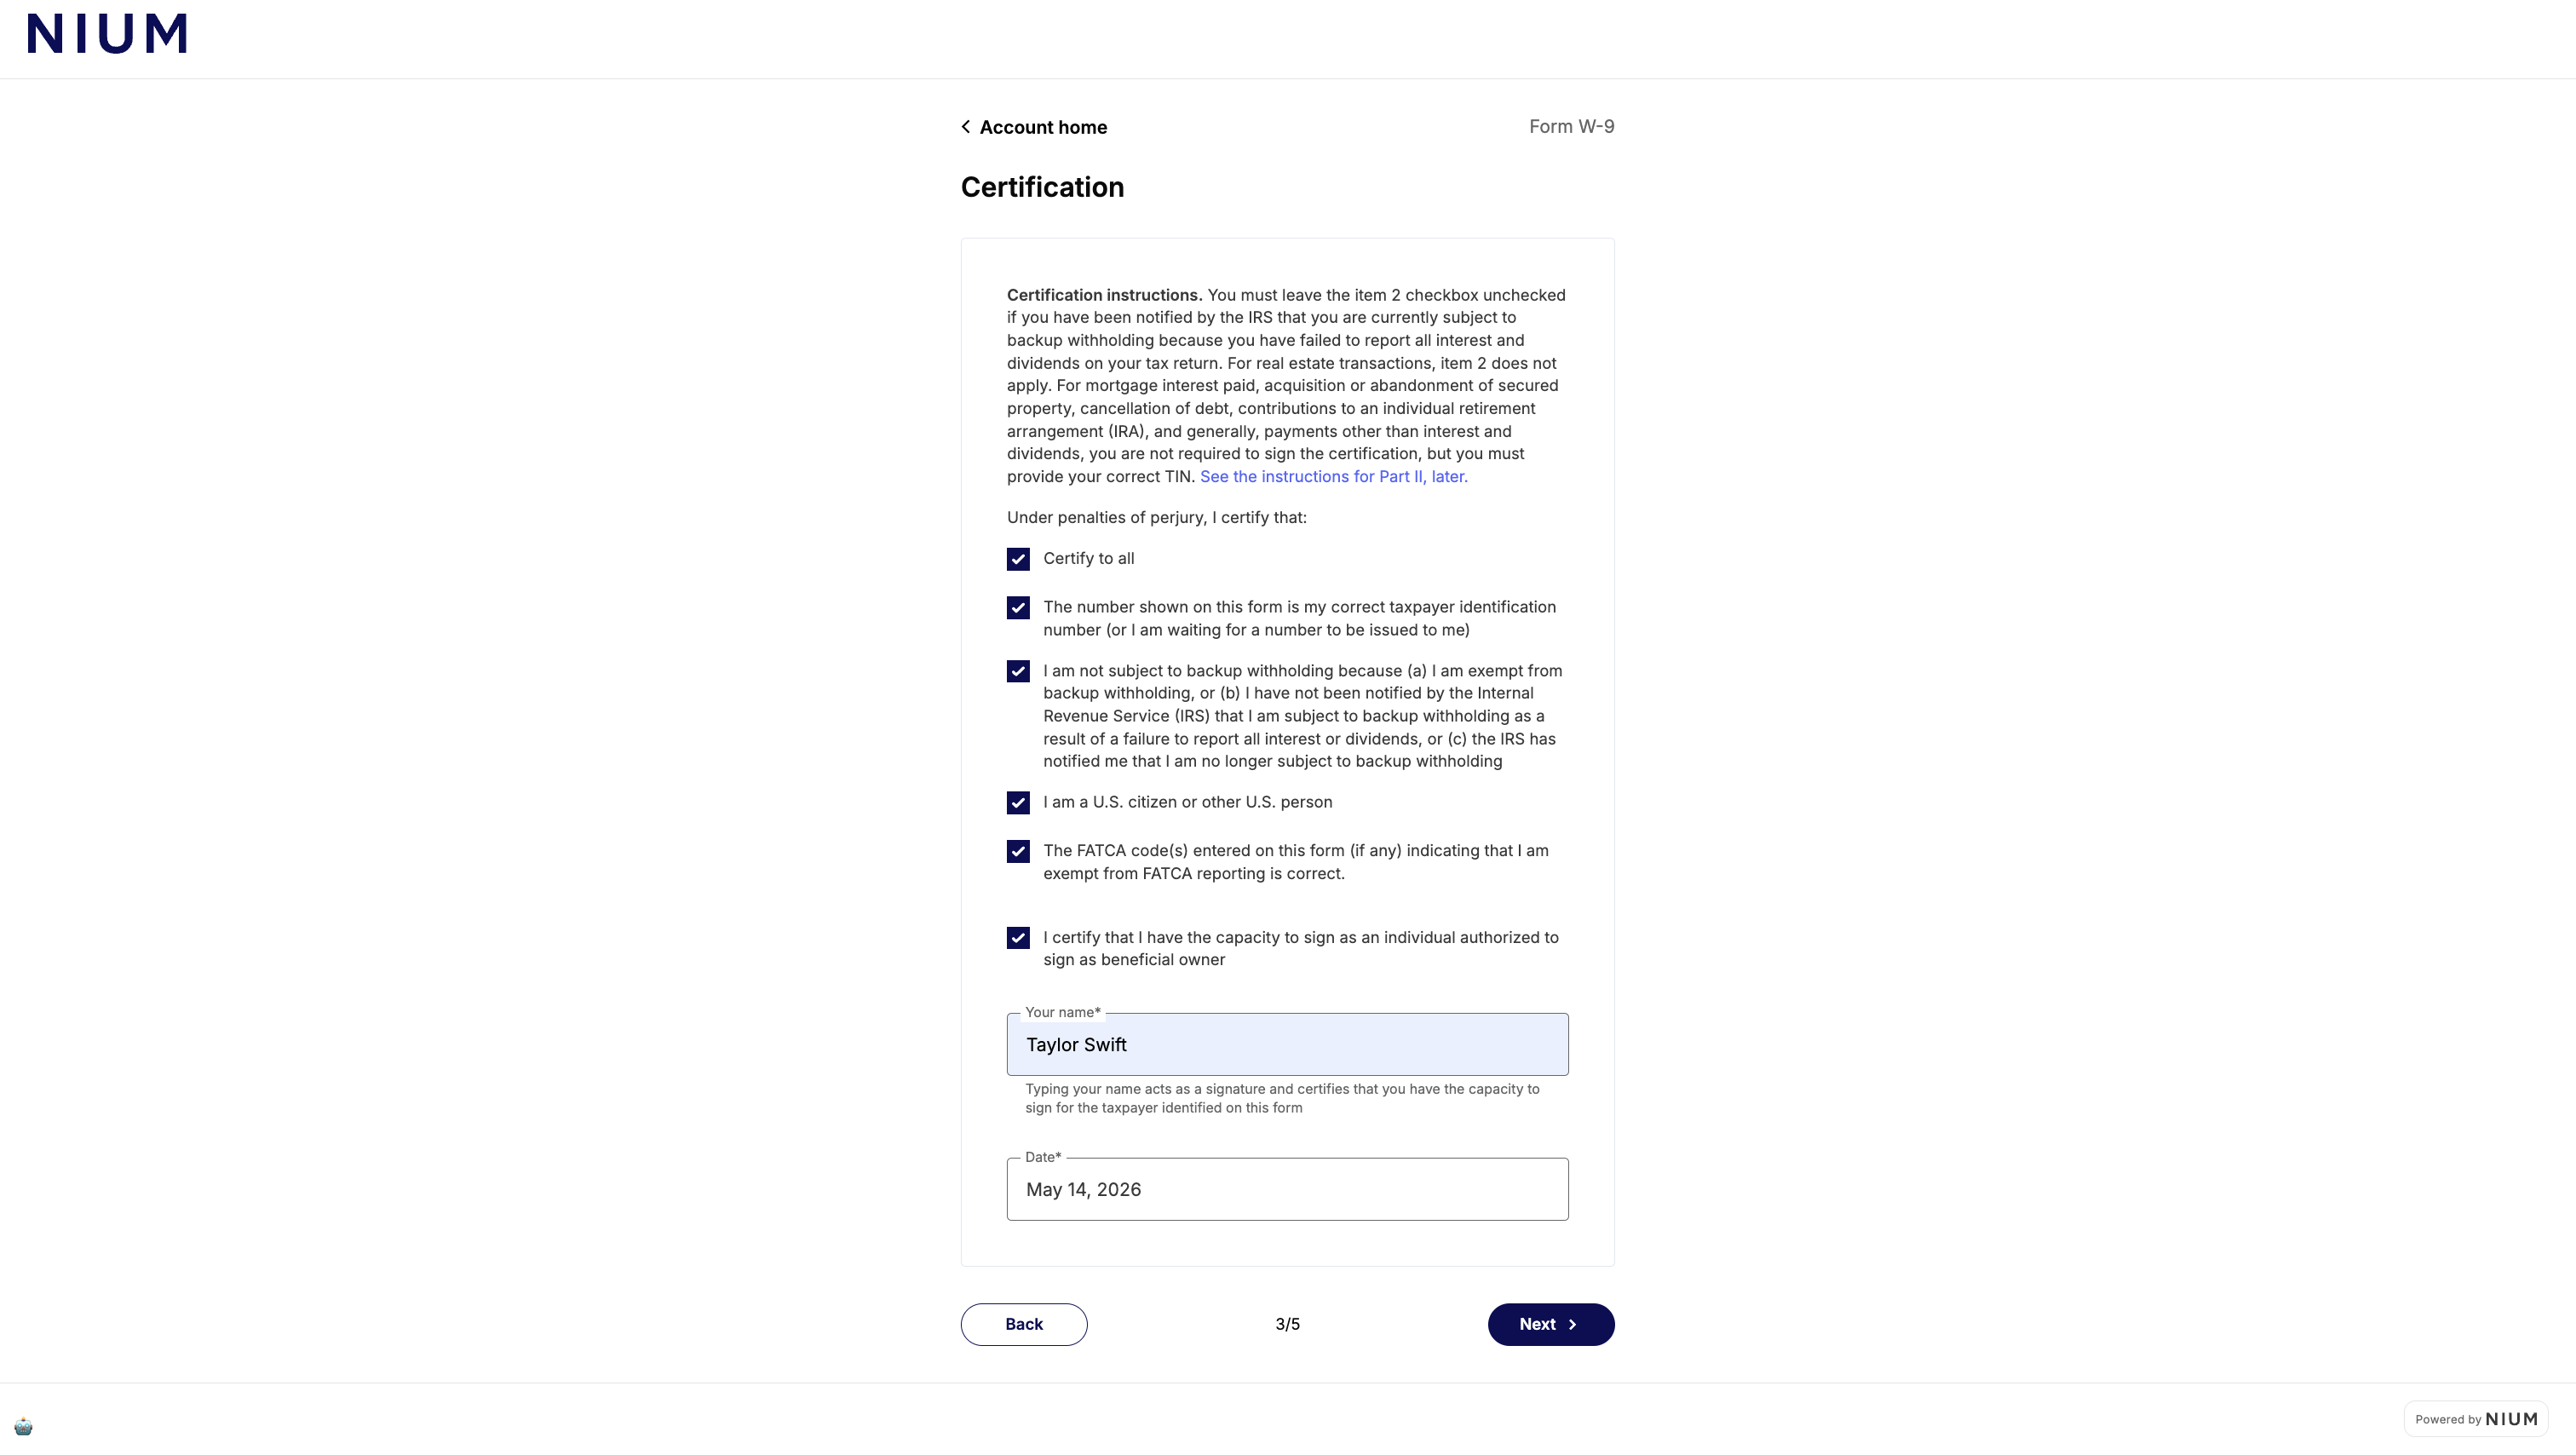
Step 3 of 5: Certification
The beneficiary reviews the IRS certification statements and signs by typing their name. The typed name acts as a legal signature certifying the accuracy of the submitted tax information.
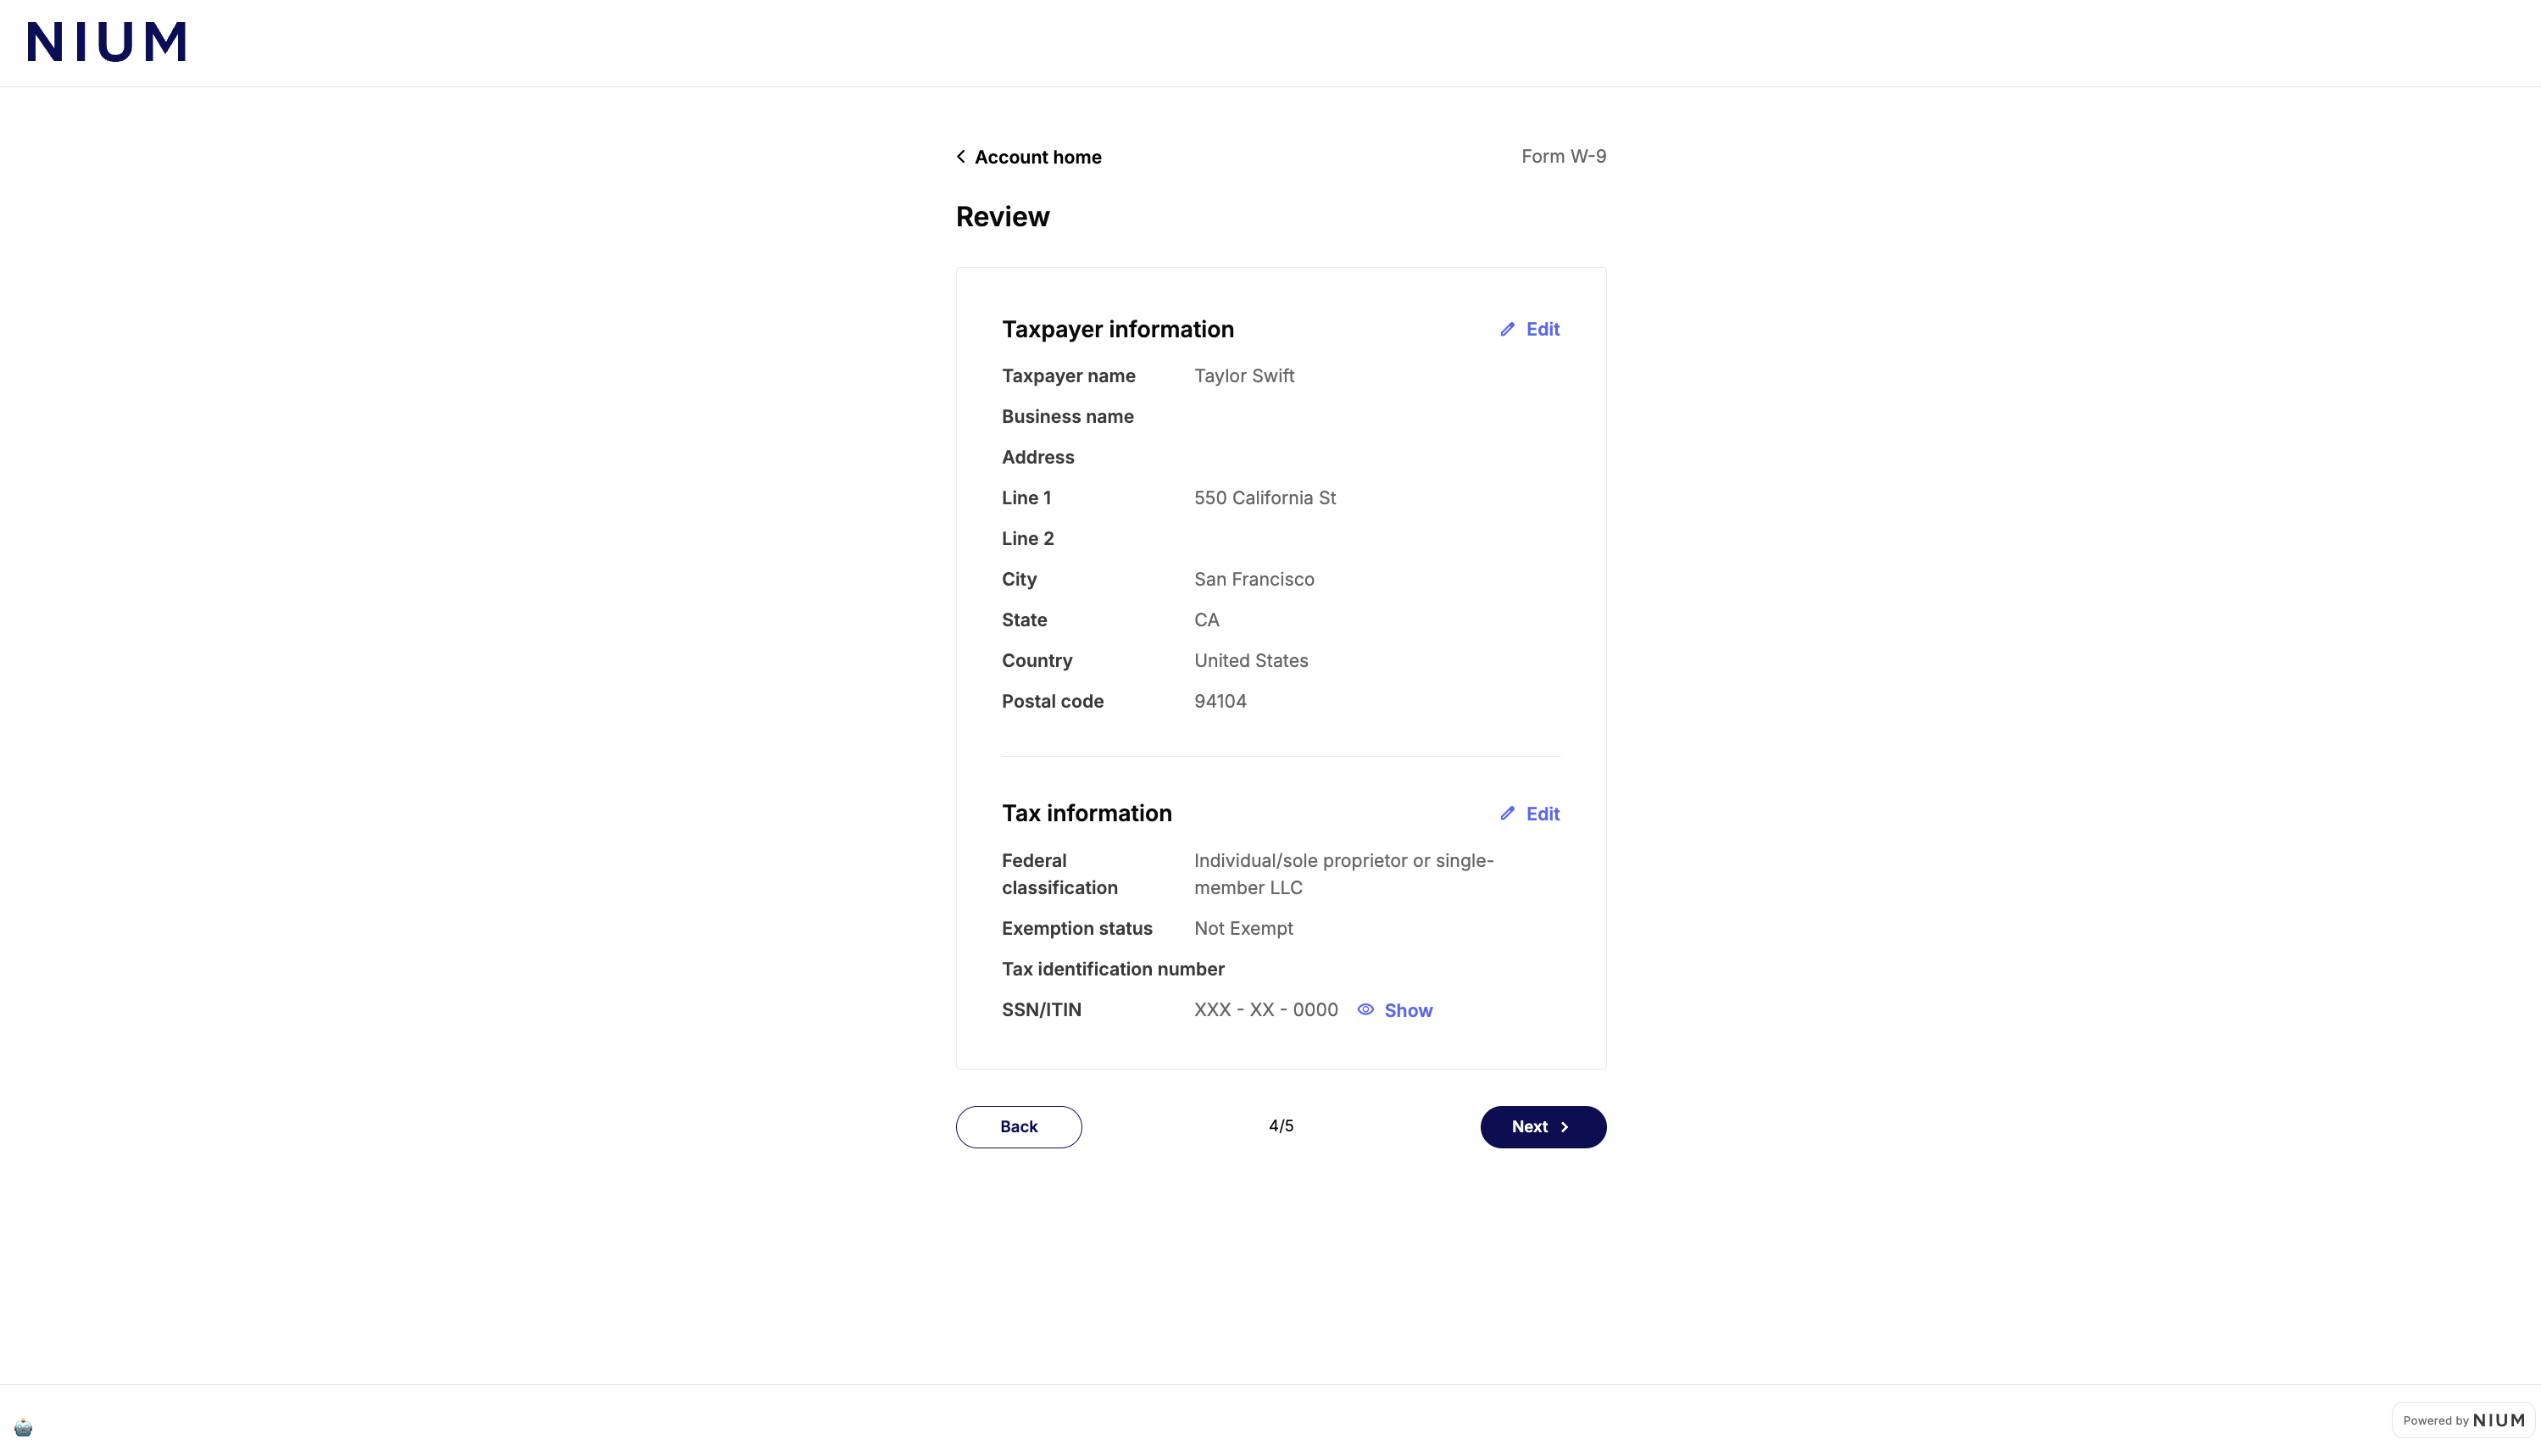
Step 4 of 5: Review
The beneficiary reviews all entered information — taxpayer details and tax information — before submission. Each section has an edit option to make corrections.
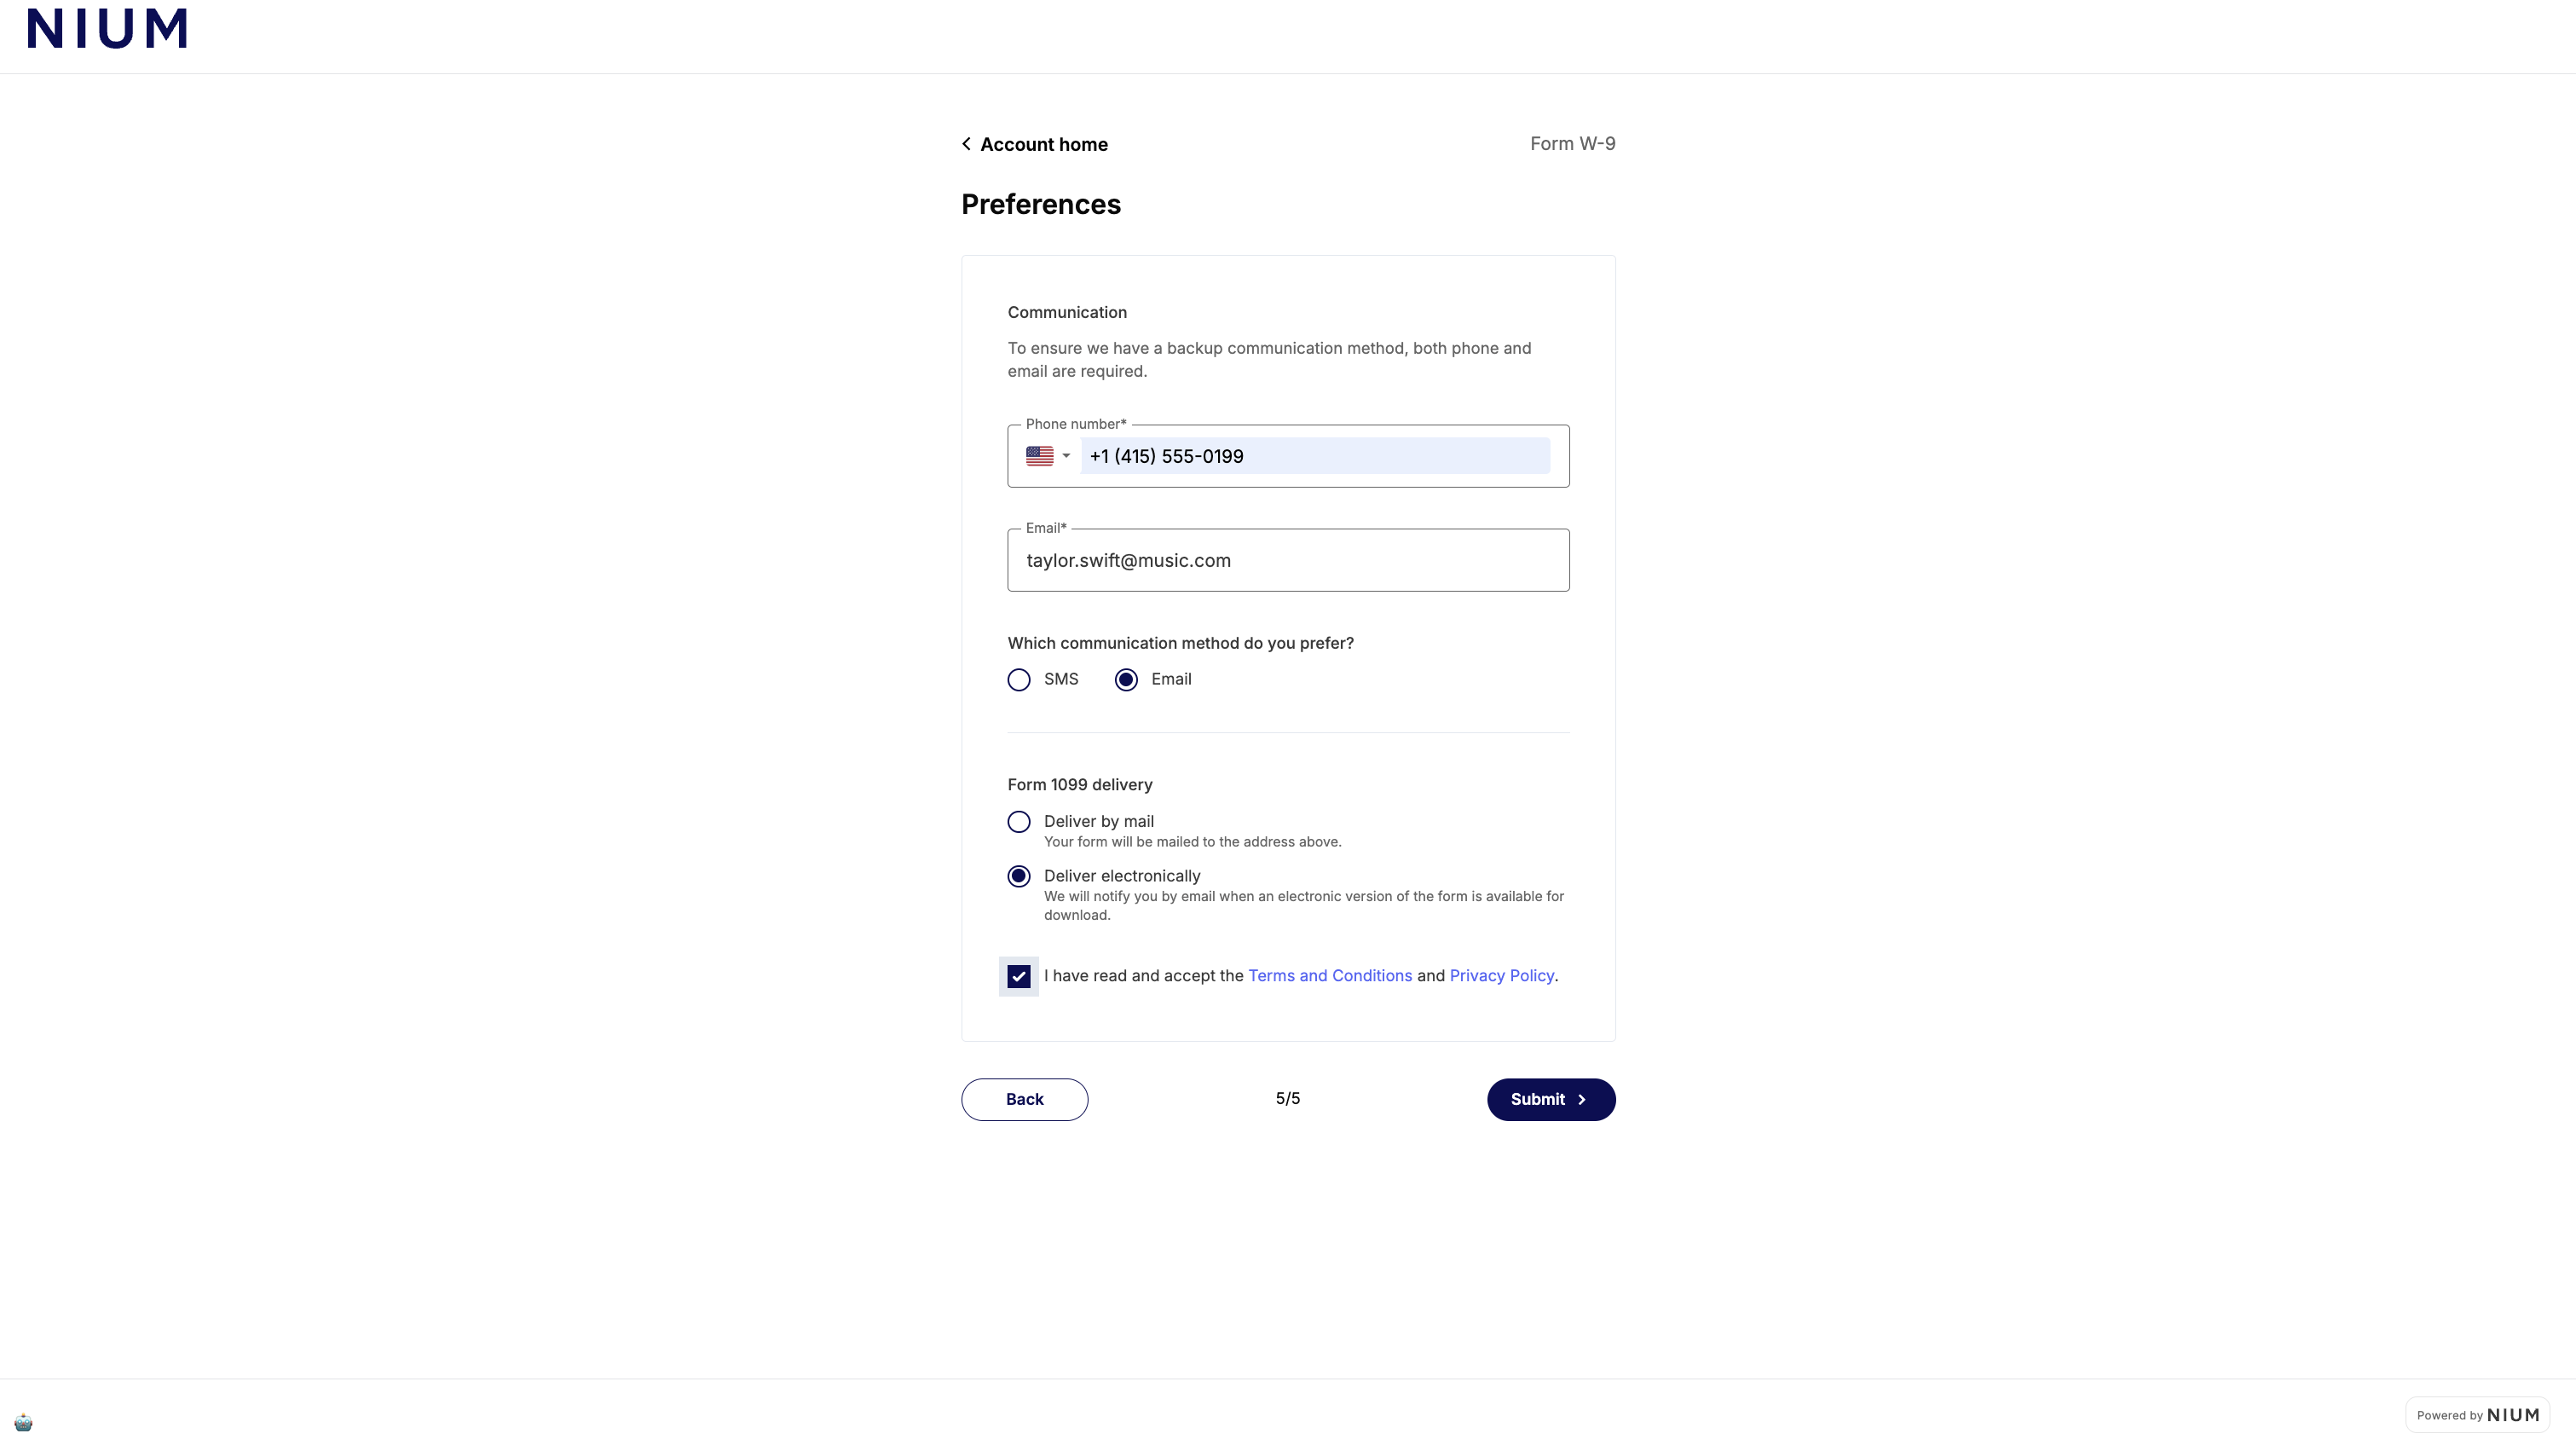
Step 5 of 5: Preferences
The beneficiary confirms their contact details, preferred communication method, and how they want to receive their 1099 form (by mail or electronically). They accept the Terms and Conditions and Privacy Policy before submitting.
Error reference
| Code | Description | Resolution |
|---|---|---|
CLIENT_NOT_FOUND | clientHashId does not match an active Nium client. | Confirm the correct clientHashId. Contact Nium Support if the issue persists. |
INVALID_CREDENTIALS | clientSecret does not match the provided clientHashId. | Verify the correct clientSecret is configured. |
CLIENT_INACTIVE | Client account is disabled. | Contact Nium Support to review or restore the account. |
MODULE_NOT_ALLOWED | Tax Forms are not enabled for your account. | Contact Nium Support to confirm which forms are enabled. |
CUSTOMER_NOT_FOUND | customerHashId does not exist or is not accessible. | Verify the correct customerHashId is provided. |
BENEFICIARY_REQUIRED | No beneficiary record exists for this referenceId. | Complete a Beneficiary Form session for this beneficiary before initiating a Tax Form. |
SESSION_NOT_FOUND | Session code is invalid or expired. | Create a new session and restart the flow. |
SESSION_ALREADY_USED | Session has already been completed. | Create a new session to continue. |
Security
- Keep
clientSecretserver-side: Never expose it in frontend code. All session creation requests must originate from your backend. - Redirect immediately: Sessions expire after 30 seconds. Redirect the beneficiary to the hosted form as soon as a valid
sessionIdis returned. - Use HTTPS: All requests to Nium APIs must use HTTPS in production environments.
- Store credentials securely: Use a secrets manager (such as AWS Secrets Manager or HashiCorp Vault) for
clientSecretand API keys. Never commit credentials to source control.
Next steps
After a beneficiary completes the Tax Form, Nium links the tax record to their beneficiary account. You can then:
- Initiate payouts using the Transfer Money endpoint.
- Use the
taxPayerHashIdto retrieve or update tax records via the Nium API. - Contact your Nium account manager for guidance on 1099 filing workflows.