Beneficiary Forms
Beneficiary Forms are secure, Nium-hosted forms that collect payment account details from your beneficiaries or recipients — creating a verified payment account in Nium without requiring you to build or maintain a custom data-collection experience.
This form is helpful for clients that:
- Pay out to a large number of beneficiaries or recipients
- Need beneficiaries to self-serve their payment account setup
- Want Nium to handle payment detail collection and validation
- Are building toward tax compliance workflows — Beneficiary Forms are a prerequisite for Tax Forms
Overview
To collect beneficiary payment details using Beneficiary Forms, clients:
- Create a session using the Nium API, providing the beneficiary's details and redirect URIs.
- Redirect the beneficiary to the Nium-hosted form using the returned session URL.
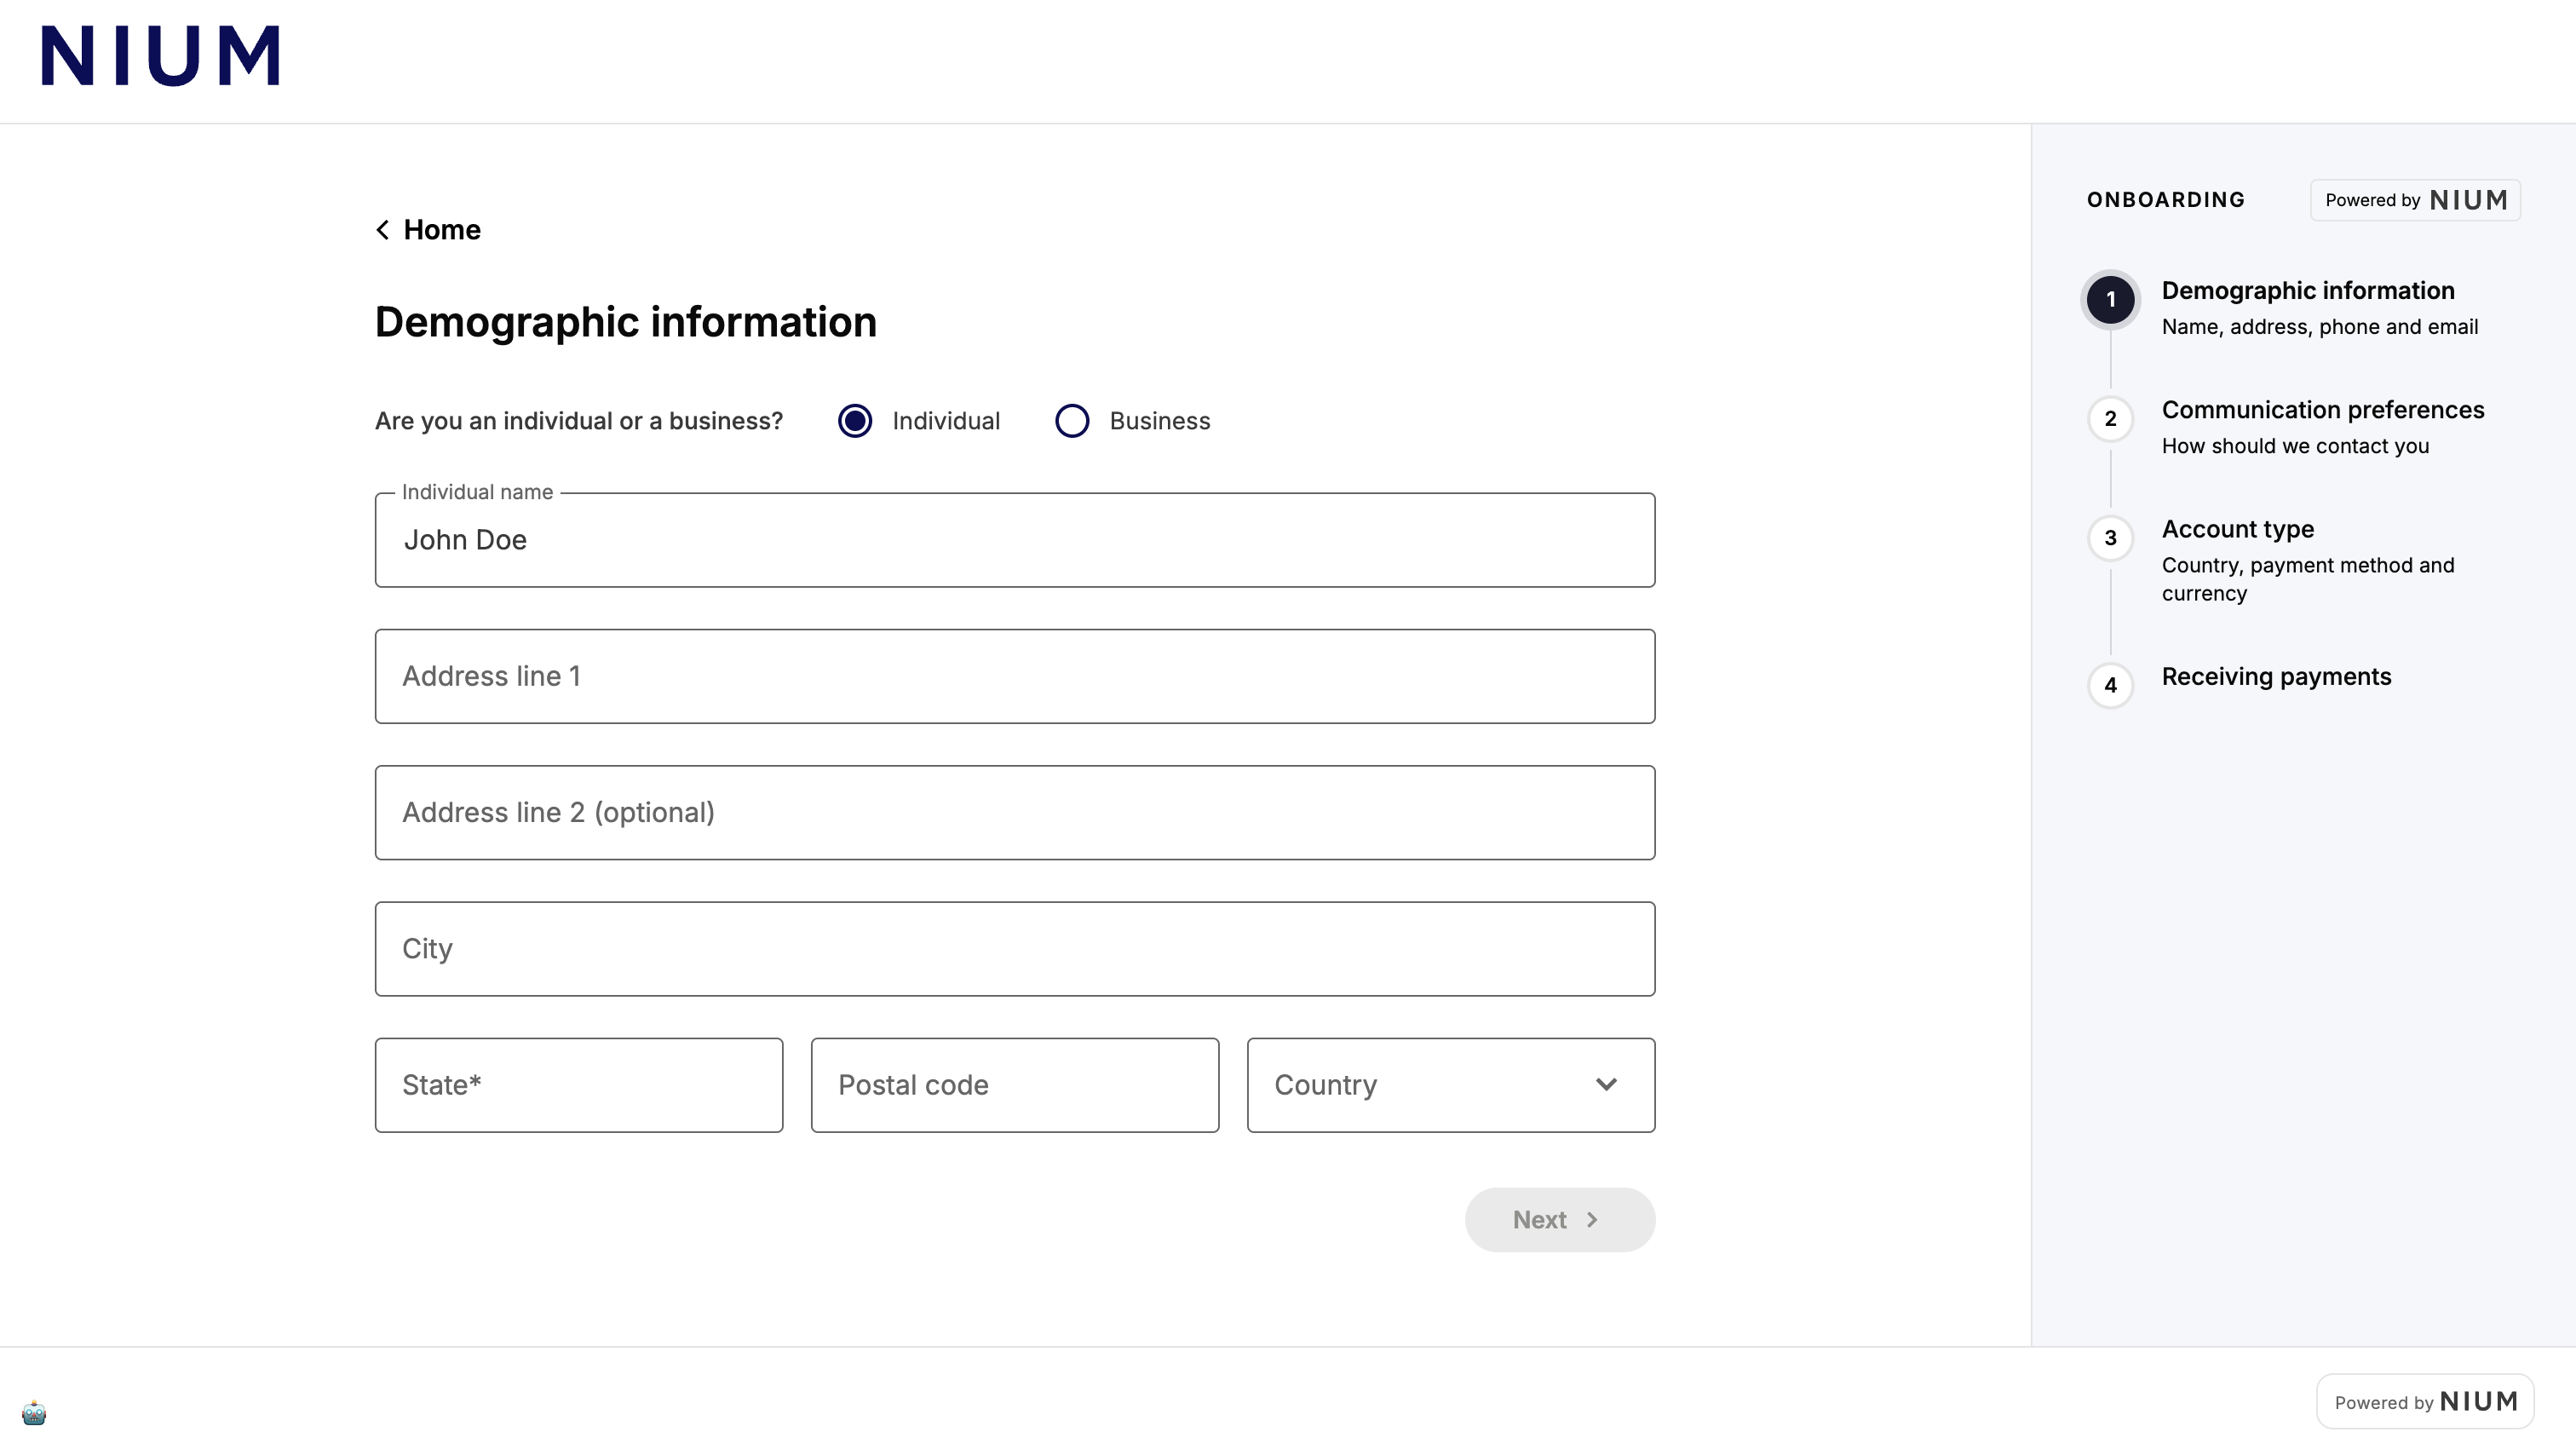
- The beneficiary completes a guided 4-step form: demographic information, communication preferences, account type, and bank transfer details.
- Nium creates a
beneficiaryrecord and a linkedpaymentAccount. - The beneficiary is redirected to the client's success URL with the
beneficiaryHashId.
Key features
Beneficiary Forms handle the full payment account setup experience, including field validation, currency and country-specific requirements, and secure data submission directly into Nium.
Other benefits of using Beneficiary Forms include:
- No frontend build required — Nium hosts and maintains the form.
- Supports bank accounts and payment cards across multiple regions.
- Secure session-based access — each session is single-use and short-lived.
- Configurable redirect URIs for success, cancellation, and session expiry outcomes.
Responsibilities
| Feature | Client | Nium |
|---|---|---|
| Session creation | X | |
| Beneficiary redirect | X | |
| Form experience and field validation | X | |
| Payment account creation | X | |
| Outcome handling and redirect | X |
Branding
You can add your organization's logo to the Beneficiary Form for a consistent customer experience.
Your logo appears at the top left corner of the form, replacing the Nium logo shown in the default view. Provide your logo to your Nium account manager during initial setup.
Prerequisites
Before integrating Beneficiary Forms:
- Your client account must be onboarded in Nium. You need your
clientHashId,clientSecret, and API key. - A customer record (
customerHashId) must exist for the entity acting as the remitter. - Hosted Components must be enabled for your account. Contact your Nium account manager or Nium Support to enable and configure this feature.
Create a Beneficiary Form session
Step 1: Request access
Contact your Nium account manager or Nium Support to enable Beneficiary Forms for your account.
Step 2: Create a session
Use the Initiate Pre-built Form request to generate a sessionId.
Request example
curl --request POST "https://gateway.nium.com/api/v1/client/{clientHashId}/prebuilt-forms-init" \
  --header "Content-Type: application/json" \
  --header "x-api-key: {x-api-key}" \
  --data '{
    "clientSecret": "{clientSecret}",
    "modules": ["payment"],
    "referenceId": "{your-beneficiary-reference-id}",
    "userDetails": {
      "name": "Jane Smith",
      "email": "jane.smith@example.com",
      "entityType": "individual"
    },
    "customerHashId": "{customerHashId}",
    "redirectUris": {
      "success": "https://yourplatform.com/payment/success",
      "cancel": "https://yourplatform.com/payment/cancel",
      "refresh": "https://yourplatform.com/payment/refresh"
    }
  }'
| Field | Type | Required | Description |
|---|---|---|---|
clientSecret | String | Required | Client secret for authentication. Keep this server-side — never expose in frontend code. |
modules | Array | Required | Set to ["payment"] for Beneficiary Forms. |
referenceId | String | Required | Your internal identifier for the beneficiary. |
userDetails.name | String | Required | Full name of the beneficiary. |
userDetails.email | String | Required | Email address of the beneficiary. |
userDetails.entityType | String | Required | individual or business. |
userDetails.mobile | String | Optional | Mobile number of the beneficiary. |
customerHashId | String | Required | Unique identifier of the customer acting as remitter. |
redirectUris.success | String | Required | URL to redirect the beneficiary after successful completion. |
redirectUris.cancel | String | Required | URL to redirect the beneficiary if they cancel. |
redirectUris.refresh | String | Required | URL to redirect the beneficiary if the session expires. |
Successful response
{
  "status": "SUCCESS",
  "sessionId": "25f82bda-d630-4b27-91e0-e99eaa9754f4",
  "redirectUrl": "https://onboard.sandbox.nium.com?code=25f82bda-d630-4b27-91e0-e99eaa9754f4",
  "expiresInSeconds": 30,
  "error": null
}
| Field | Description |
|---|---|
sessionId | One-time session code. Expires after 30 seconds — redirect immediately. |
redirectUrl | The full hosted form URL with the session code appended. |
expiresInSeconds | Time in seconds before the session expires. |
Step 3: Open the form
Redirect the beneficiary to the redirectUrl returned in the session response. The session expires after 30 seconds — initiate the redirect immediately after receiving a successful response.
The form can be opened as a full-page redirect or embedded in an iframe.
The redirectUrl in sandbox responses points to the sandbox environment. Your Nium account manager will confirm the production URL during onboarding.
Step 4: Handle outcomes
When the beneficiary completes, cancels, or lets the session expire, Nium redirects them to the URI you provided in the session request.
| Outcome | Redirect target | Query parameters |
|---|---|---|
| Completed | redirectUris.success | ?beneficiaryHashId={id} |
| Cancelled | redirectUris.cancel | — |
| Expired | redirectUris.refresh | — |
On success, store the beneficiaryHashId — you need it to retrieve payment account details and to initiate payouts.
Step 5: Retrieve the beneficiary record
After a beneficiary completes the form, use the following endpoints to retrieve their record and payment account details.
List all beneficiaries:
curl --location 'https://gateway.nium.com/api/v3/client/{clientHashId}/customer/{customerHashId}/beneficiaries' \
  --header 'x-api-key: {x-api-key}'
Get a specific beneficiary:
curl --location 'https://gateway.nium.com/api/v3/client/{clientHashId}/customer/{customerHashId}/beneficiaries/{beneficiaryHashId}' \
  --header 'x-api-key: {x-api-key}'
List payment accounts for a beneficiary:
curl --location 'https://gateway.nium.com/api/v3/client/{clientHashId}/customer/{customerHashId}/beneficiaries/{beneficiaryHashId}/payment-accounts' \
  --header 'x-api-key: {x-api-key}'
Form walkthrough
The beneficiary completes the form across four steps. Nium guides them through each step in sequence.
Step 1: Demographic information
The beneficiary selects whether they are an individual or a business, then enters their name and address details.
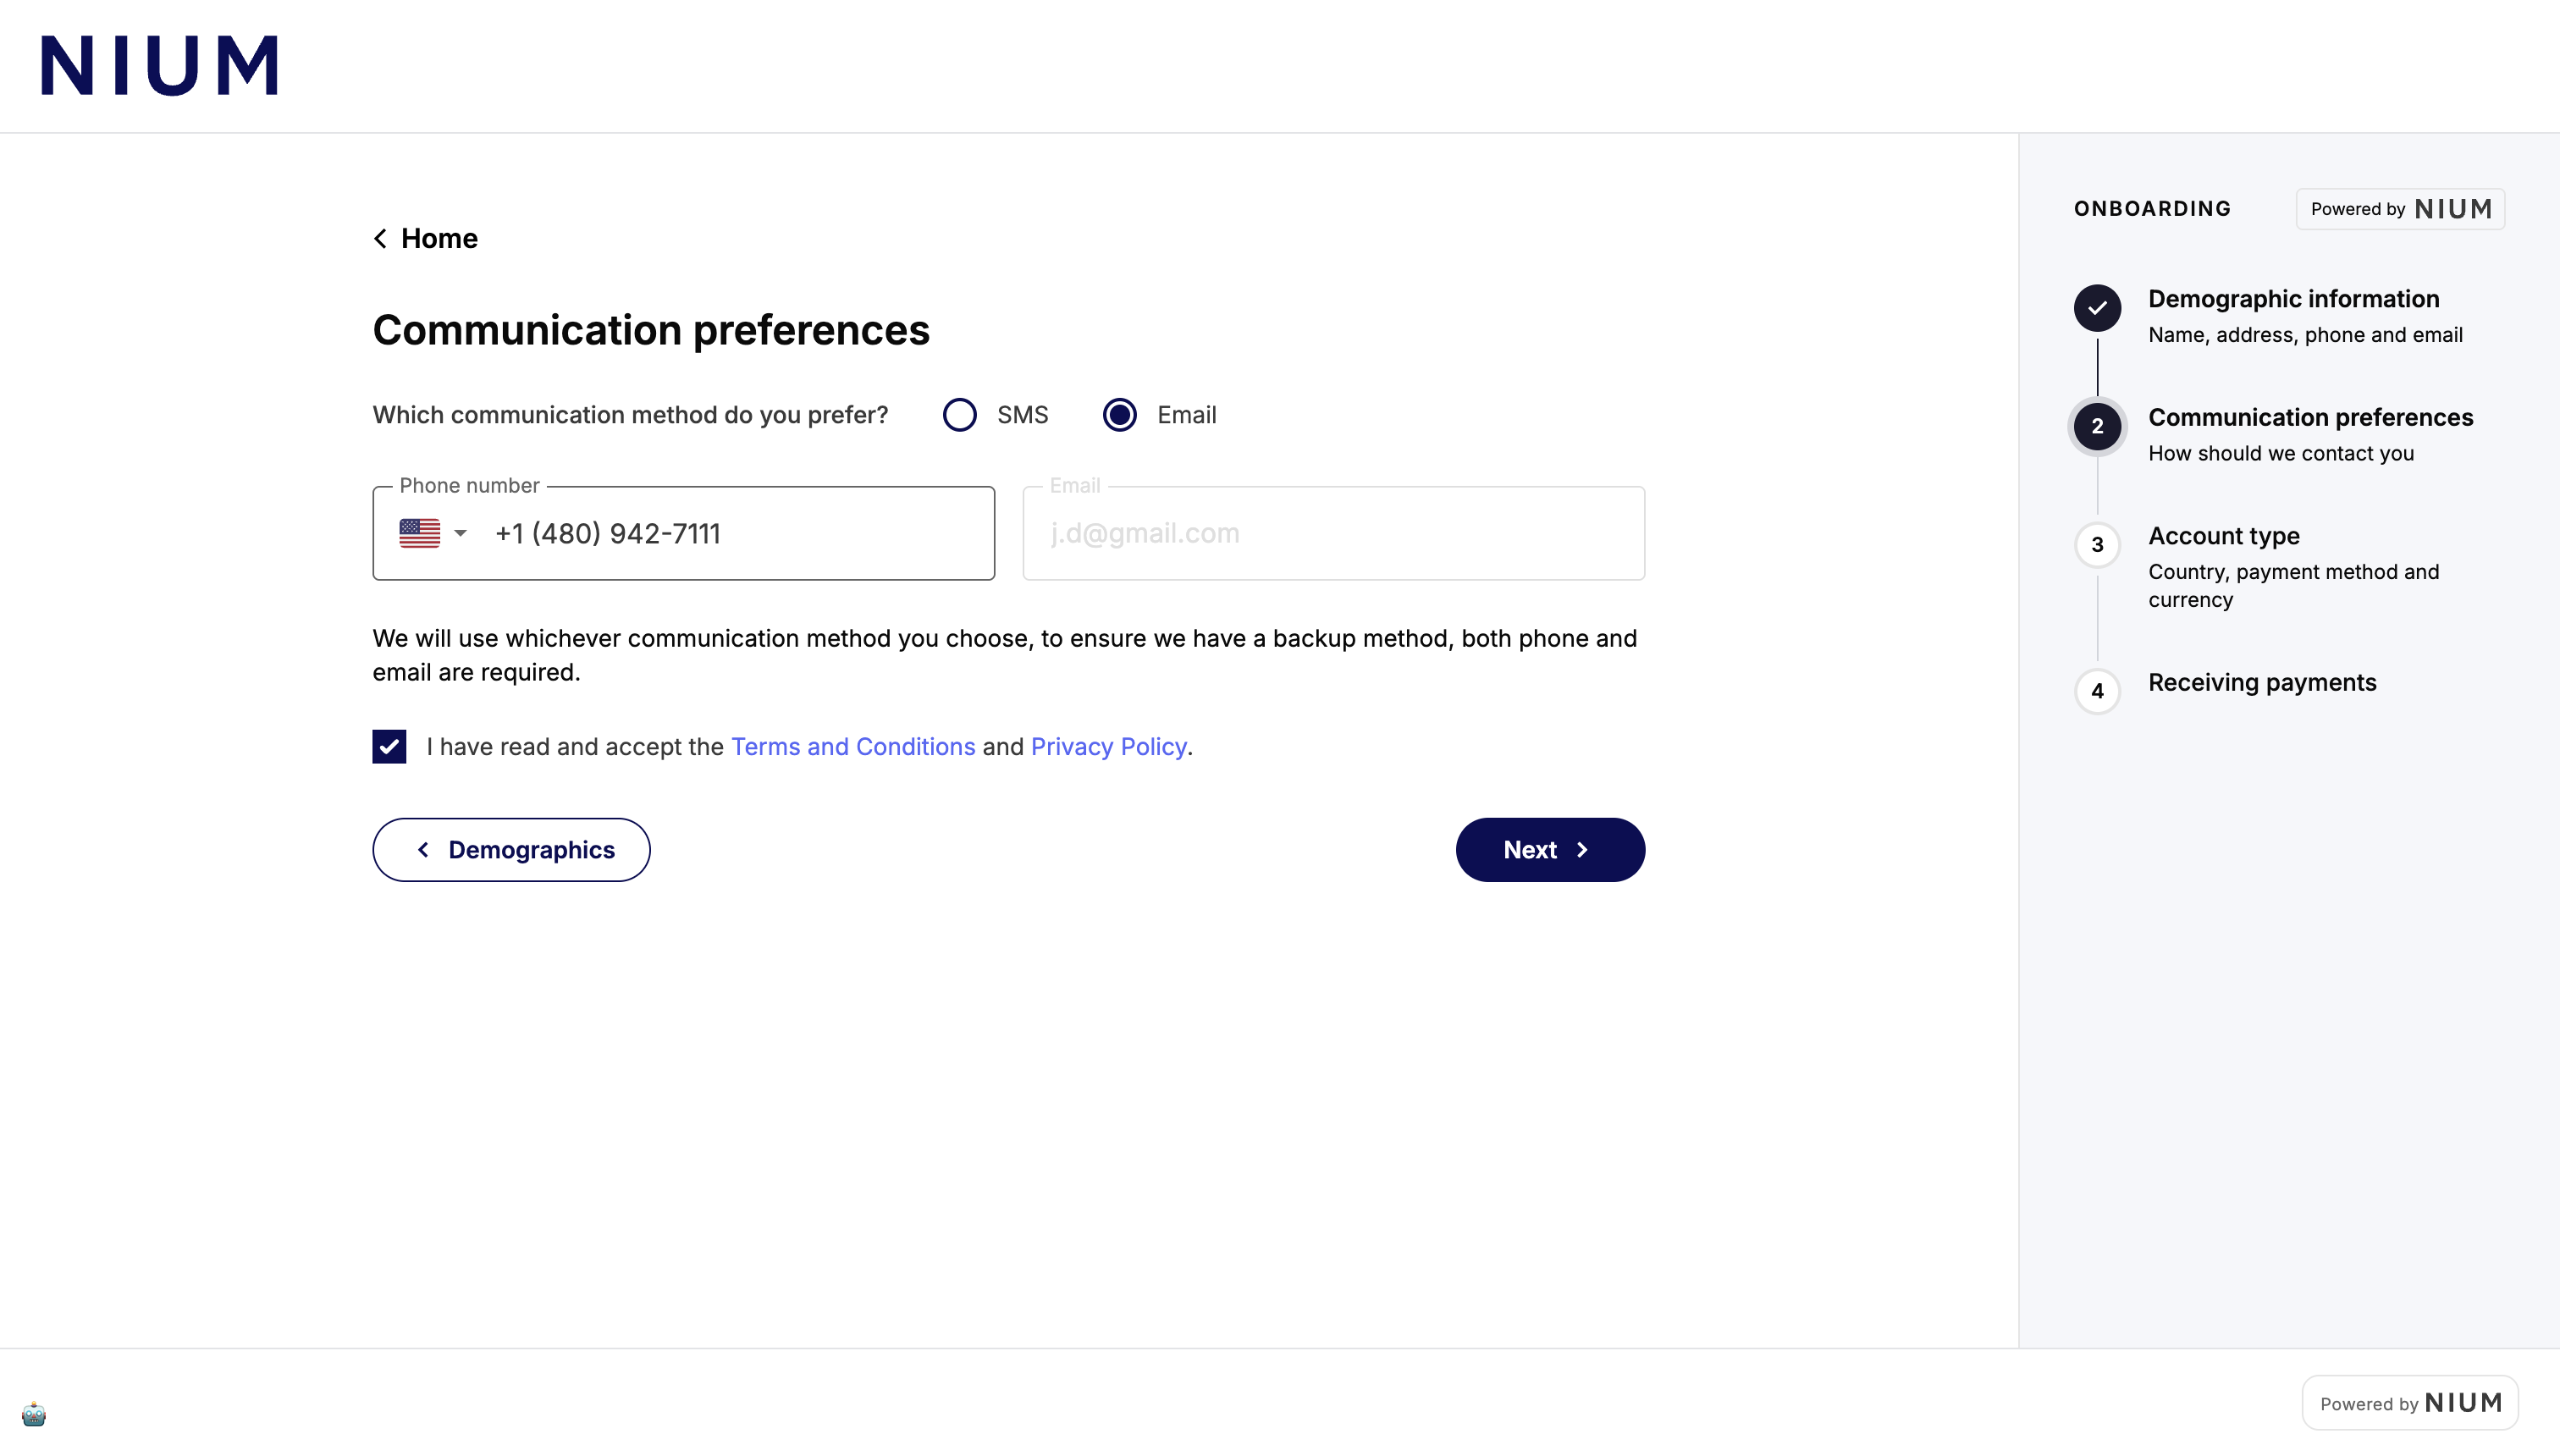
Step 2: Communication preferences
The beneficiary selects their preferred communication method (SMS or email) and provides their phone number and email address. Both are required as backup contact methods. The beneficiary accepts the Terms and Conditions and Privacy Policy before proceeding.
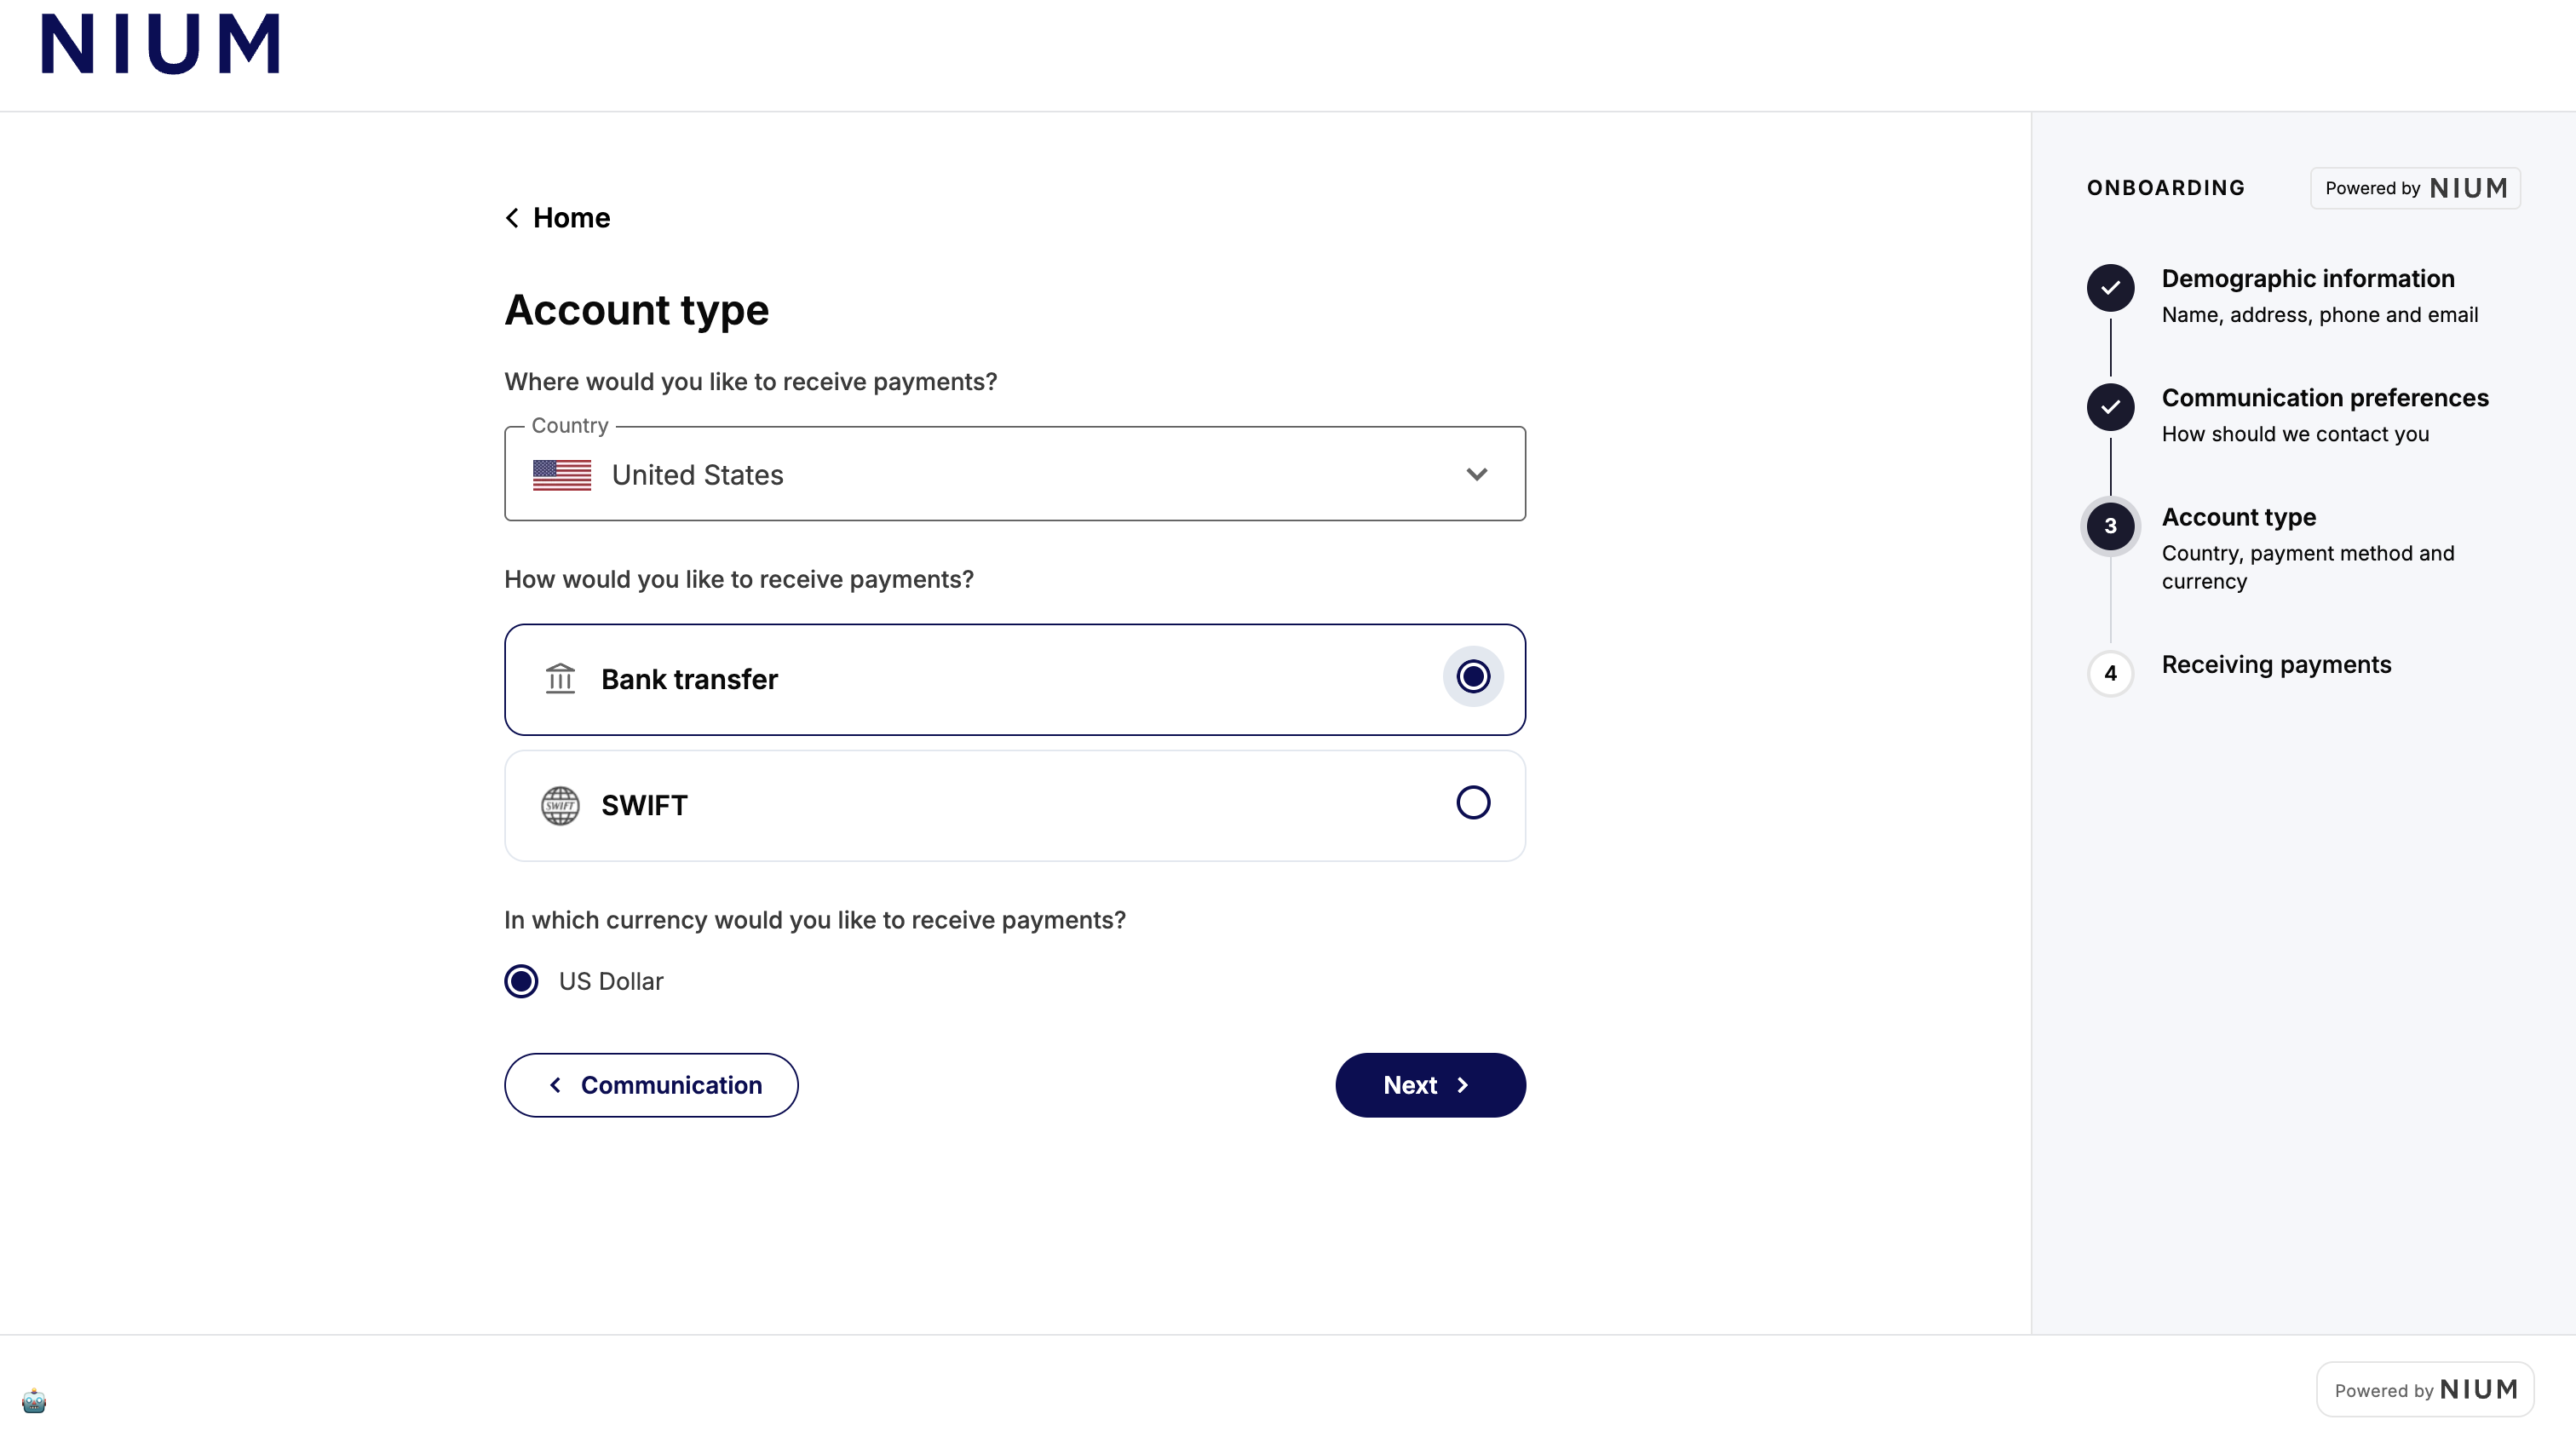
Step 3: Account type
The beneficiary selects the country where they want to receive payments, their preferred payment method (bank transfer or SWIFT), and the currency.
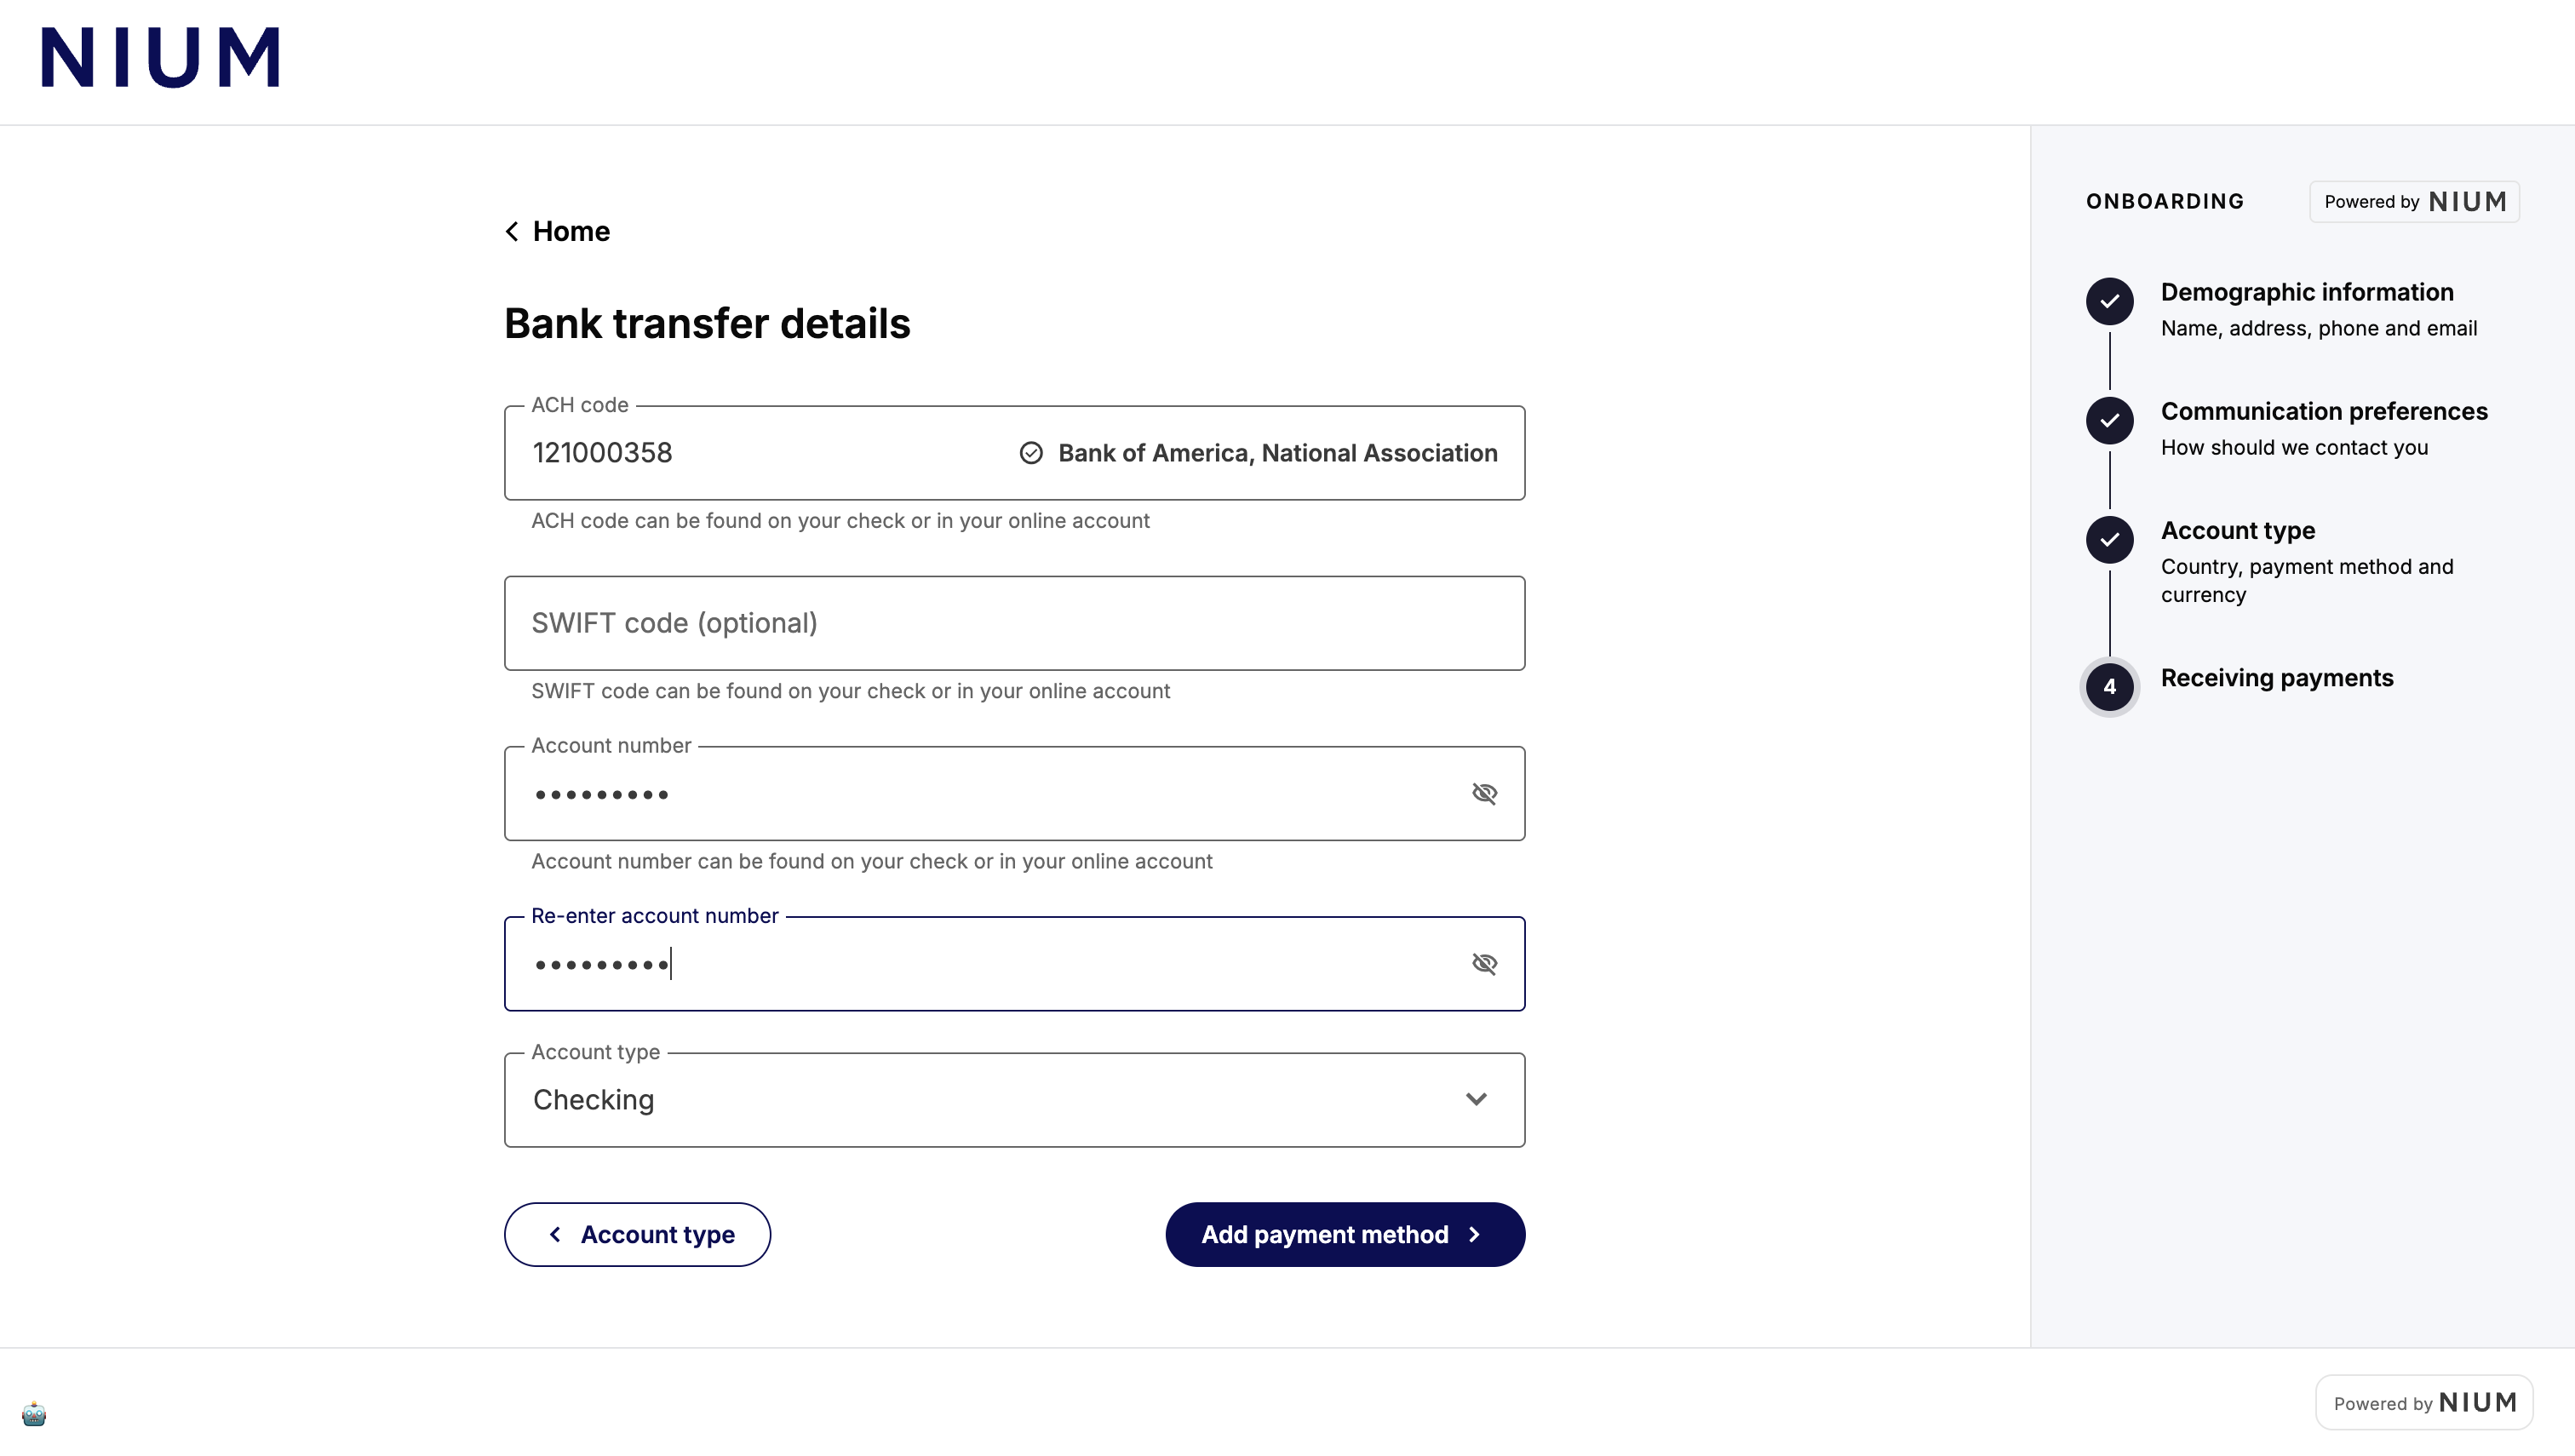
Step 4: Bank transfer details
The beneficiary enters their bank account details — ACH code, account number, and account type. Nium validates the details and creates the payment account on submission.
Error reference
| Code | Description | Resolution |
|---|---|---|
CLIENT_NOT_FOUND | clientHashId does not match an active Nium client. | Confirm the correct clientHashId. Contact Nium Support if the issue persists. |
INVALID_CREDENTIALS | clientSecret does not match the provided clientHashId. | Verify the correct clientSecret is configured. |
CLIENT_INACTIVE | Client account is disabled. | Contact Nium Support to review or restore the account. |
MODULE_NOT_ALLOWED | Beneficiary Forms are not enabled for your account. | Contact Nium Support to confirm which forms are enabled. |
CUSTOMER_NOT_FOUND | customerHashId does not exist or is not accessible. | Verify the correct customerHashId is provided. |
SESSION_NOT_FOUND | Session code is invalid or expired. | Create a new session and restart the flow. |
SESSION_ALREADY_USED | Session has already been completed. | Create a new session to continue. |
Security
- Keep
clientSecretserver-side: Never expose it in frontend code. All session creation requests must originate from your backend. - Redirect immediately: Sessions expire after 30 seconds. Redirect the beneficiary to the hosted form as soon as a valid
sessionIdis returned. - Use HTTPS: All requests to Nium APIs must use HTTPS in production environments.
- Store credentials securely: Use a secrets manager (such as AWS Secrets Manager or HashiCorp Vault) for
clientSecretand API keys. Never commit credentials to source control.
Next steps
After a beneficiary completes the Beneficiary Form, you can:
- Initiate payouts using the
beneficiaryHashIdandpaymentAccountIdvia the Transfer Money endpoint. - Collect tax information from the beneficiary using Tax Forms.