Hosted KYC Form
Nium's hosted KYC form allows you to collect identity verification details from customers without building your own verification interface.
This form is the recommended identity collection method for Onboarding v5. You generate a session, share a secure link, and Nium manages document collection and verification based on regional requirements and configuration.
When to use the hosted KYC form
Use the hosted form if you:
- Do not want to build and maintain your own KYC UI
- Want Nium to manage region-specific document requirements
- Want a branded onboarding experience
- Want automated verification where available
How it works
- Create a session using the Create a Session request.
- Share the generated session link with the customer.
- The customer completes identity verification.
- Nium processes verification (instant or manual review).
- The customer
statusandsubstatusupdate based on verification progress.
-
When KYC has not been completed:
status:pendingsubstatus:awaiting_kyc
-
When KYC has been submitted and is under review with Nium:
status:pendingsubstatus:under_review
Once review is complete, the customer's status updates based on the verification outcome (for example, clear or rejected).
You can retrieve status via the Customer Details endpoint or listen for webhook notifications.
Branding
You can provide a company logo to be displayed on the hosted form.
Layout, document requirements, and verification flow are controlled by Nium to ensure regulatory compliance.
Contact your Nium account representative for more details.
Responsibilities
When using the hosted KYC form:
- Nium manages document collection and verification.
- Nium determines required documents based on region and configuration.
- The client remains responsible for ensuring onboarding configuration is correct.
- The client controls when the onboarding process is initiated.
Integration
Step 1: Provide branding assets (optional)
Share your company logo with the Nium team.
If no logo is provided, the Nium logo appears in the hosted form.
Step 2: Create a session
Create a session and generate a sessionId.
Example request
curl --location 'https://gateway.nium.com/api/v1/client/{clientHashId}/sessions' \
--header 'Content-Type: application/json' \
--header 'x-api-key: ***********' \
--data '{
  "featureType": "kyc_form",
  "integrationType": "standalone",
  "expiry": "2026-02-25T10:30:00Z",
  "rollingDurationMinutes": 200,
  "onBehalf": false,
  "customerHashId": "549d0fd0-d5f1-411f-85a3-q19cbfd310r4"
}'
Request parameters
| Field | Type | Required | Description | Allowed values |
|---|---|---|---|---|
featureType | string | Yes | Type of hosted feature to generate. | kyc_form |
customerHashId | string | Yes | Unique customer identifier returned from the Create Customer (v5) request. | — |
integrationType | string | Yes | Determines how the form is presented to the user. | embedded, standalone |
expiry | string (ISO-8601) | Yes | Absolute expiration time for the session (yyyy-MM-dd'T'HH:mm:ssXXX). | — |
rollingDurationMinutes | integer | Yes | Inactivity timeout in minutes. Minimum value: 1. | — |
domain | string | Conditional | Required when integrationType = embedded. Must match the session domain. | — |
onBehalf | boolean | Yes | Indicates whether the client is accessing the form on behalf of the customer. | true, false |
email | string | Conditional | Required when onBehalf = true. Used to send OTP authentication. | — |
expirydefines the absolute expiration time of the session.rollingDurationMinutesdefines how long the session remains active during user inactivity.
Step 3: Present the Form to the customer
Append the generated sessionId to the hosted URL:
https://nformify-sandbox.nium.com/kyc?sessionId=
You can:
- Embed the link in your portal (
integrationType=embedded) - Share the link directly with the authorized signatory (
standalone)
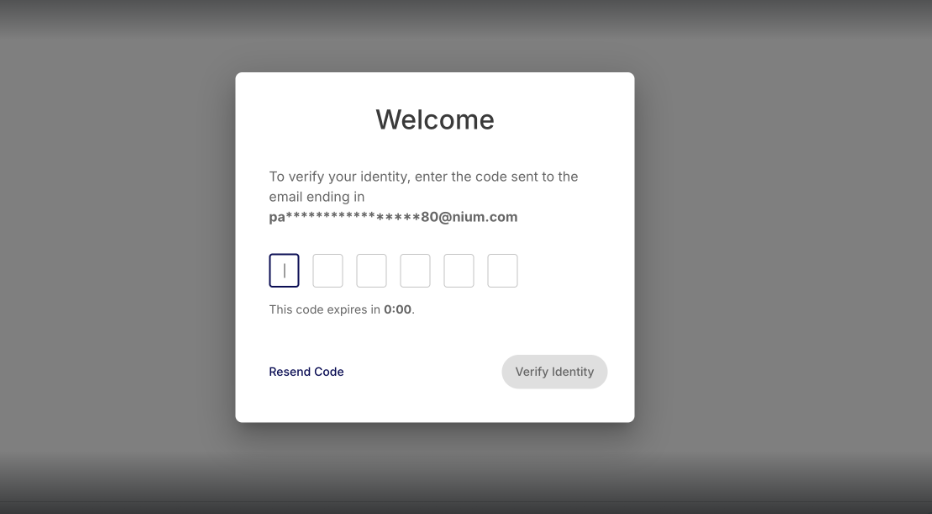
Step 4: User Accesses the KYC Form
The authorized signatory opens the link.
If authentication is required, an OTP is sent to the configured email address.
The user must enter the OTP to proceed.
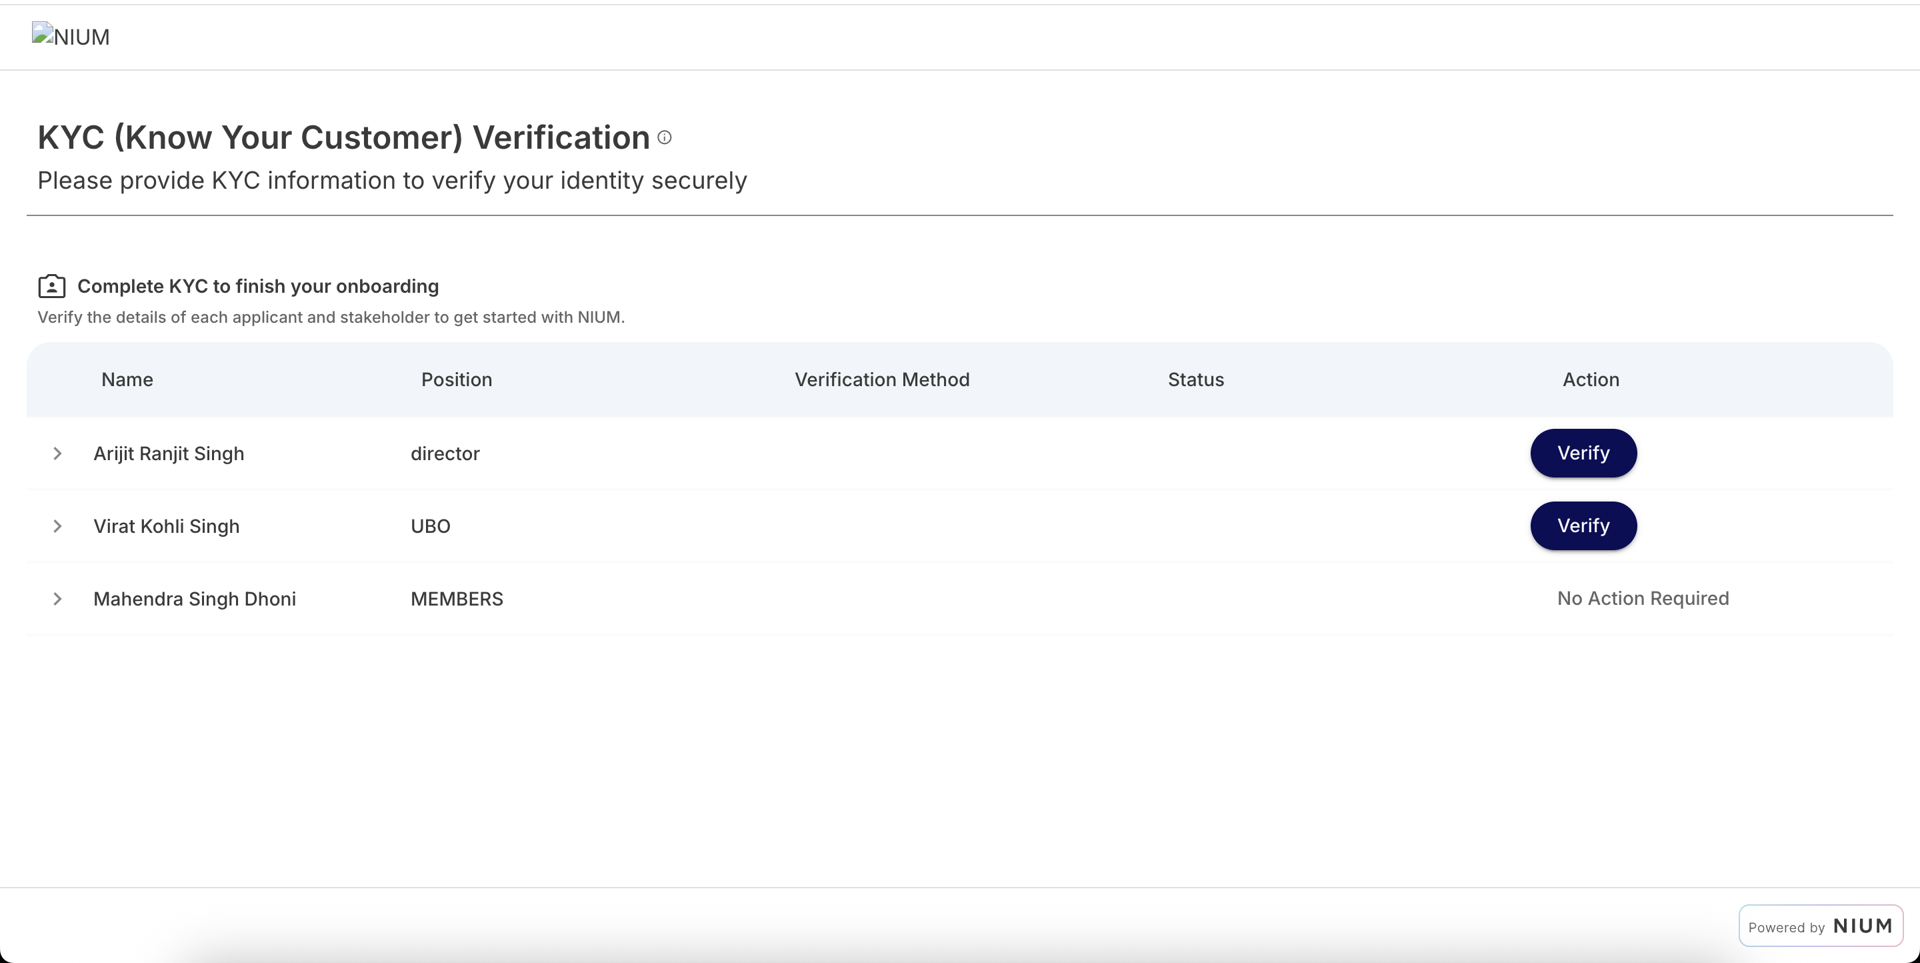
Step 5: Customer completes KYC
After authentication, the user completes identity verification.
The form displays:
- The list of individuals requiring verification
- Required documents (based on region and stakeholder type)
- Real-time status updates
The user must complete KYC for:
- The authorized signatory
- Any additional stakeholders specified during onboarding
Depending on configuration:
- Verification may complete instantly (automated checks)
- Documents may be uploaded for manual review
Status and lifecycle
After submission:
- The session status updates.
- The customer’s KYC status transitions accordingly.
- Webhooks are triggered (if configured).
- You can retrieve the current customer
statusandsubstatususing the Get Customer Details request or subscribe to Customer Lifecycle.
If the session expires:
- The link becomes invalid.
- A new session must be generated.
- Previously submitted information remains associated with the customer.
Multiple sessions can be generated for the same customer if needed.
Retrying hosted forms
If a user does not complete the form:
- The session expires based on
expiryorrollingDurationMinutes. - A new session can be generated.
- Previously submitted information remains associated with the customer.
If verification fails:
- The customer’s KYC status is updated accordingly.
- A new session may be required depending on the failure reason.