Nium Portal
When you sign up for a Nium account, you gain access to Nium Portal. Nium Portal is a no-code, user-friendly dashboard you can use to manage transactions, beneficiaries, customers, and anything else processed through Nium.
For details on how to sign up for a Nium account and generate your API keys, see Getting Started.
To log into Nium Portal:
- Click Log In in the top right of any guide to login to Nium Portal.
- Go to app.nium.com.
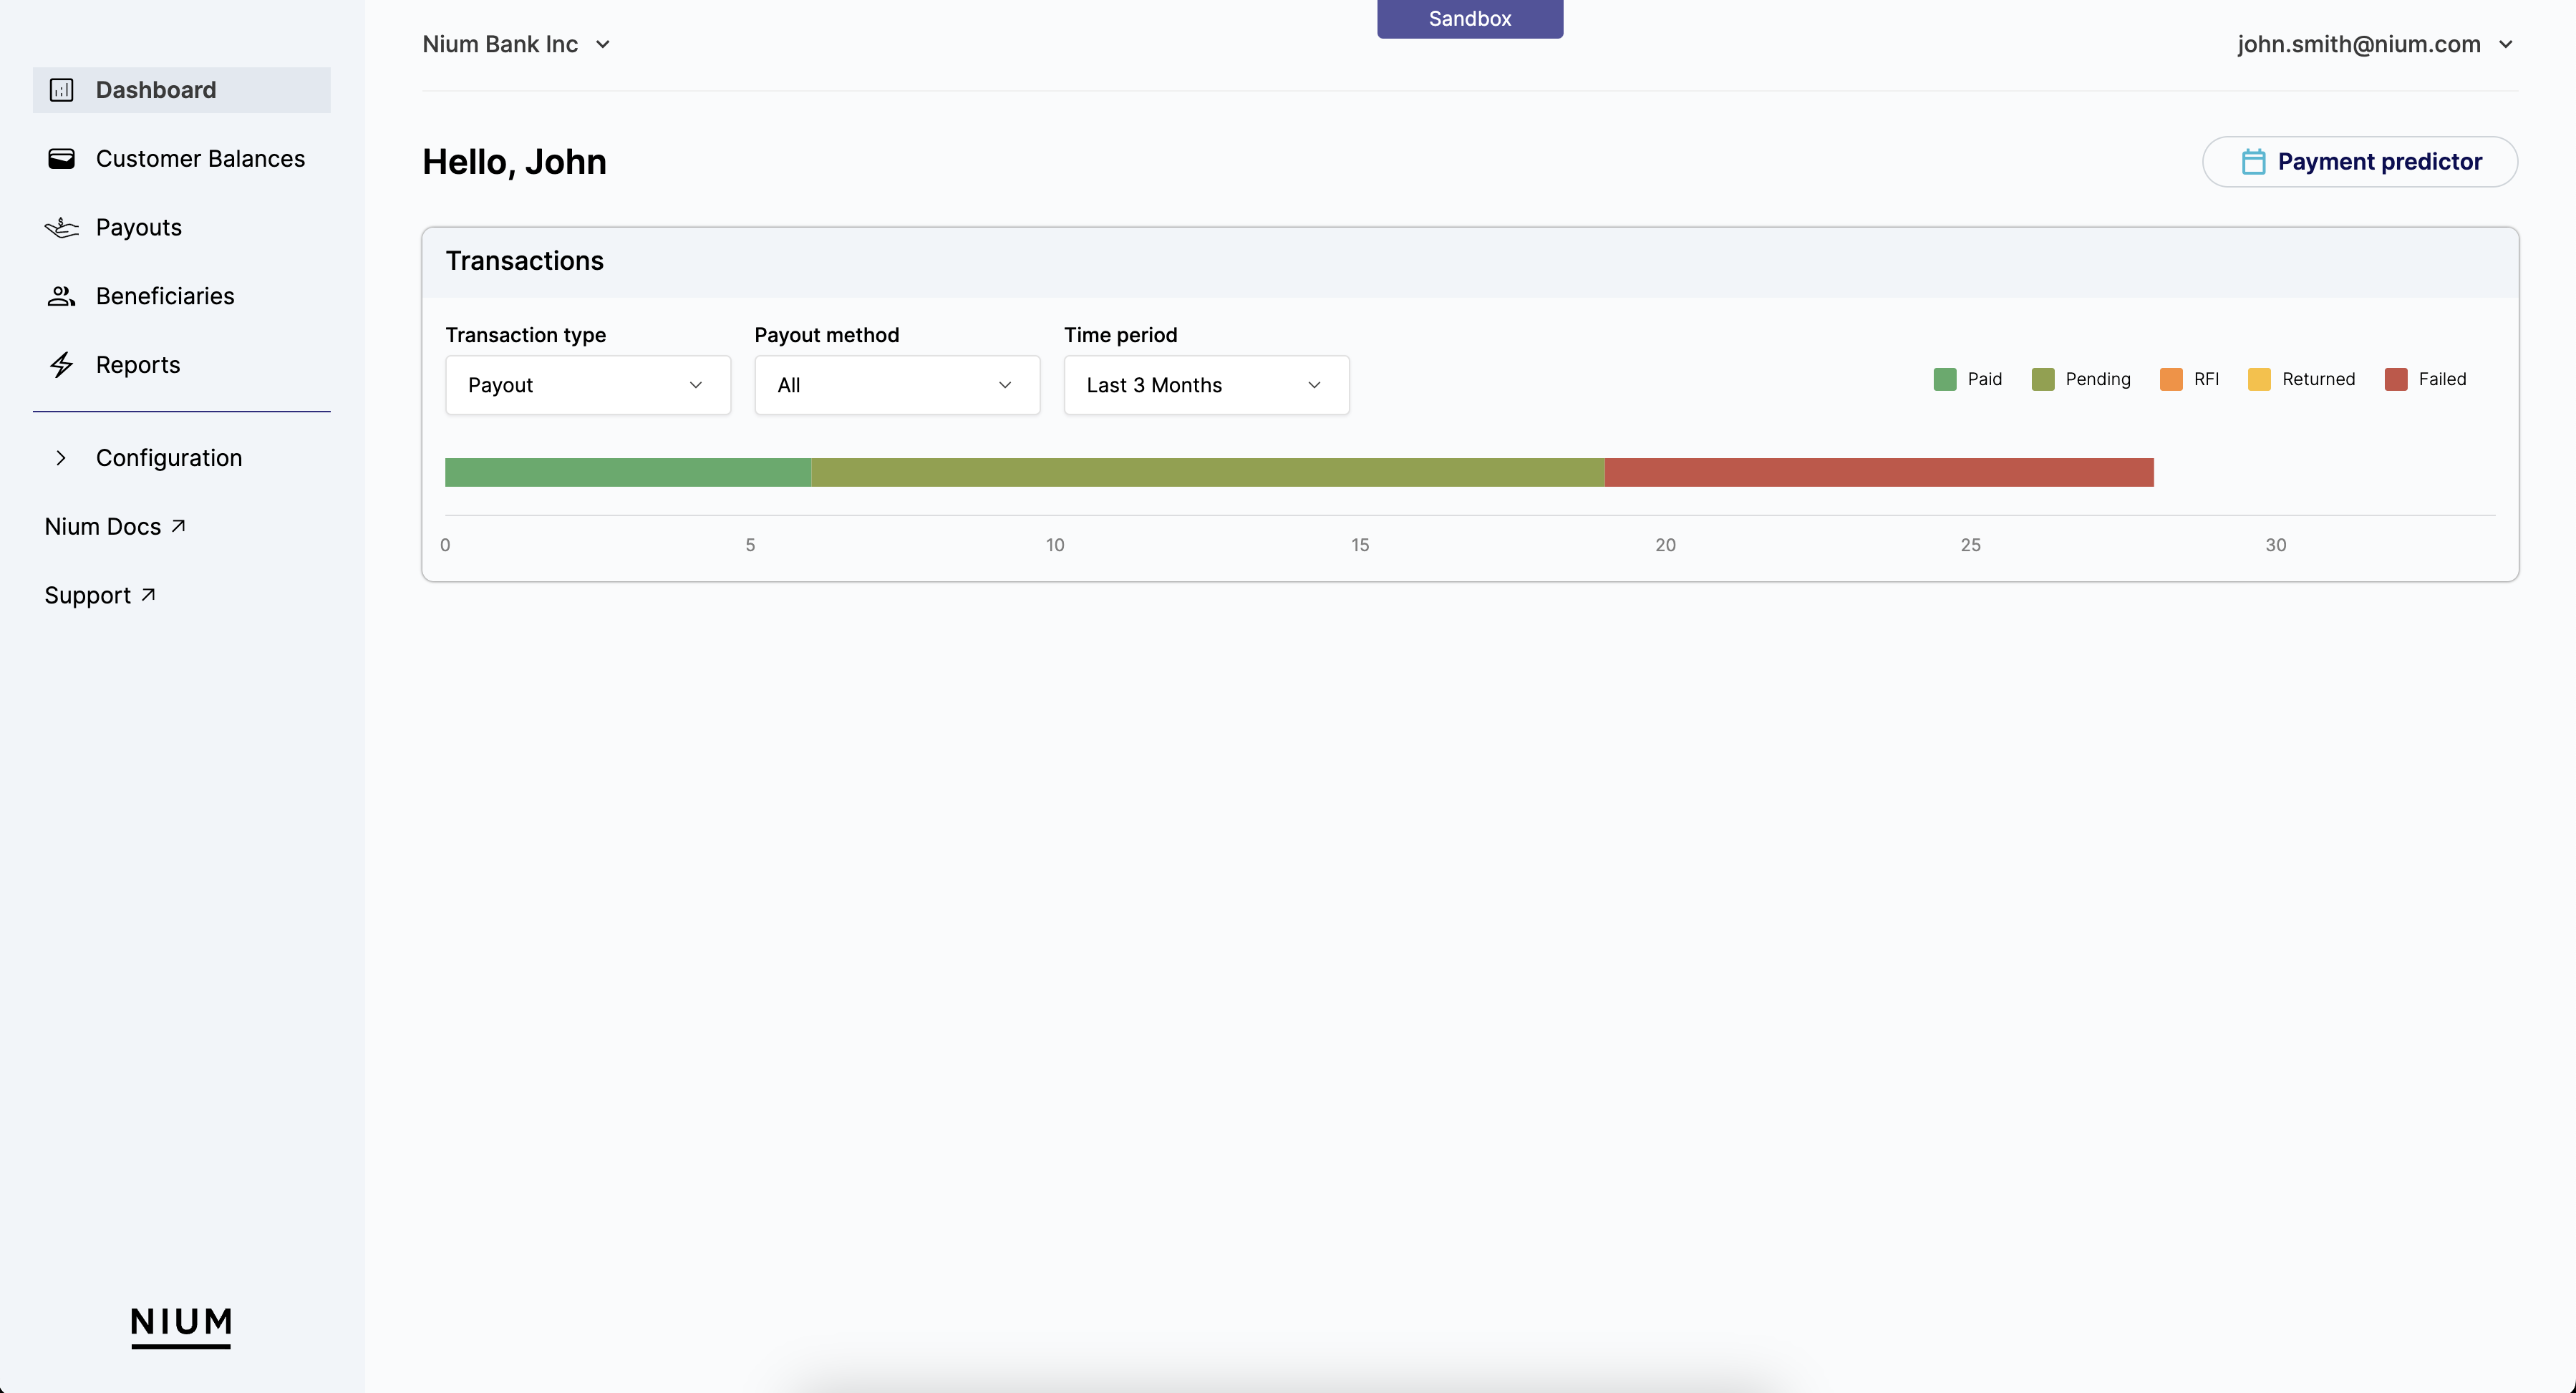
Dashboard
The first page you see after logging in is the Dashboard page. The Dashboard page provides an overview of the transactions processed by the customer. Use the dropdown menus to filter what transactions to display.
Customer Balances
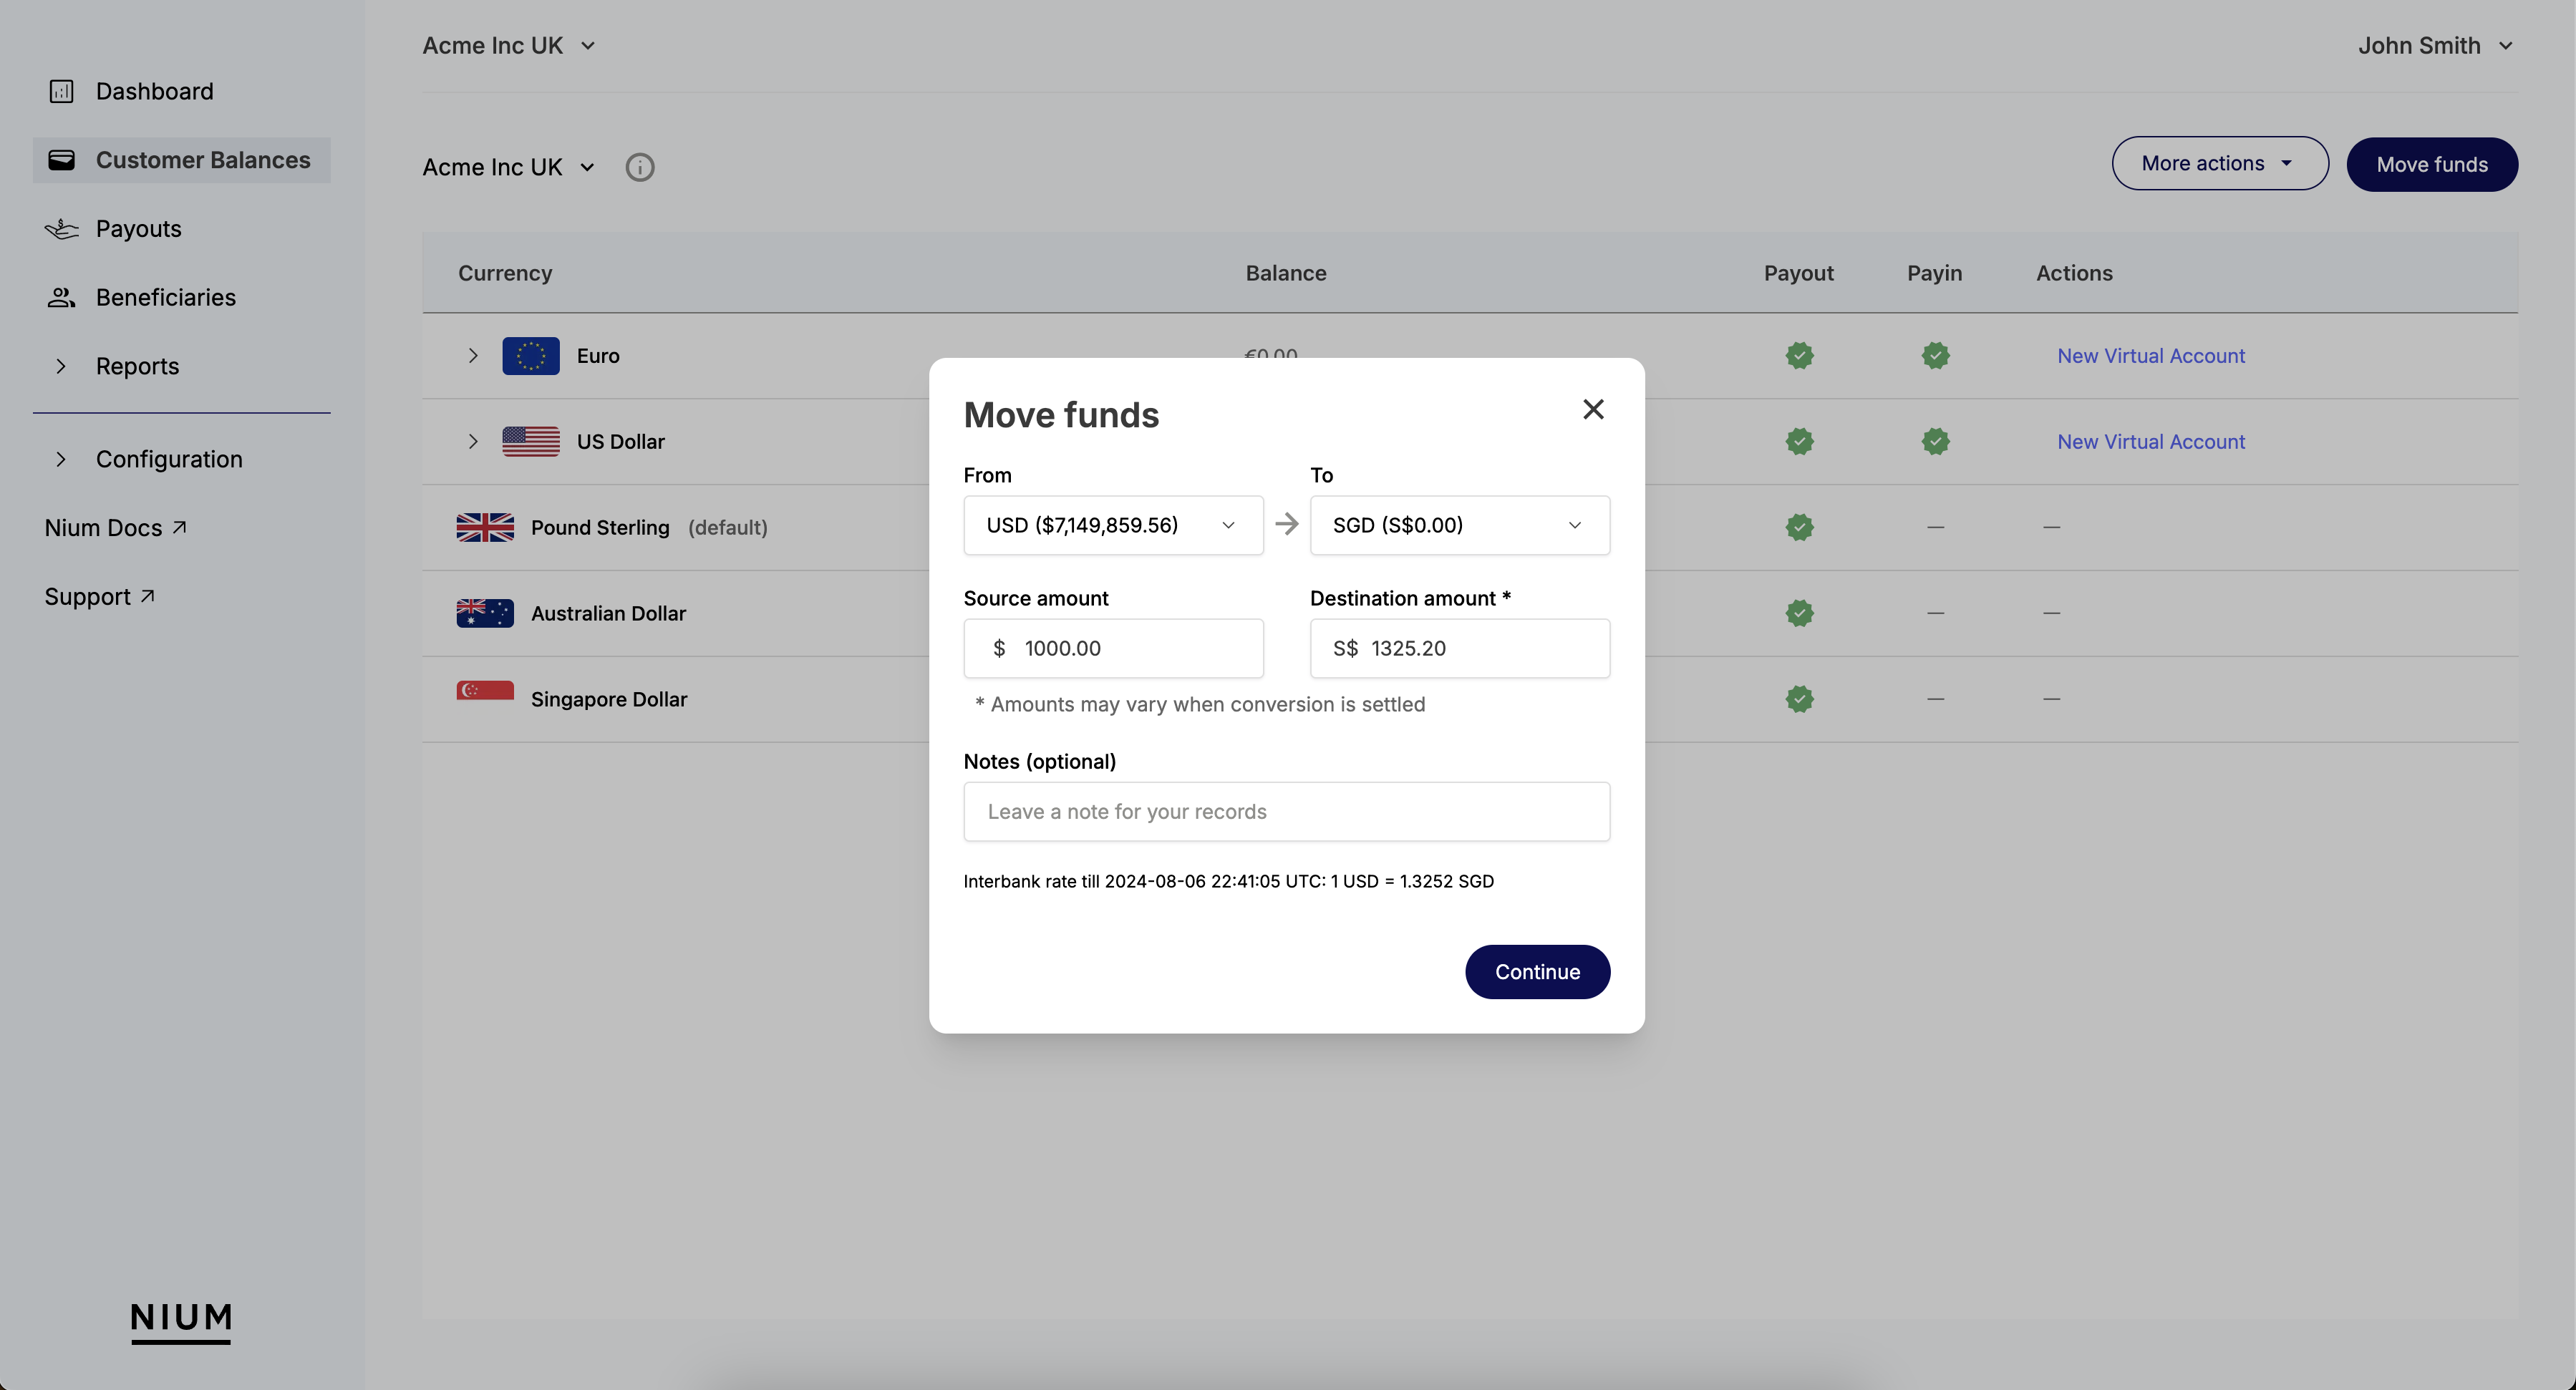
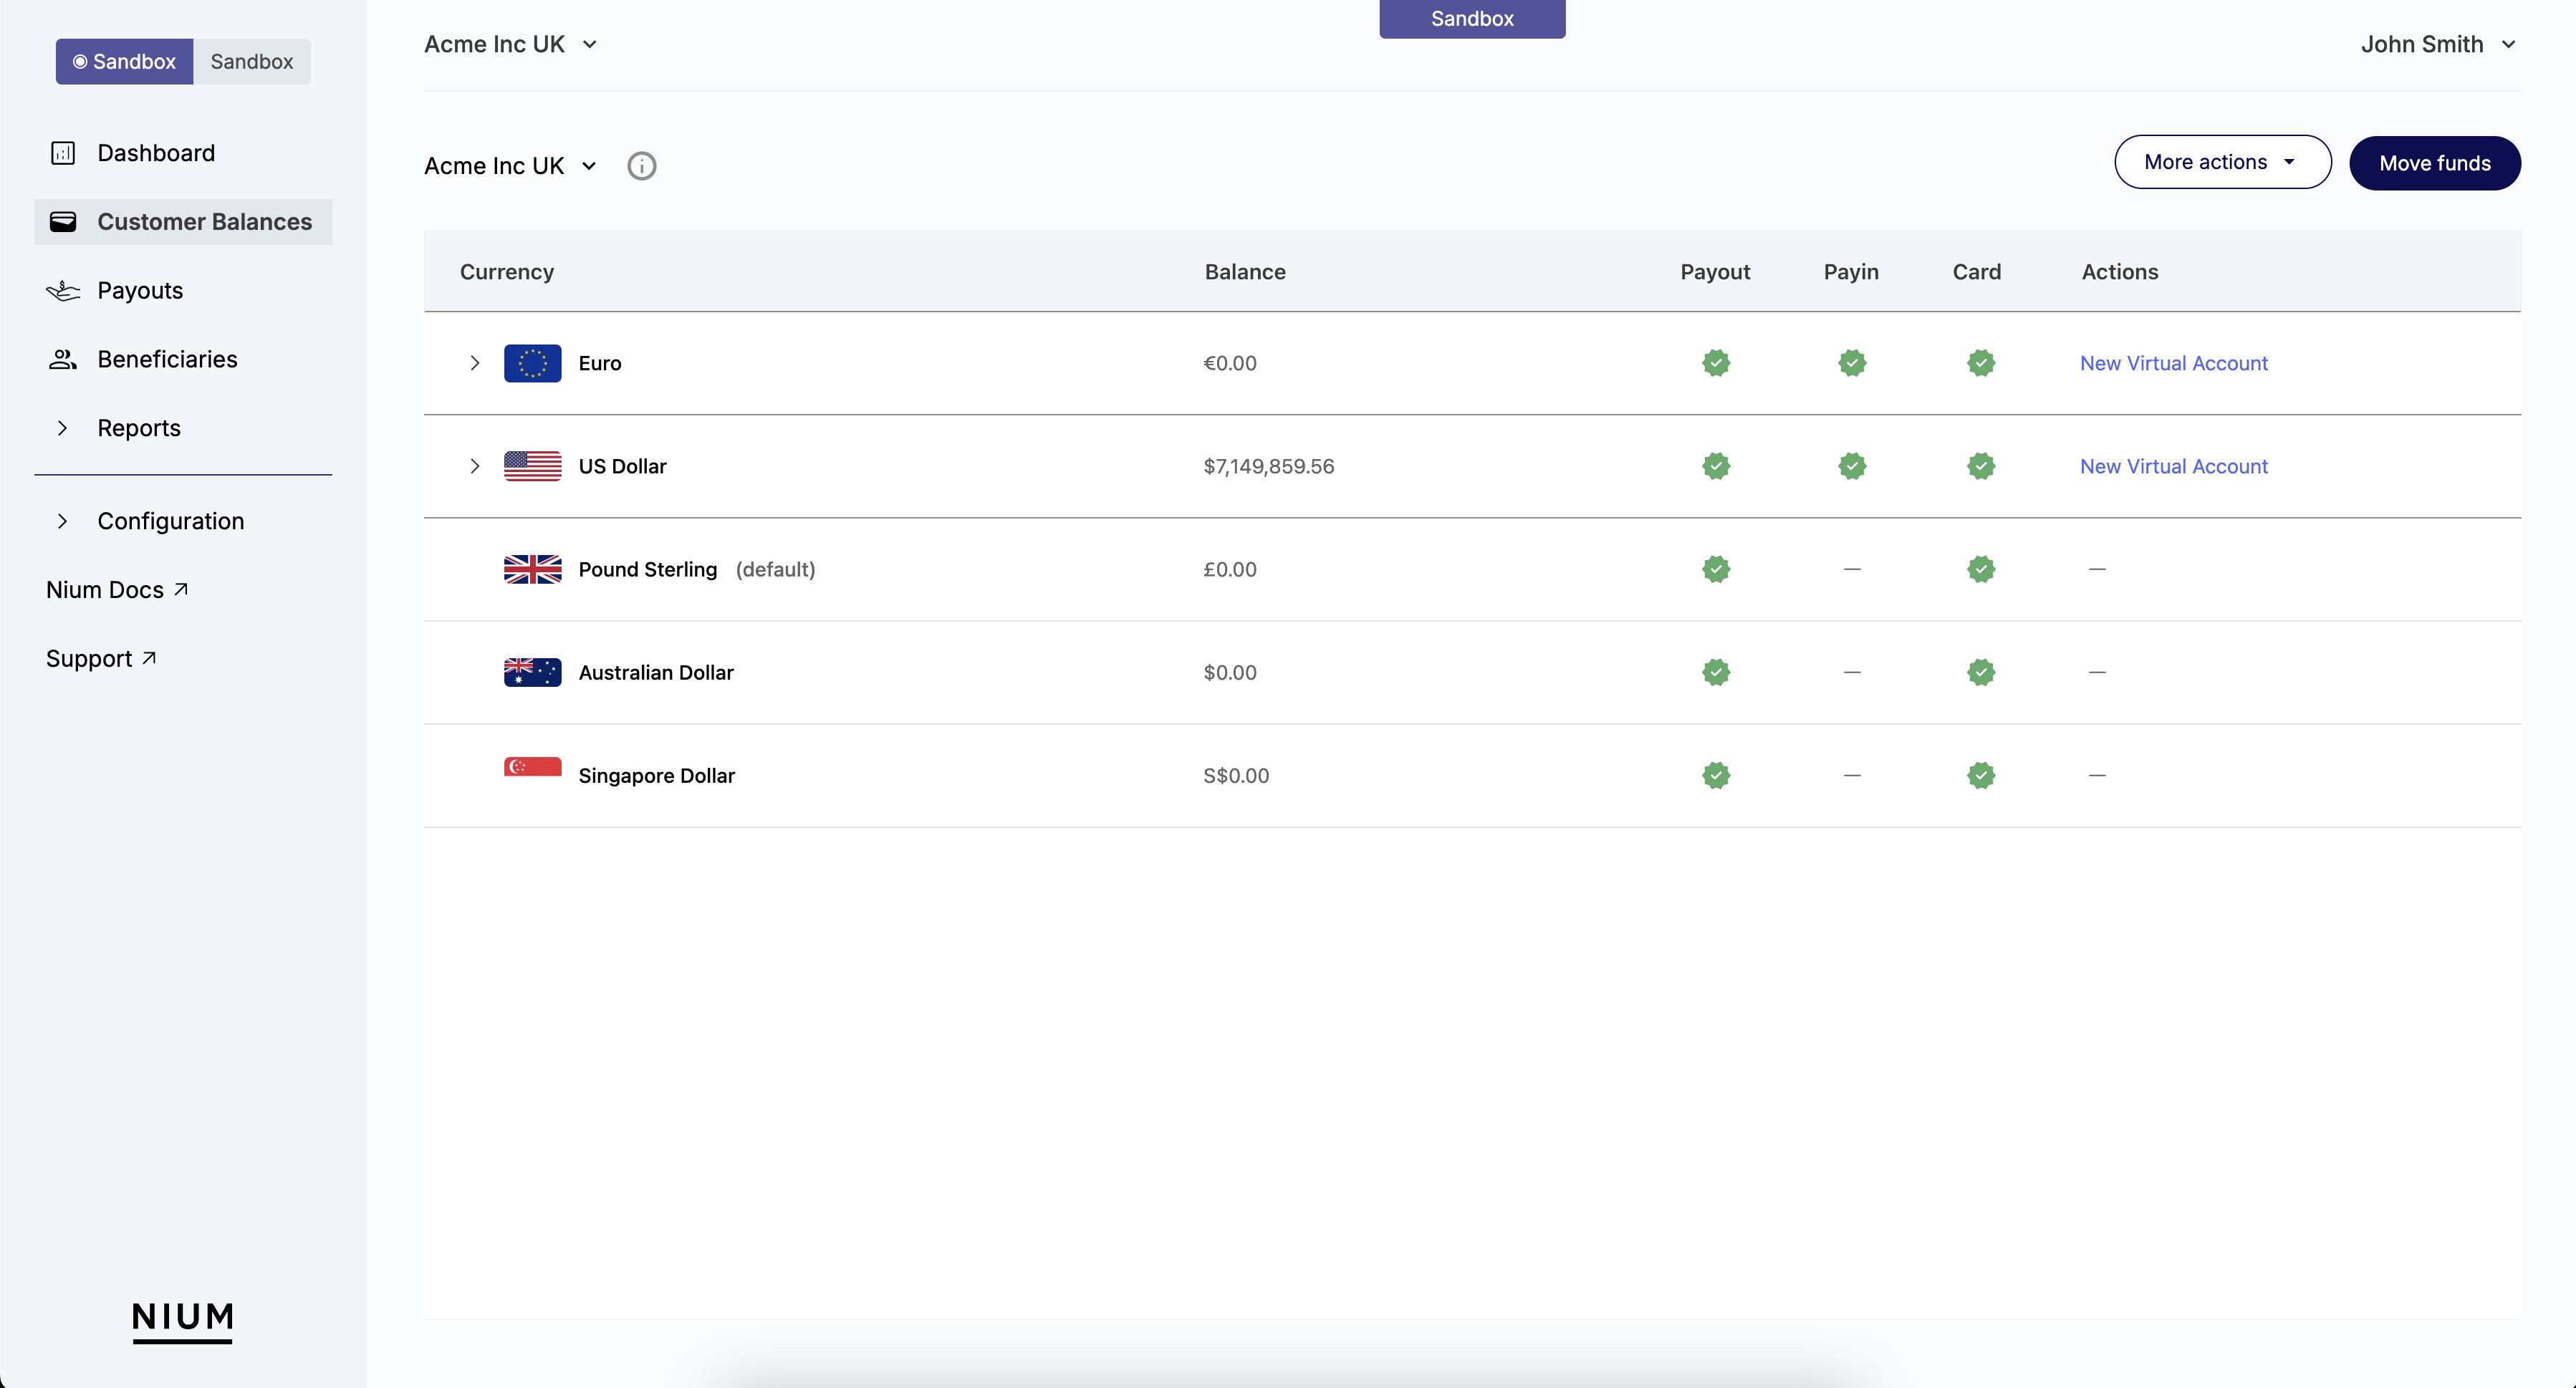
The Customer Balances page provides an overview of the selected customers balances in the different wallets and currencies they use.
Click the customer's name at the top of the page to review another customer's balances.
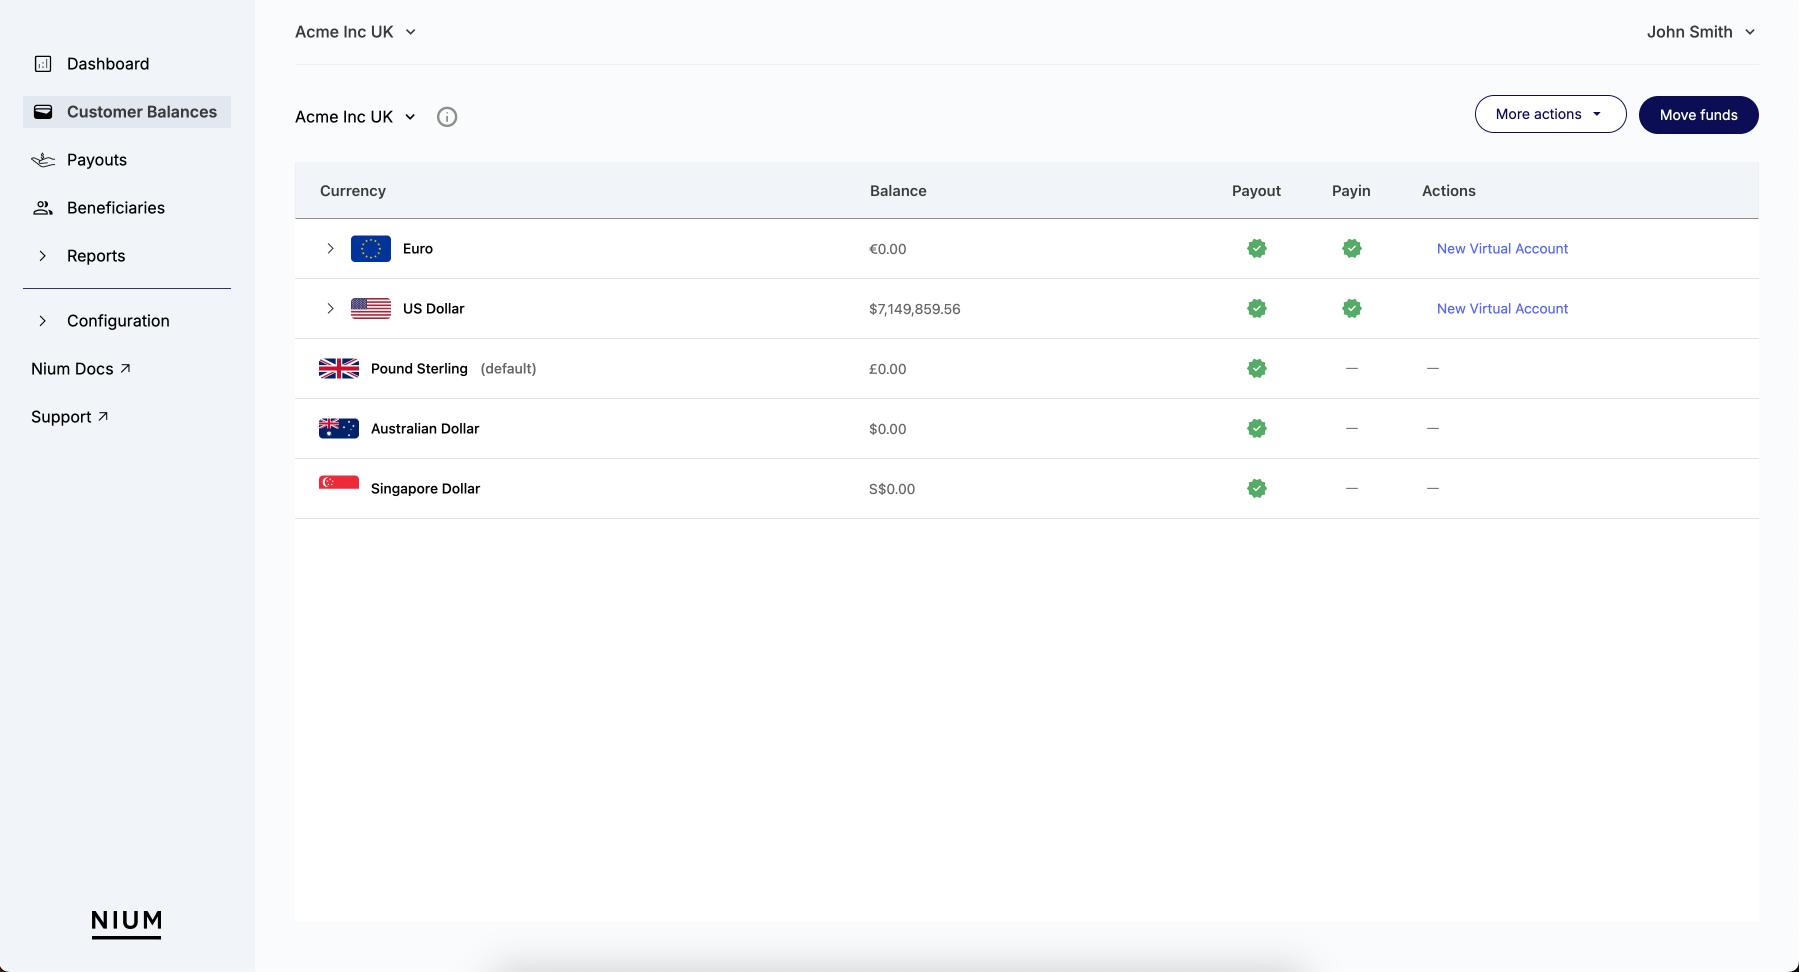
Review at a glance what features are available for each currency - this help you understand what tools you have available when managing those funds. Click on a currency to review the bank account details.
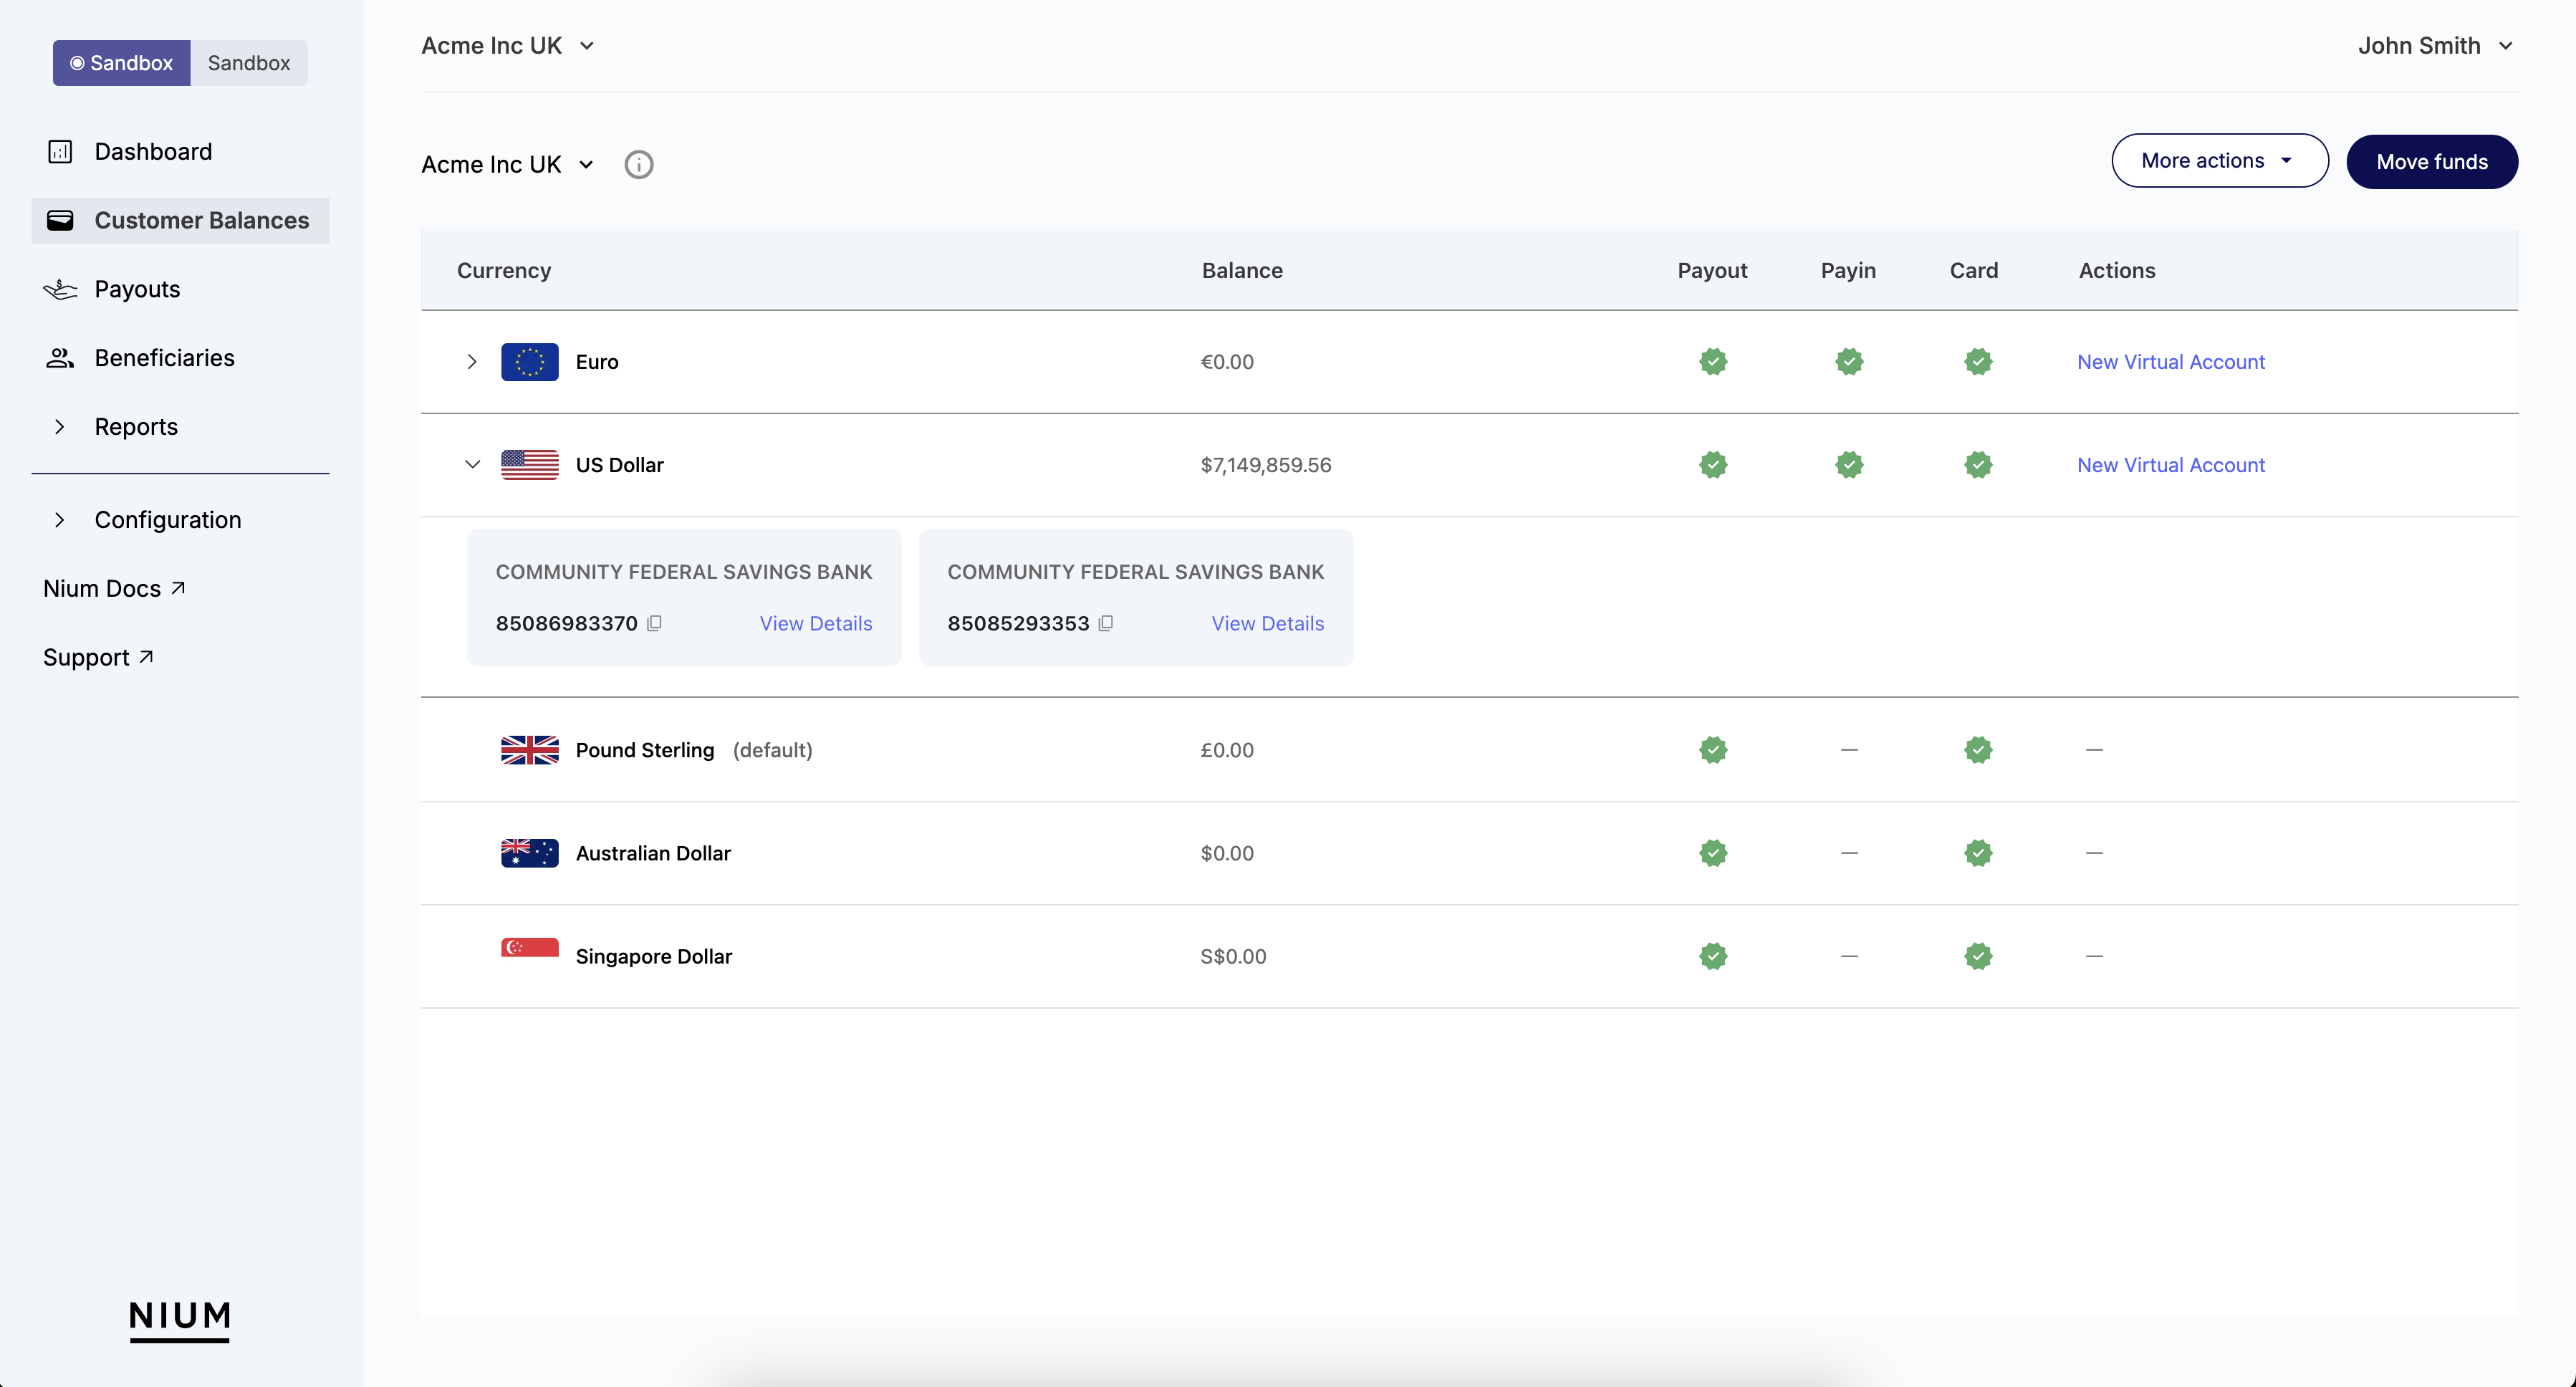
Click Move Funds to convert funds in the customer's balances to a different currency.
Virtual Accounts
You can also use the Customer Balances page to create new Virtual Accounts in the different wallets and currencies your customers use.
Please note, Virtual Accounts are only available for accounts and wallets that are enabled to recieve Payins.
- See the Payin column to confirm a currency wallet is enabled to receive Payins.
- To enable Payins for a currency, please contact your Nium Account Manage or Nium Support .
To create a Virtual Account:
- Click New Virtual Account next to the currency you want to create an account for.
- Select which bank account you want to create a Virtual Account with > Continue.
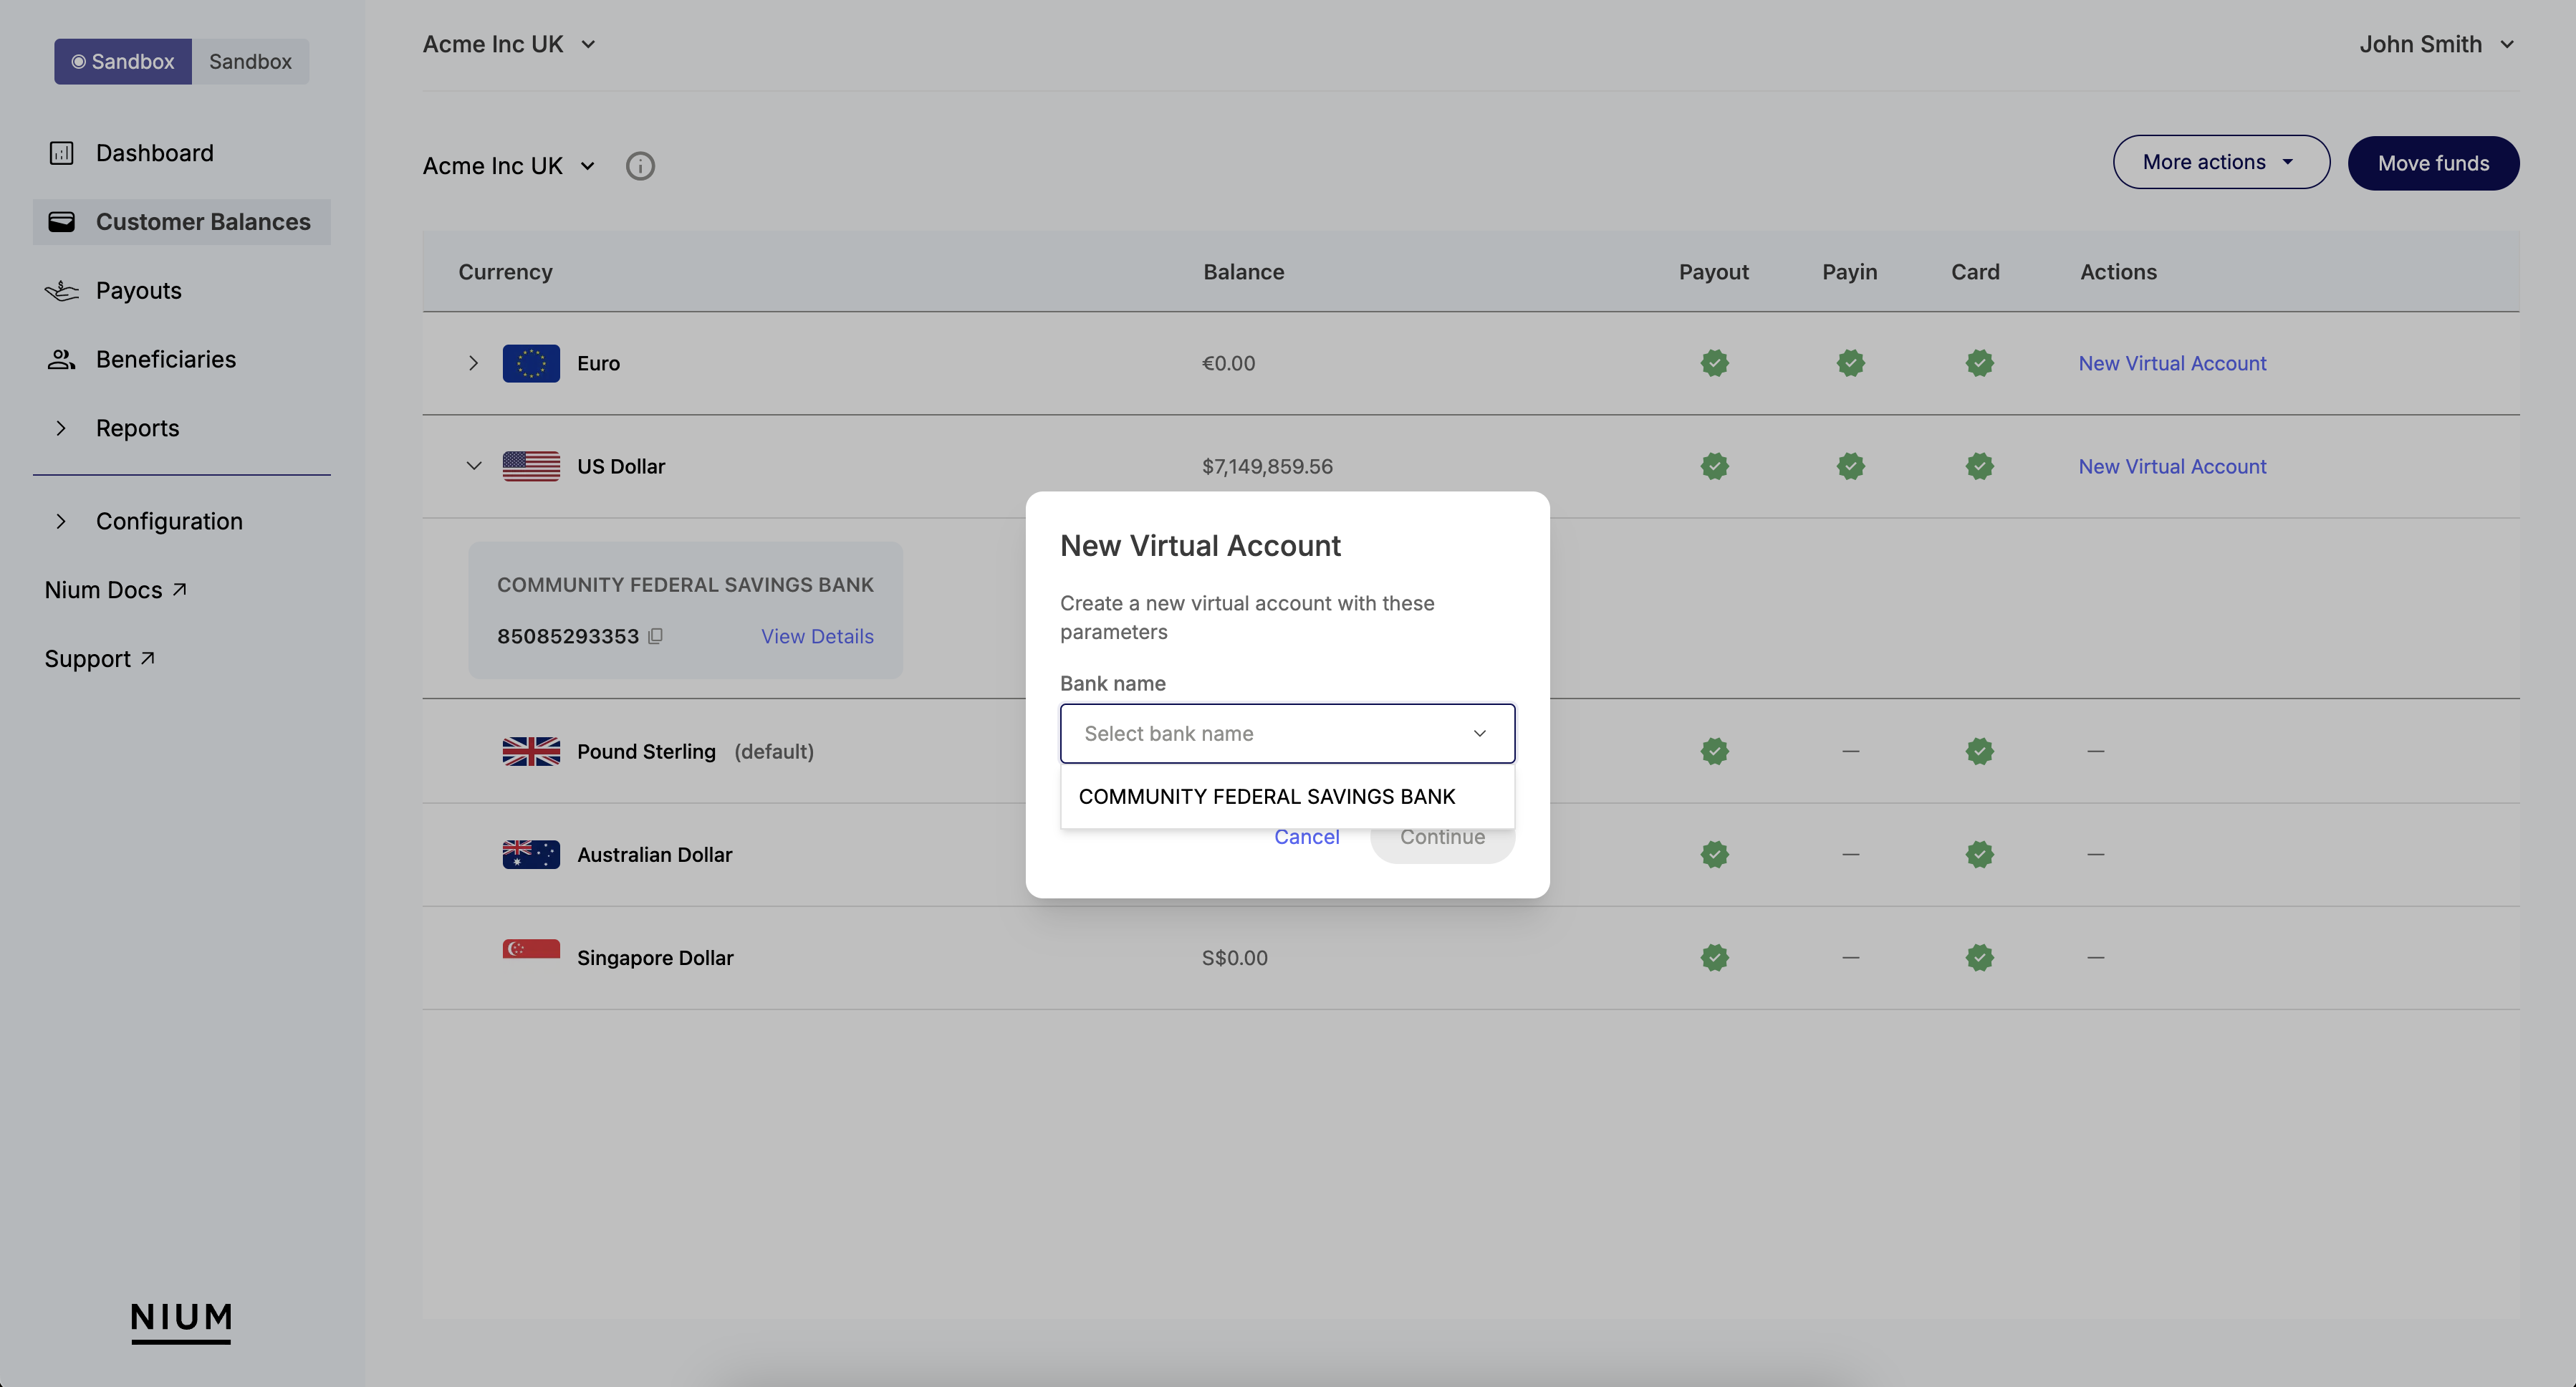
- Your currency wallet will expand with a title detailing the name of the bank and the status of your request.
- Once the bank has successfully assigned the virtual account, you'll see -- update to your new Virtual Account number.

For more information about Virtual Accounts, see Virtual Account Number.
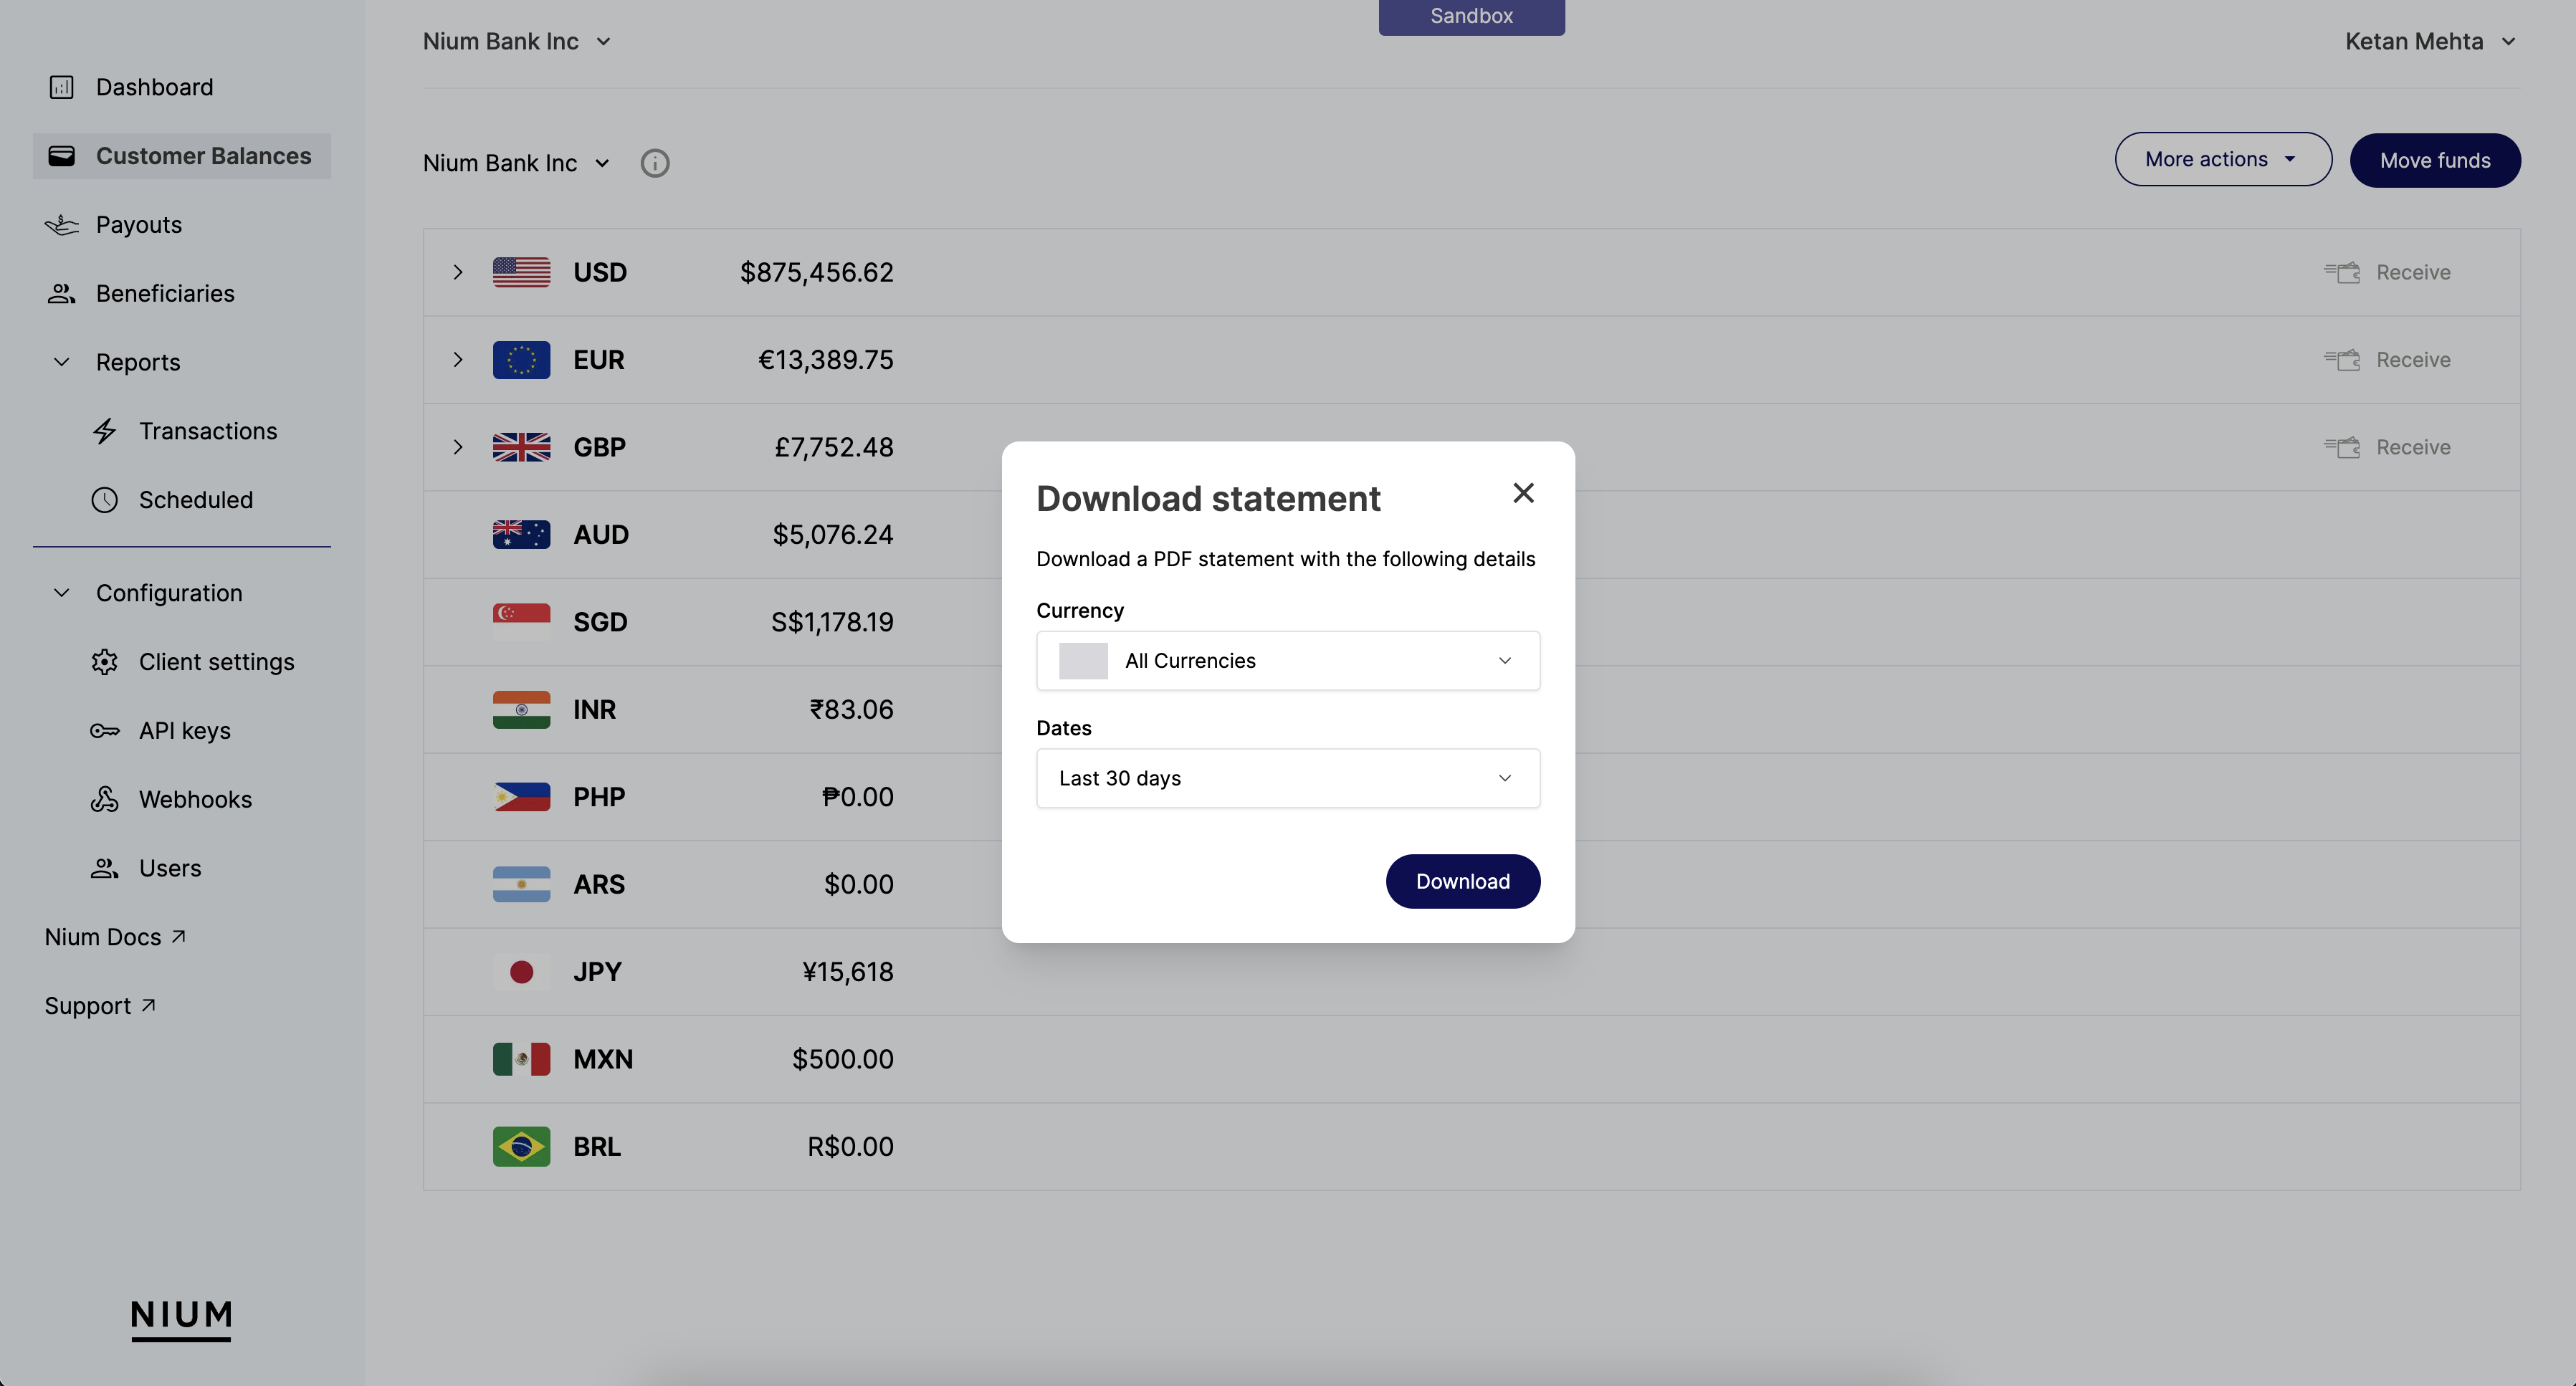
Account Statements
To download a PDF of your account activity:
- Click More actions.
- Select Download statement.
Account statements are available for all currencies and can be filtered by the following timeframes:
- Last 30 days
- Last 60 days
- Last 90 days
- Custom date range
Client Settings
Use the Client Settings page to configure which email domains can be invited into your Nium Portal dashboard.
- For example, if you only want team members from your business to have access, only include your business's email domain.
- You can also include other popular email domains (gmail.com, yahoo.com, aol.com, etc.) to ensure any users that need access won't have any issues getting invited

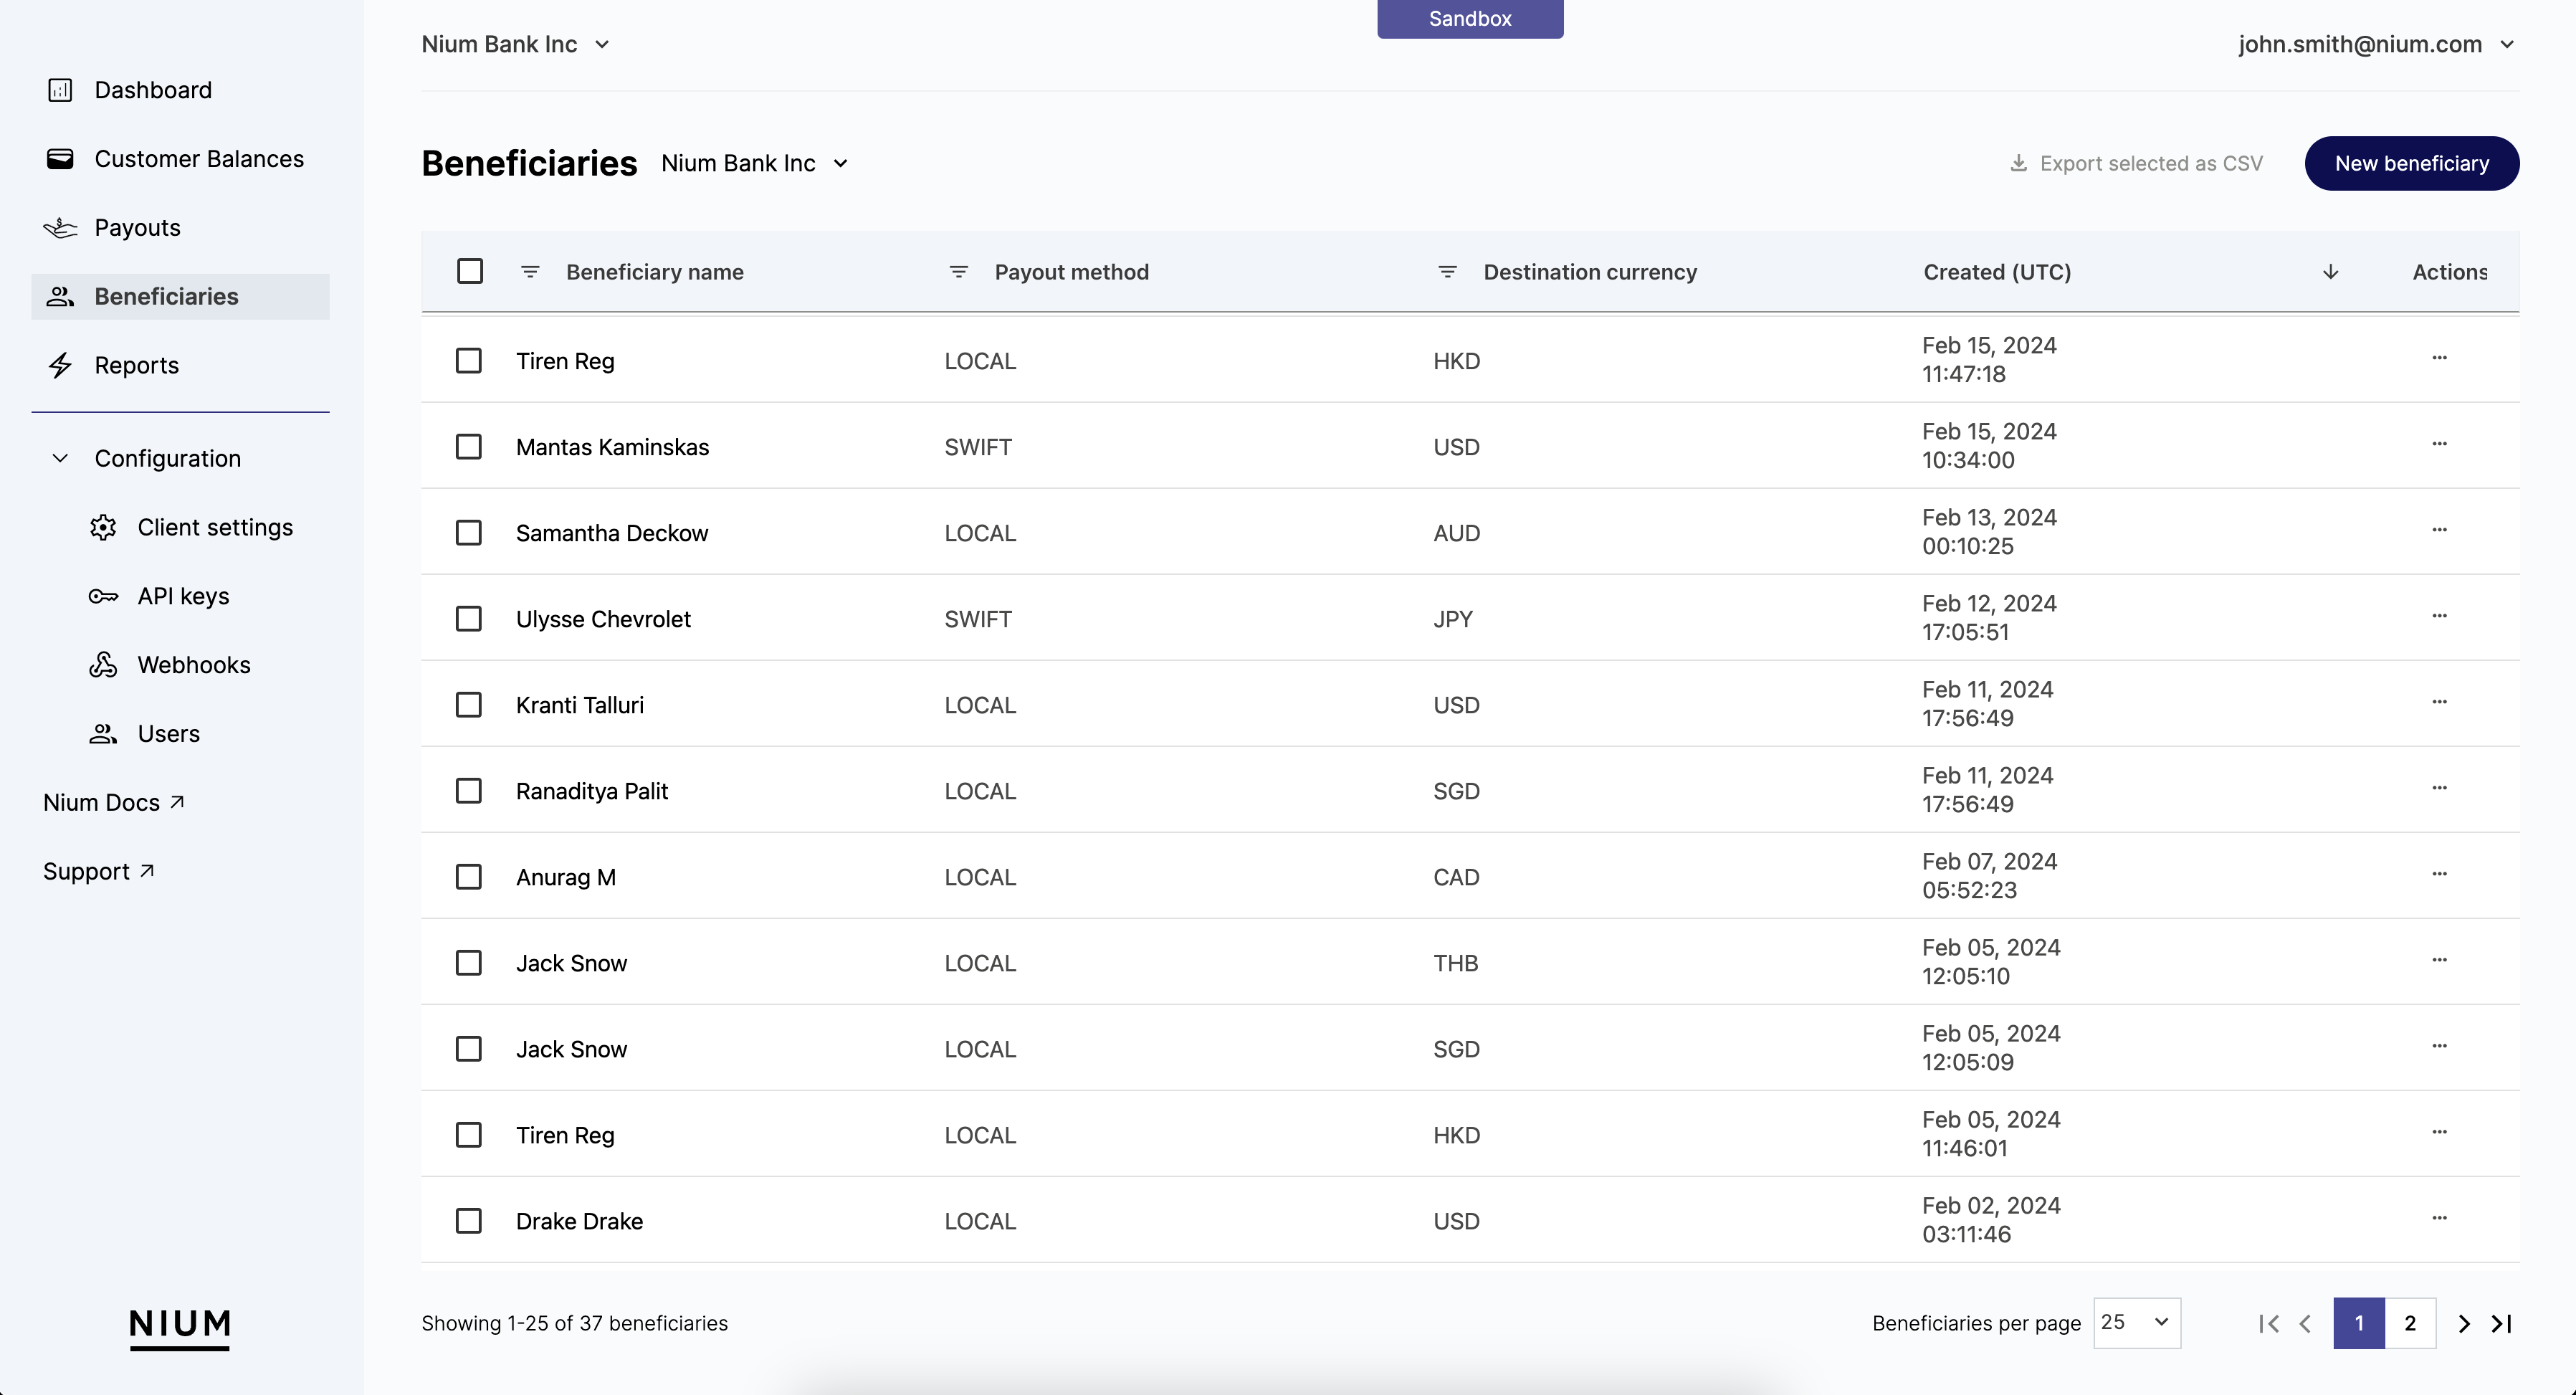
Managing Beneficiaries
Use the Beneficiaries page to manage the different beneficiaries that have been created for a customer.
Exporting Beneficiaries
Export the details of beneficiaries by checking the box next to their name and clicking Export selected as CSV.
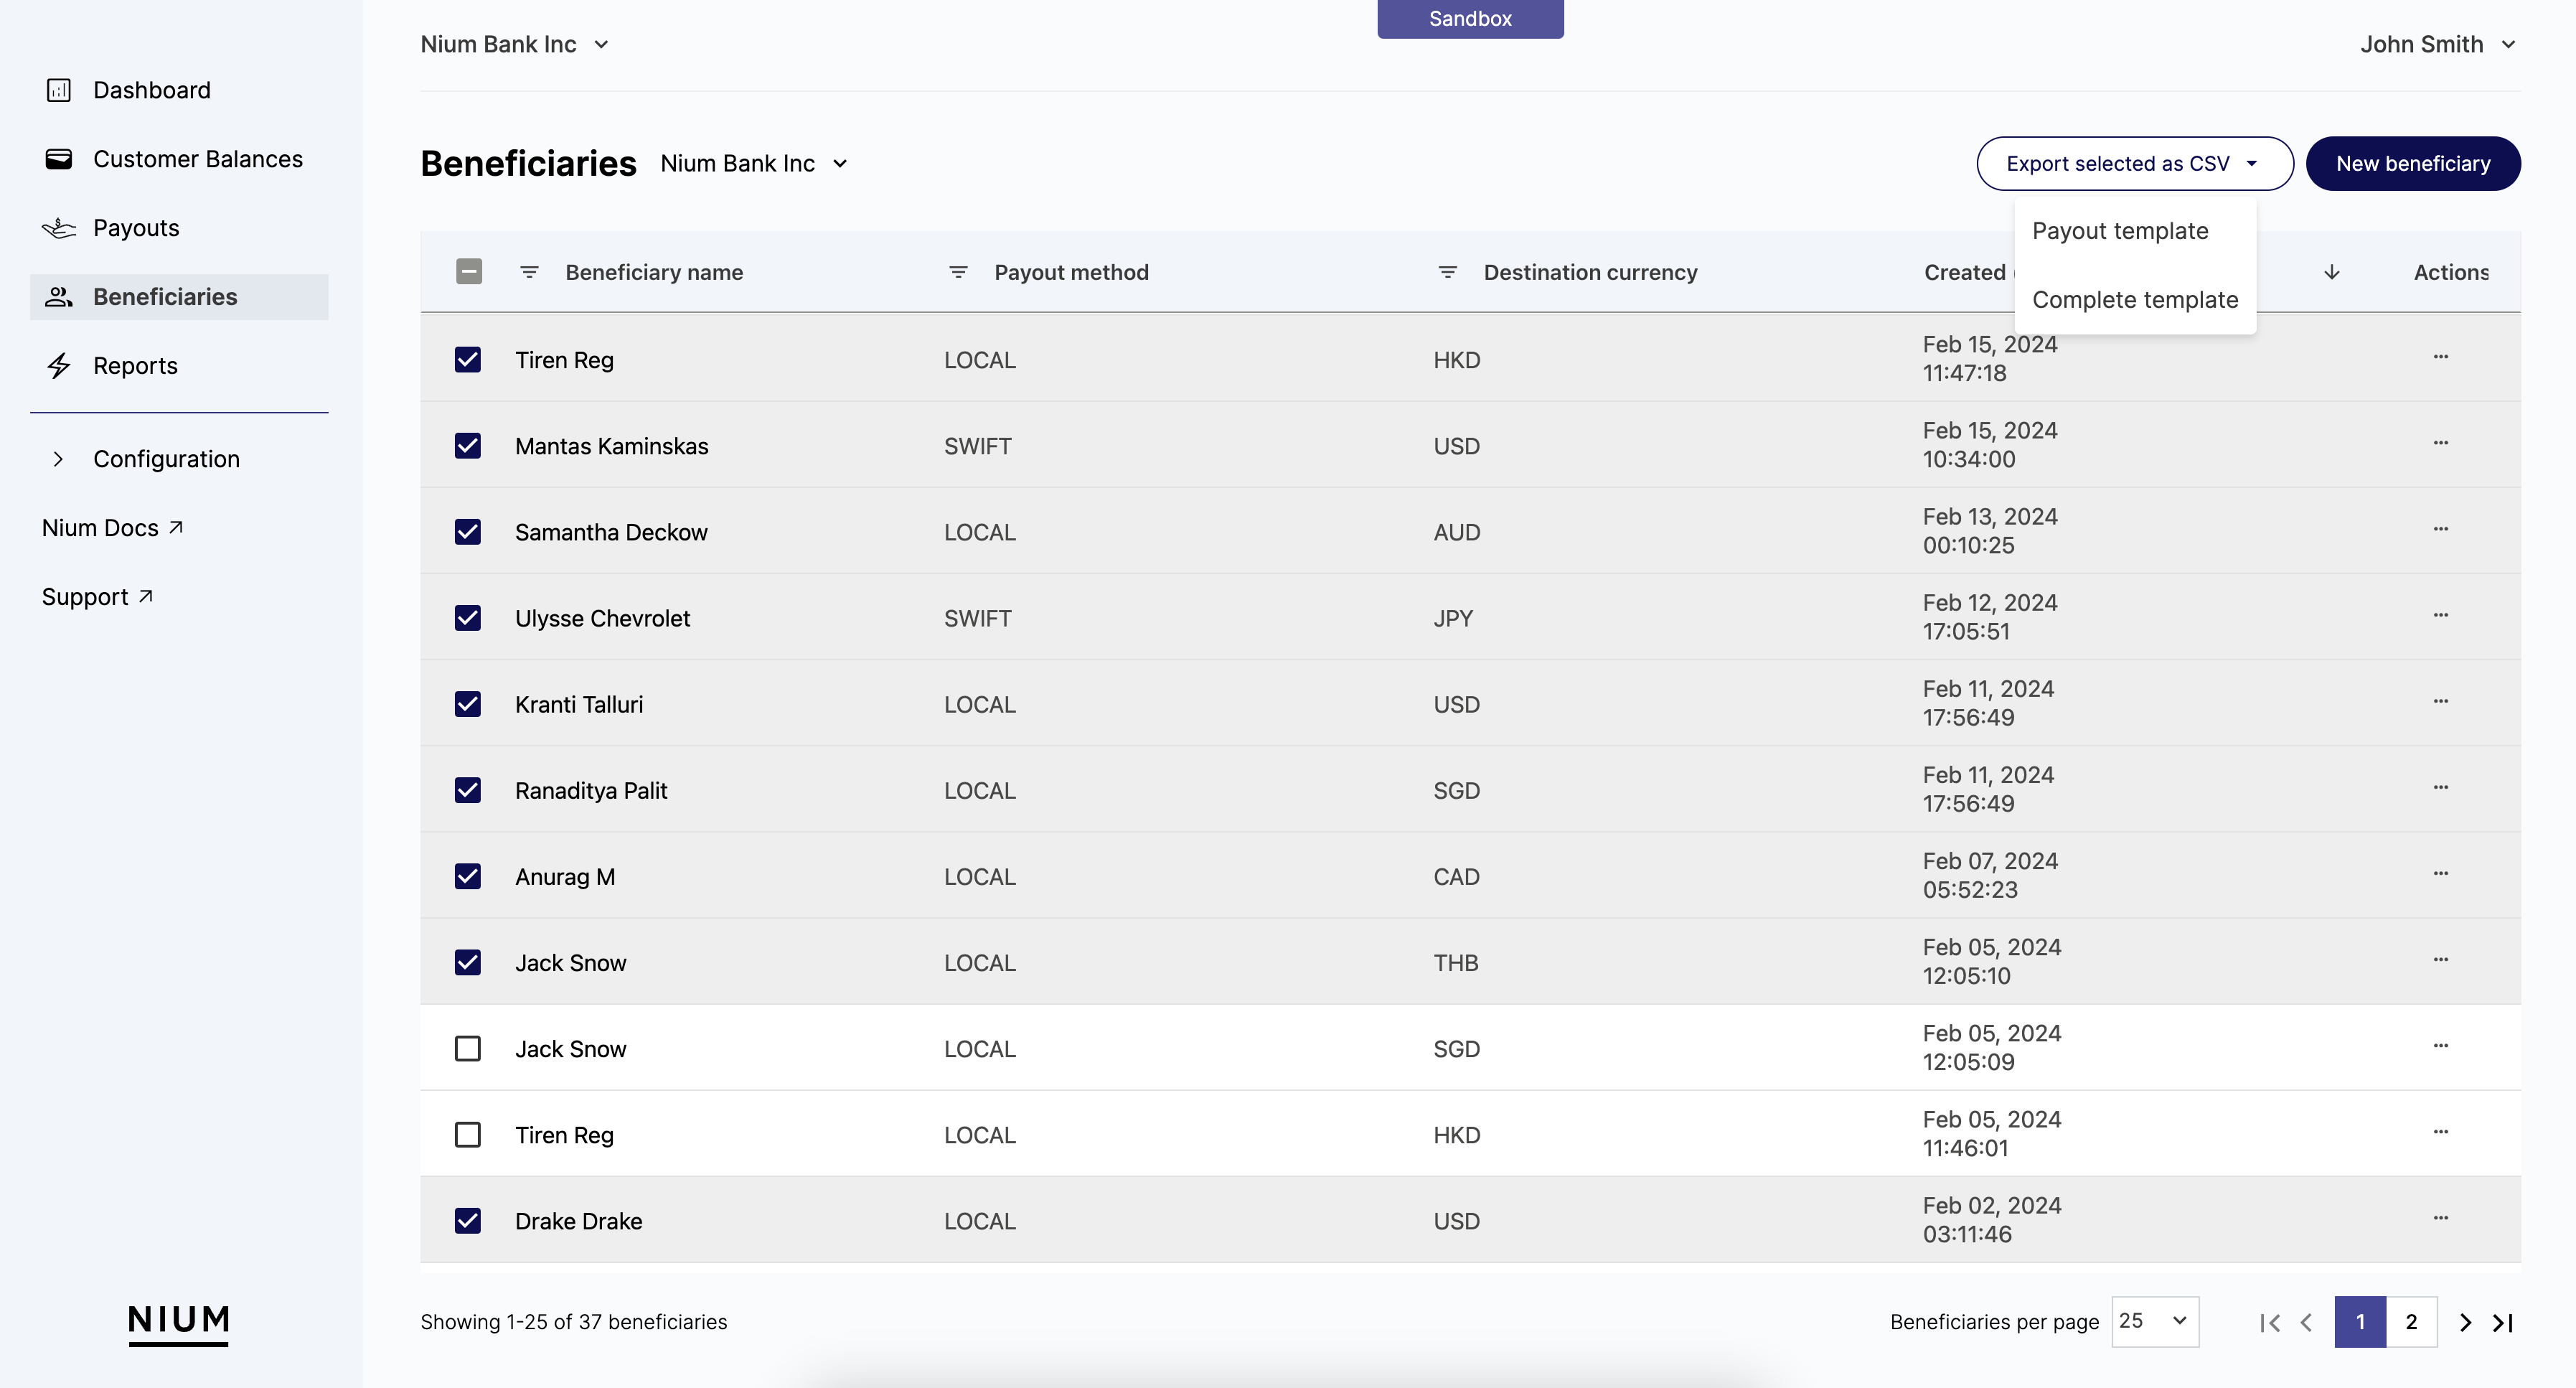
The CSV files you can export include:
- Payout template: Creates a CSV file you can easily use, with minimal changes, to create a batch of payouts. For more information, see Batch Payouts.
- Complete template: Creates a CSV file that includes all of the details avialble for the selected beneficiaries.
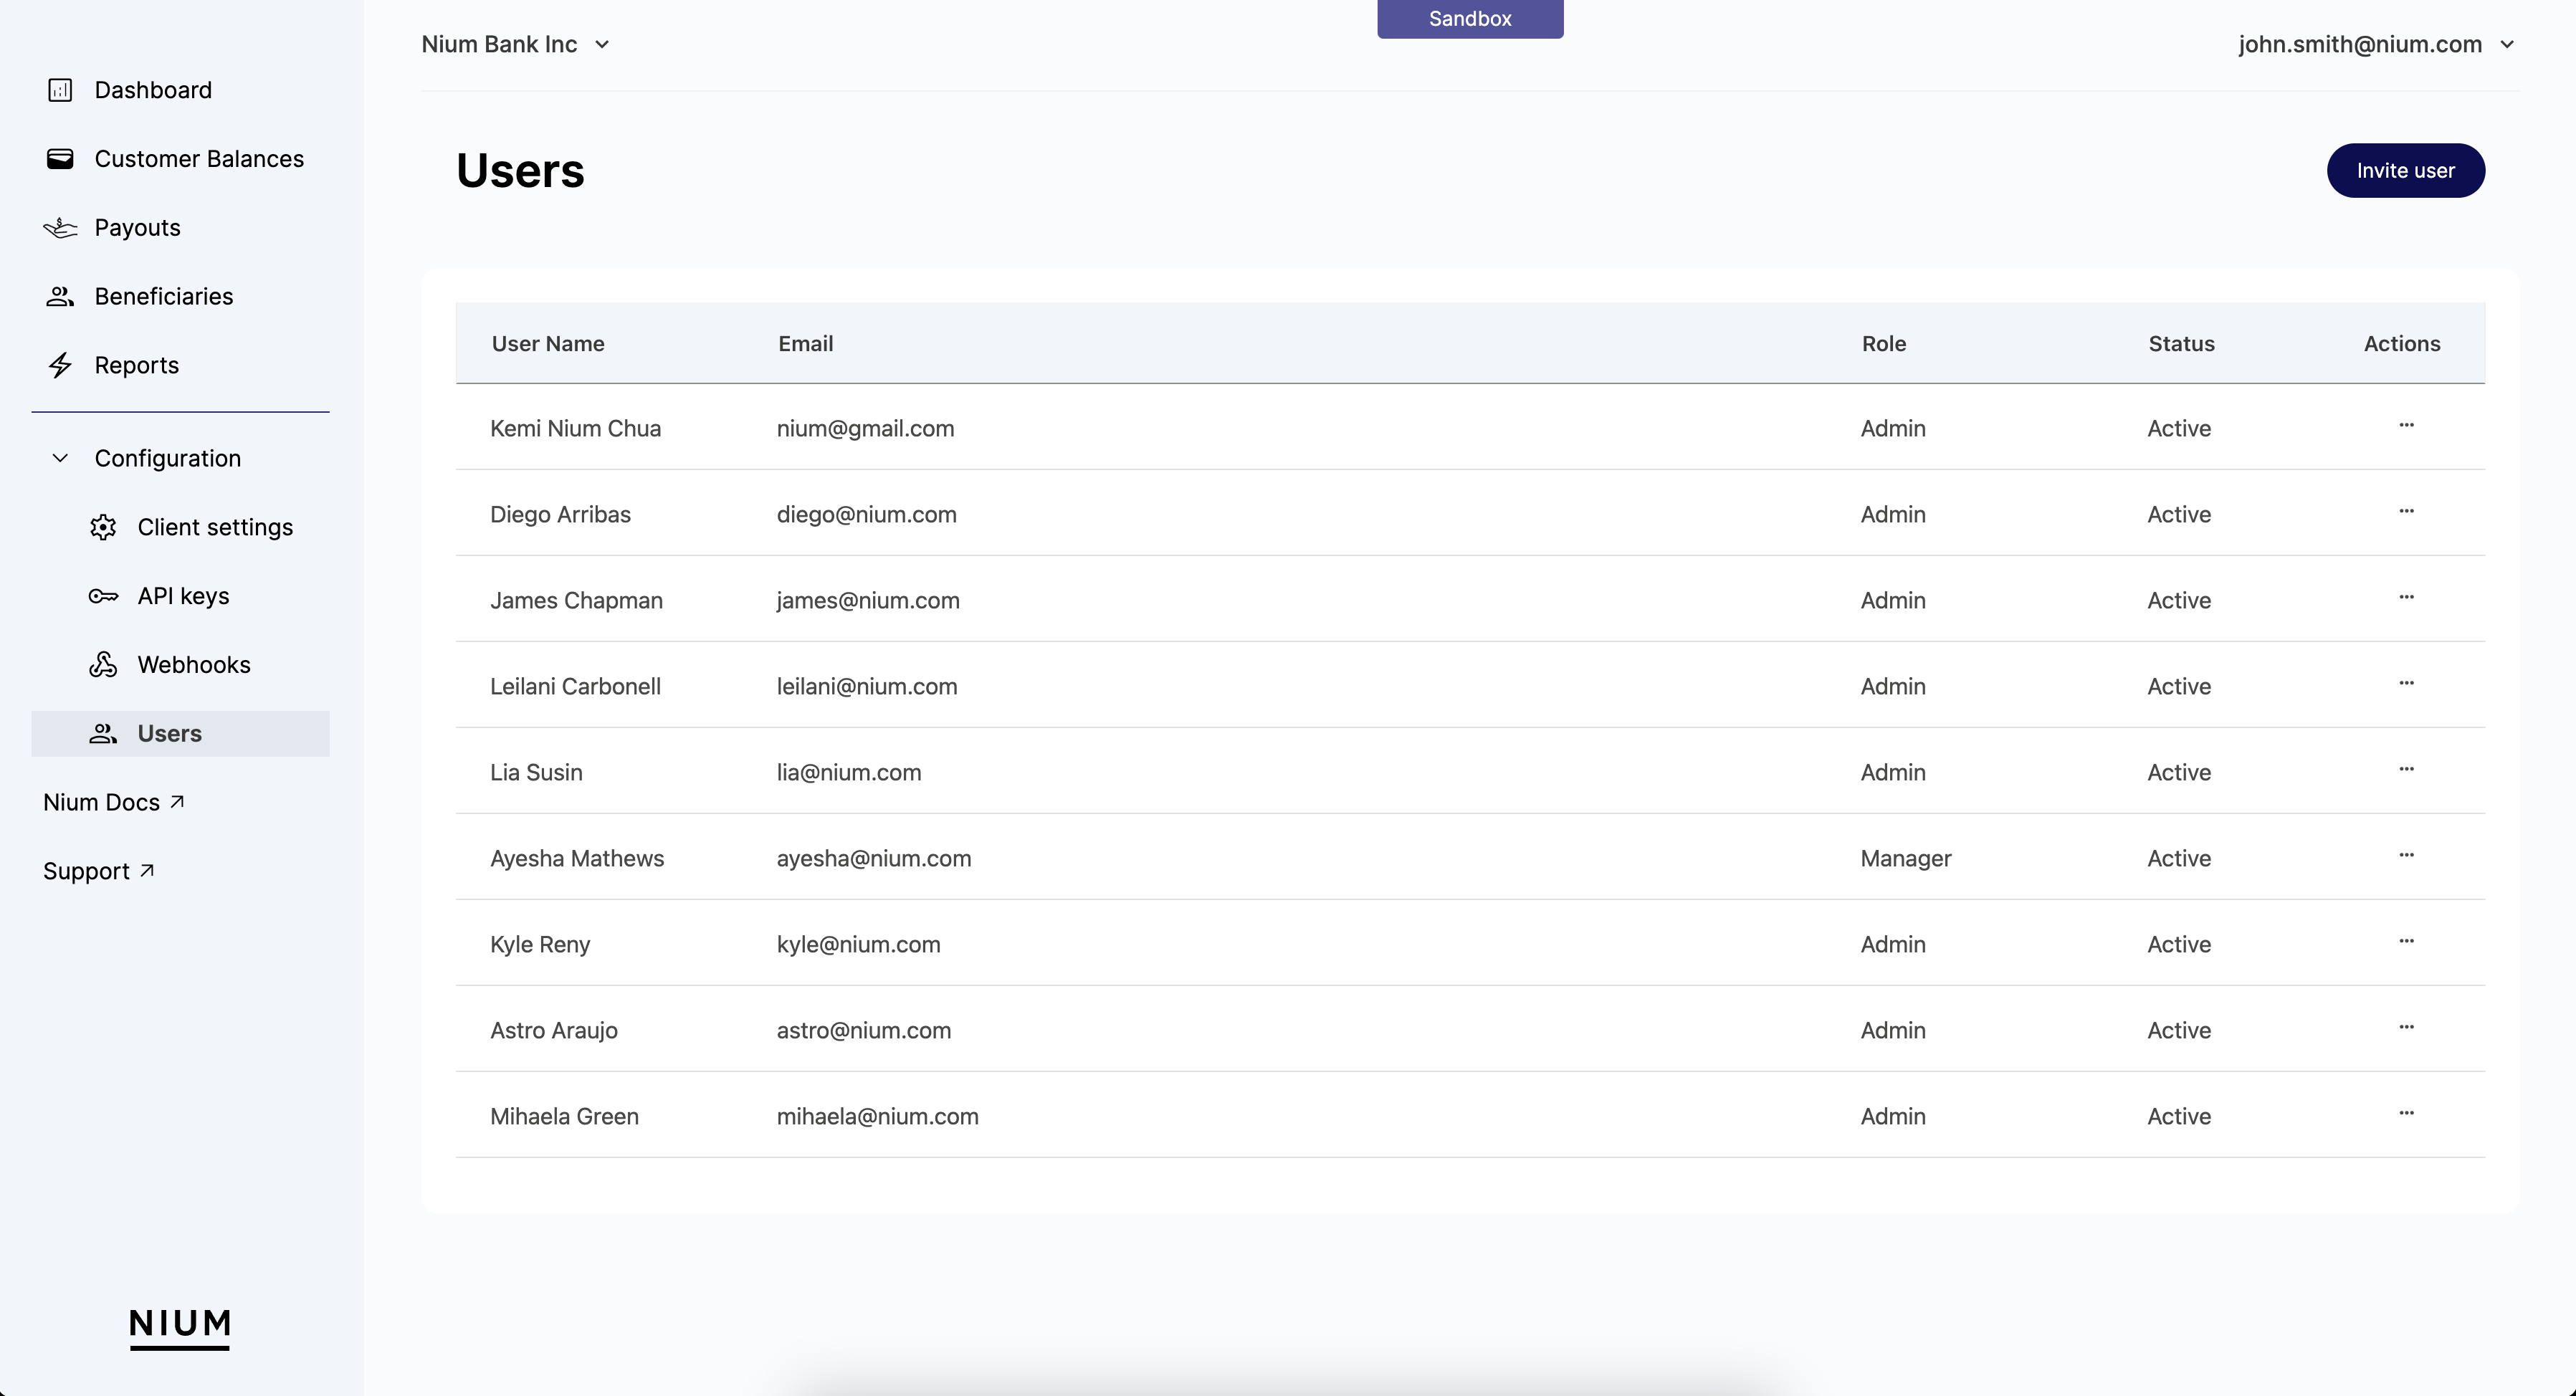
Managing Users
Use the Users page to invite team members and grant them access to your Nium Portal.
For more information about the different permissions available for the different roles, see Roles and Permissions.
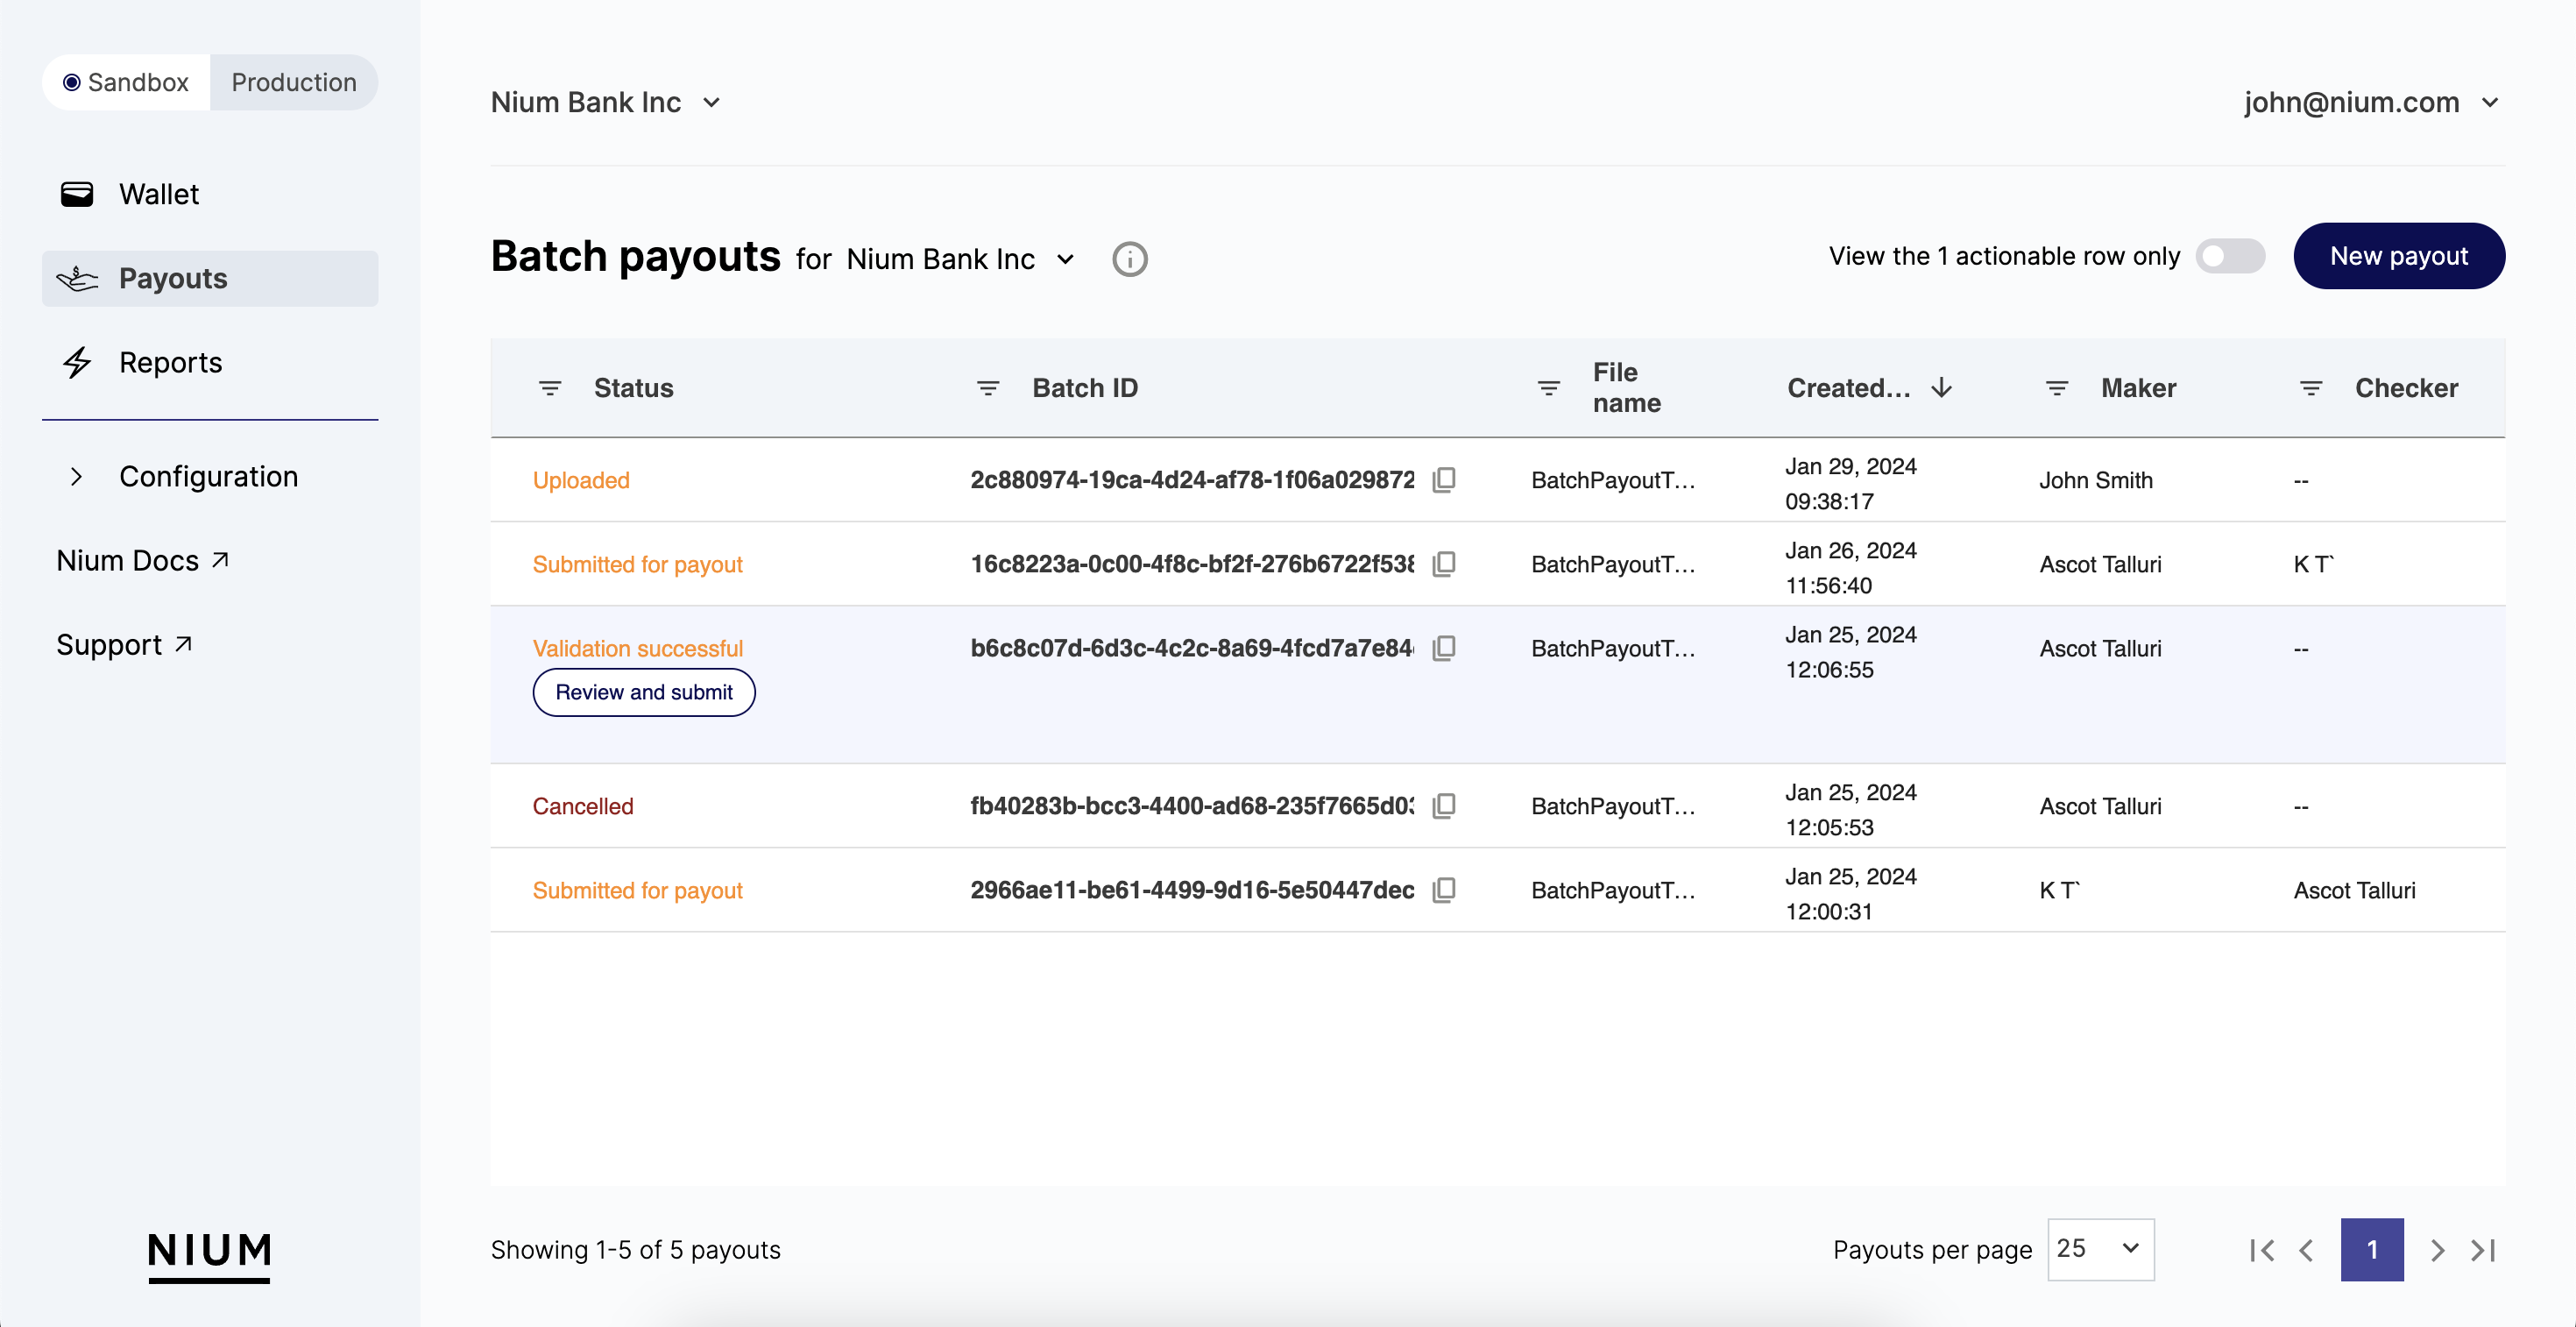
Batch Payouts
Use the Payouts page to individually or programmatically create payouts for yourself or on behalf of clients. For more information, see Batch Payouts .