Payouts
Nium Portal streamlines the process of managing payouts, allowing you to process transactions without the need for coding or integration. With Payouts, you can create one or more (batch) payouts directly within Nium Portal web app, saving time and effort.
In other words, you can use payouts in Nium Portal to process hundreds of transactions at the same time without integrating or developing anything!
This guide explains how to create payouts using the two available methods:
- Create Payouts: In-line payouts directly in Nium Portal by selecting beneficiaries for quick and simple transactions.
- Upload Payouts: Upload a CSV file to process up to 2,000 payouts at once. Ideal for large volumes of transactions.
Create In-line Payouts
In-line Payouts provide a fast and flexible way to create payouts directly in Nium Portal without needing to use CSV files. In-Line Payouts are perfect for small-scale, ad-hoc, or error-resolution payments. With In-Line Payouts, you can:
- Quickly resolve errors by correcting payout details and reprocessing transactions directly in the portal.
- Handle ad-hoc or one-off transactions—like vendor payments or employee reimbursements—without external tools, CSV files, or complex file management.
- Simplify small-scale payouts by avoiding the time-consuming creation of CSV files.
- Empower users with no-code simplicity, making payouts accessible to everyone, regardless of technical expertise.
Create an In-line Payout
-
Start a New Payout
- Log in to Nium Portal.
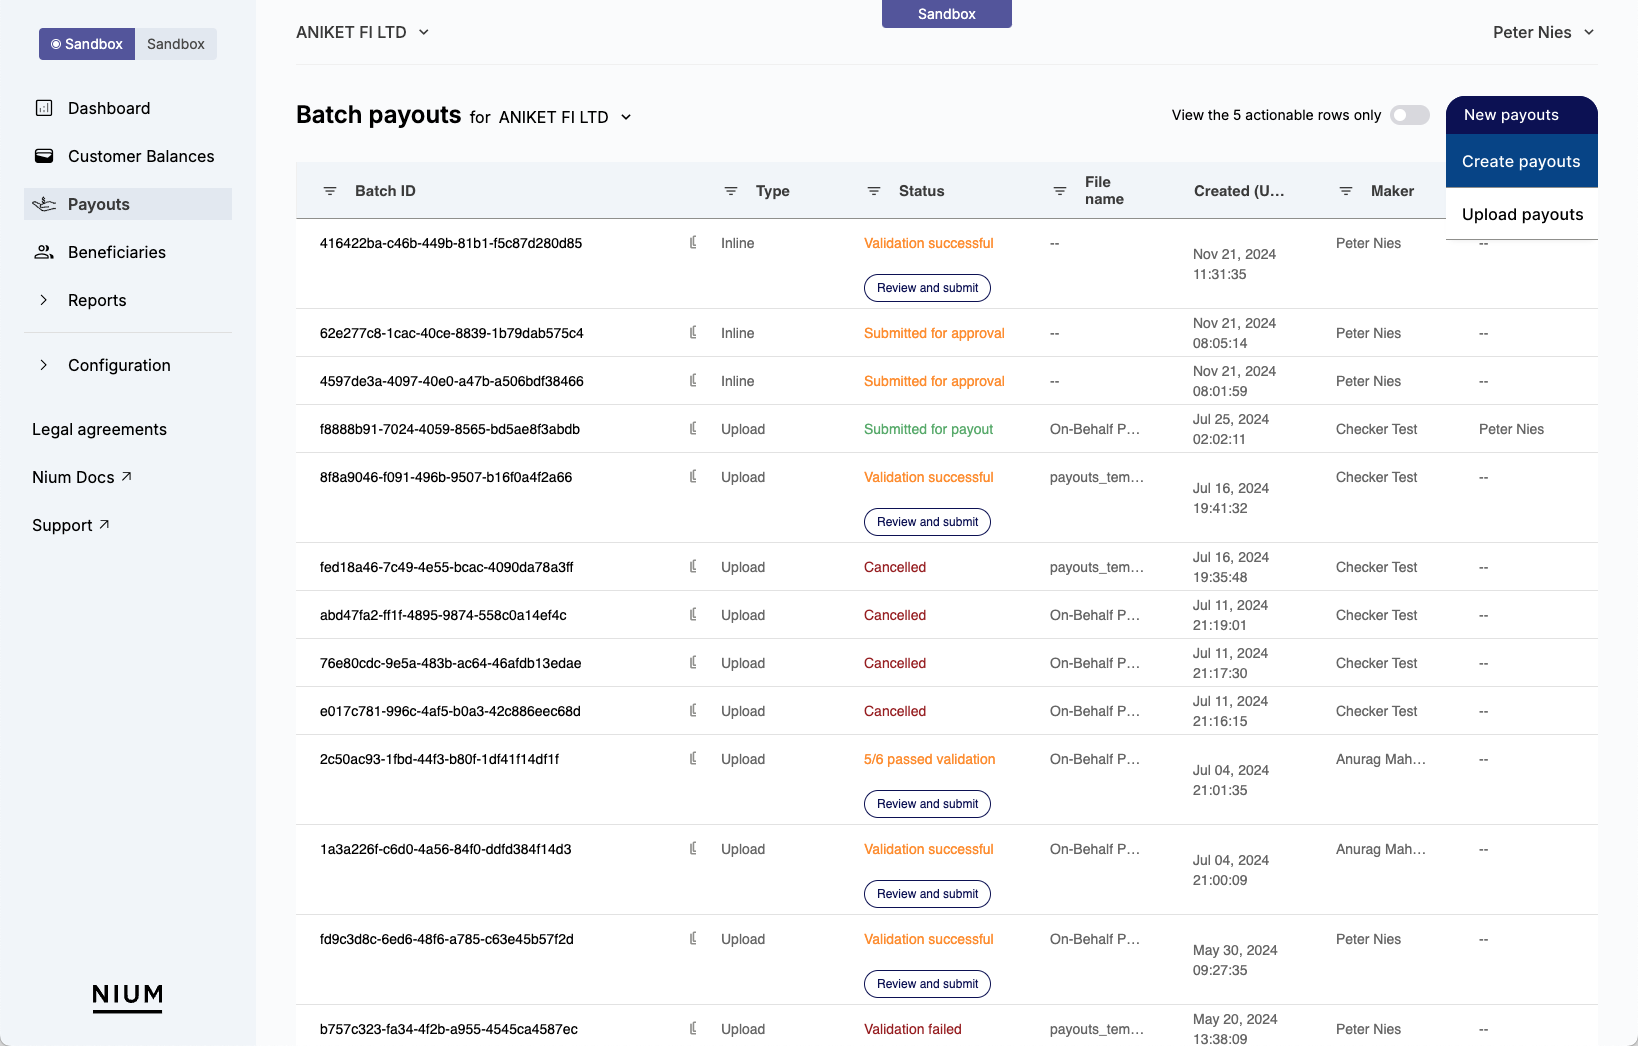
- Click Payouts > New payouts > Create payouts.
-
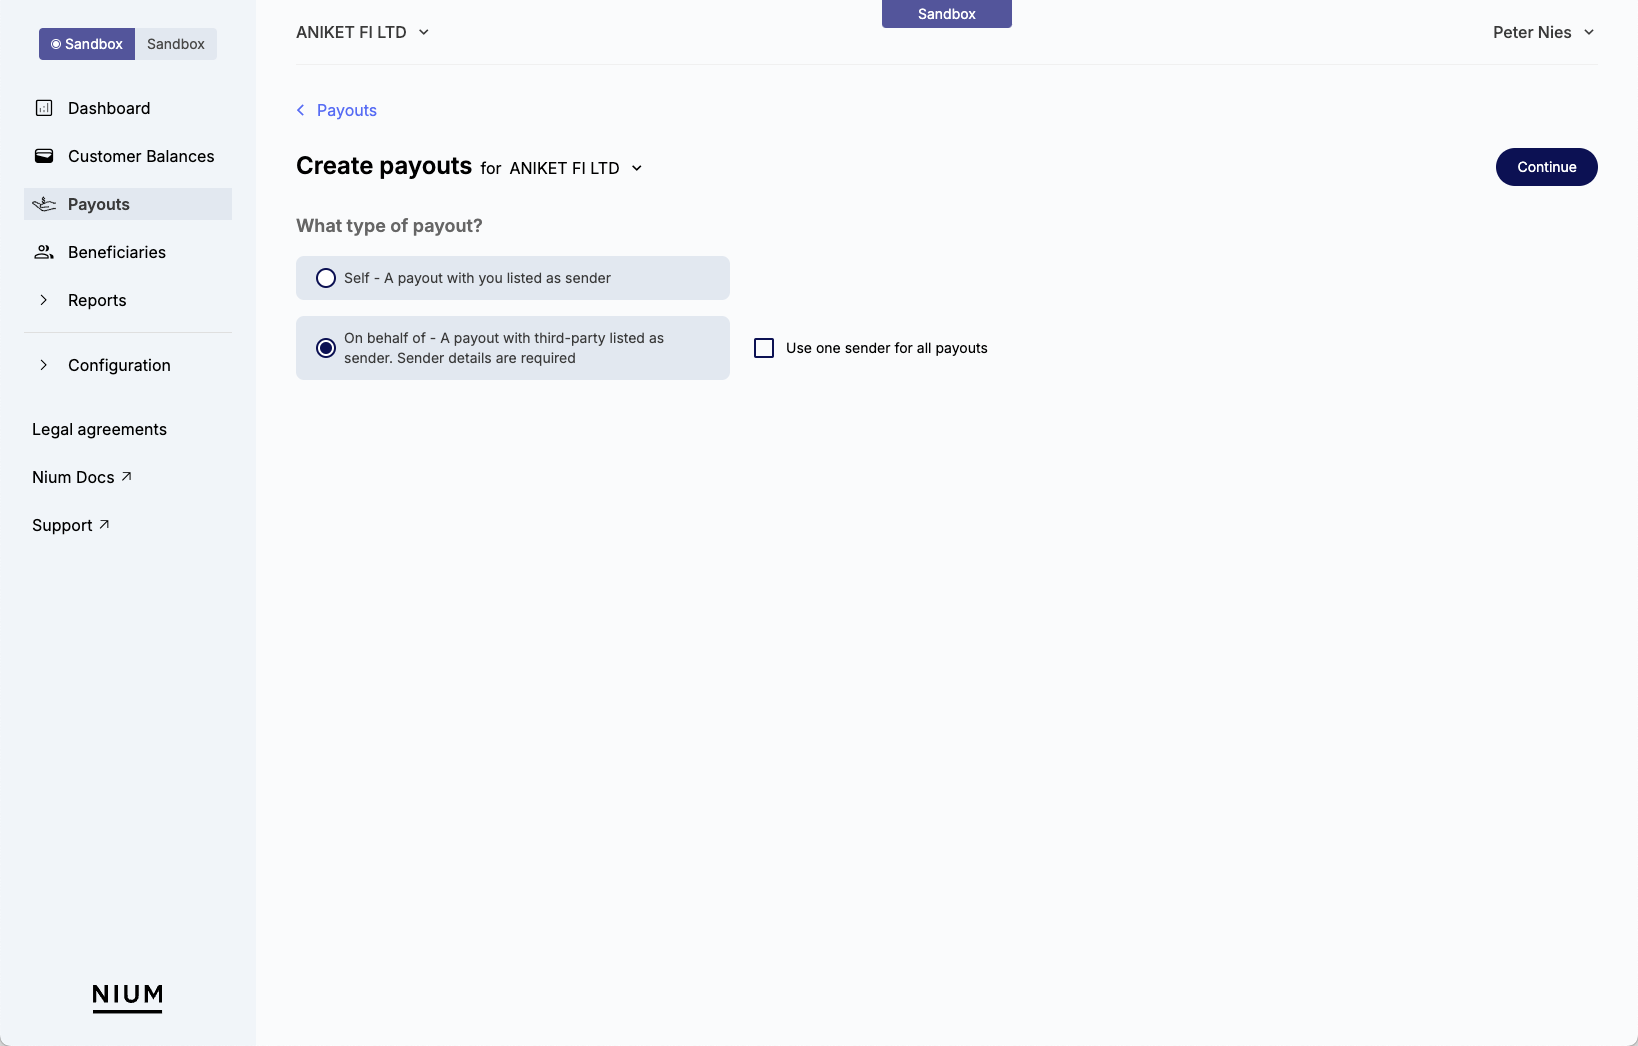
Choose the Payout Type -- This step is only available if you are a licensed financial institution. Otherwise all payments are made as self payments.
- Select Self if you're the sender.
- Select On behalf of if sending on behalf of another party.
-
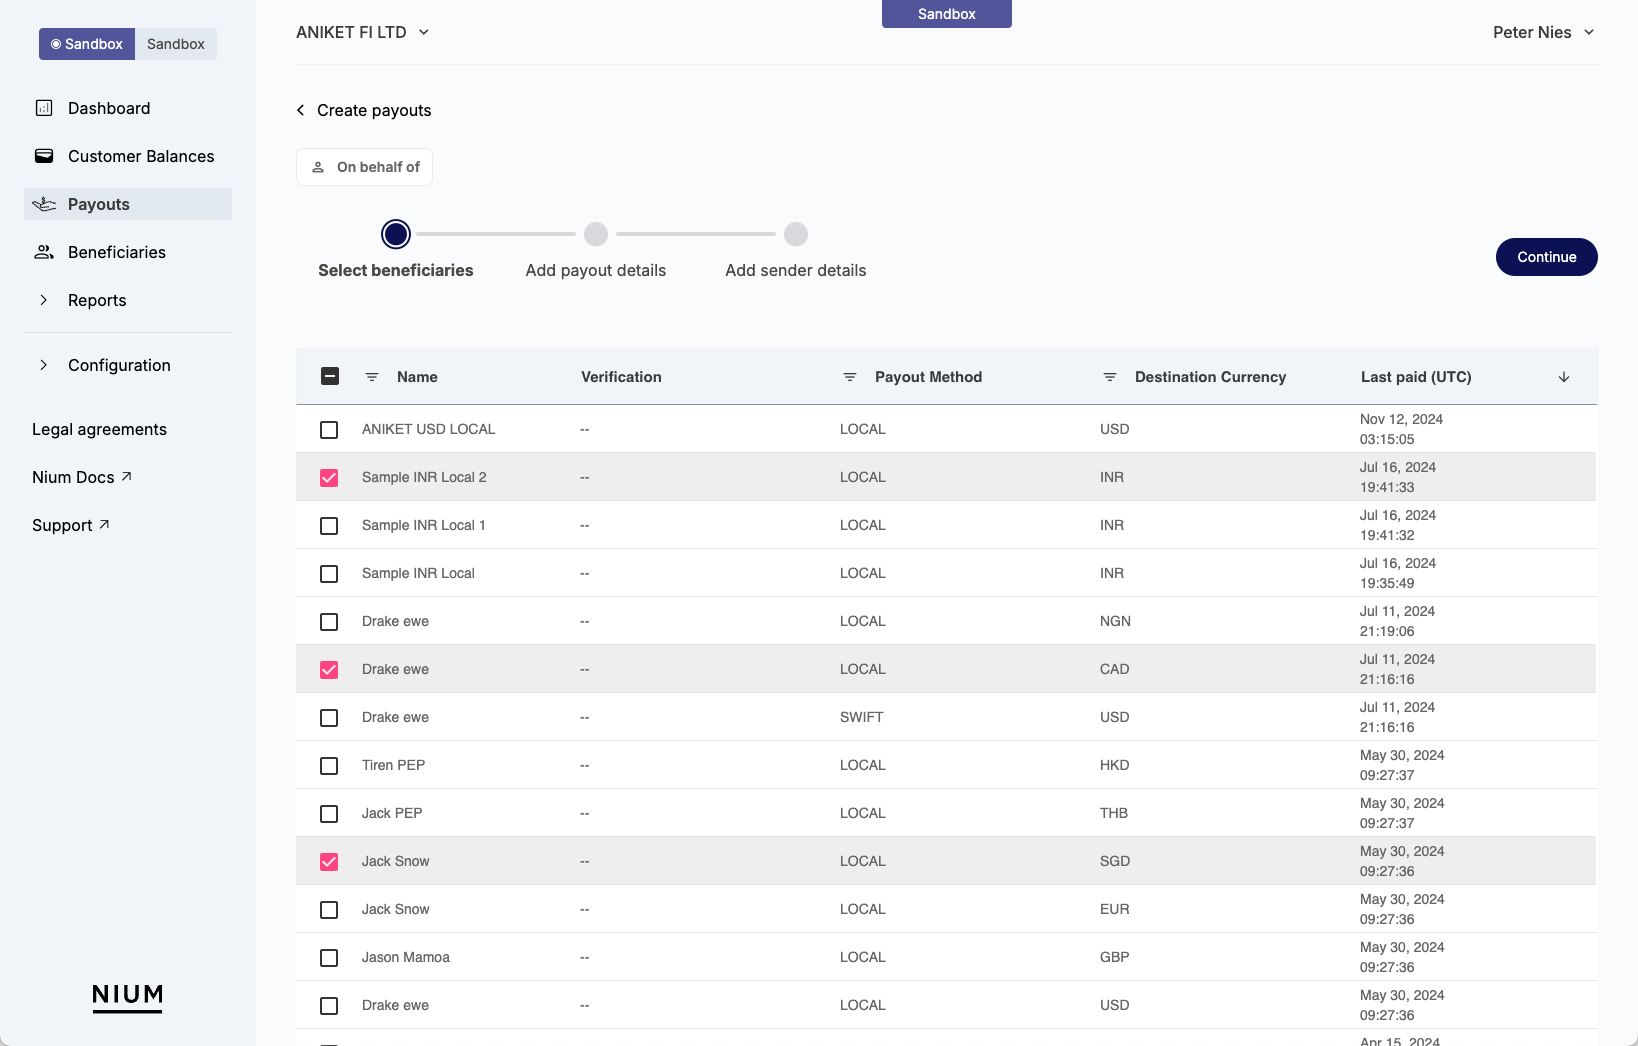
Select Beneficiaries
- Choose the individuals or companies you want to pay.
-
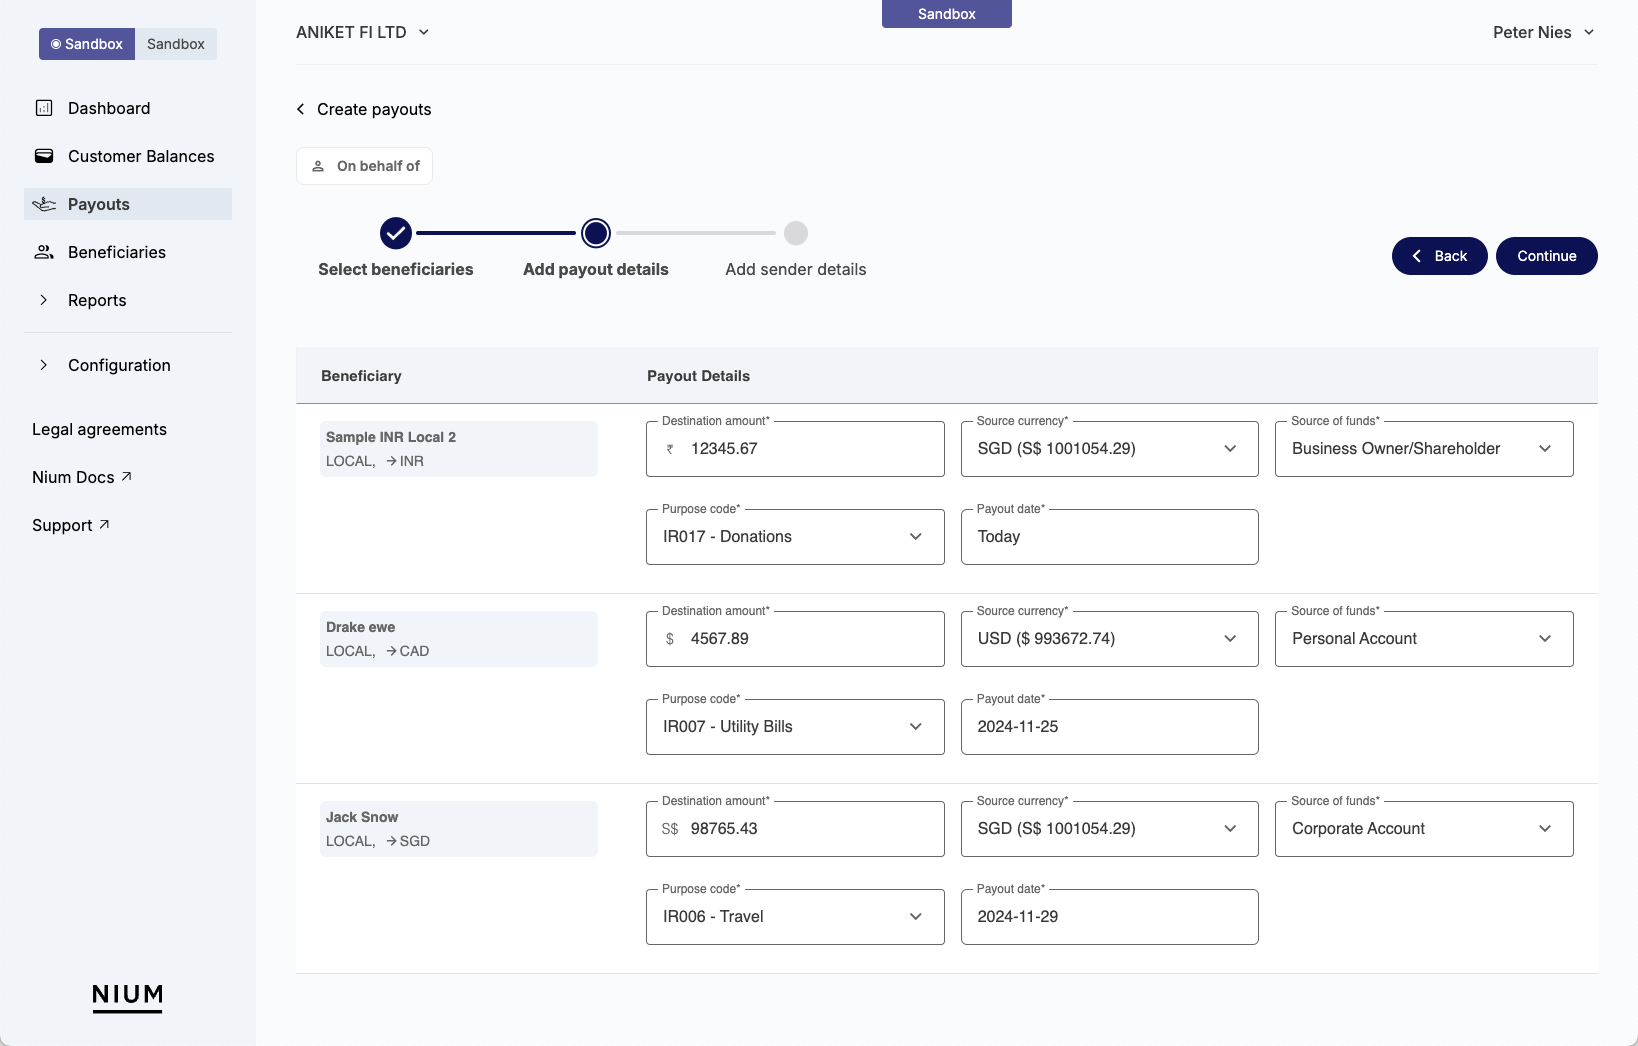
Add Payout Details
- Provide the required information, including amounts, currencies, and any other transaction details.
-
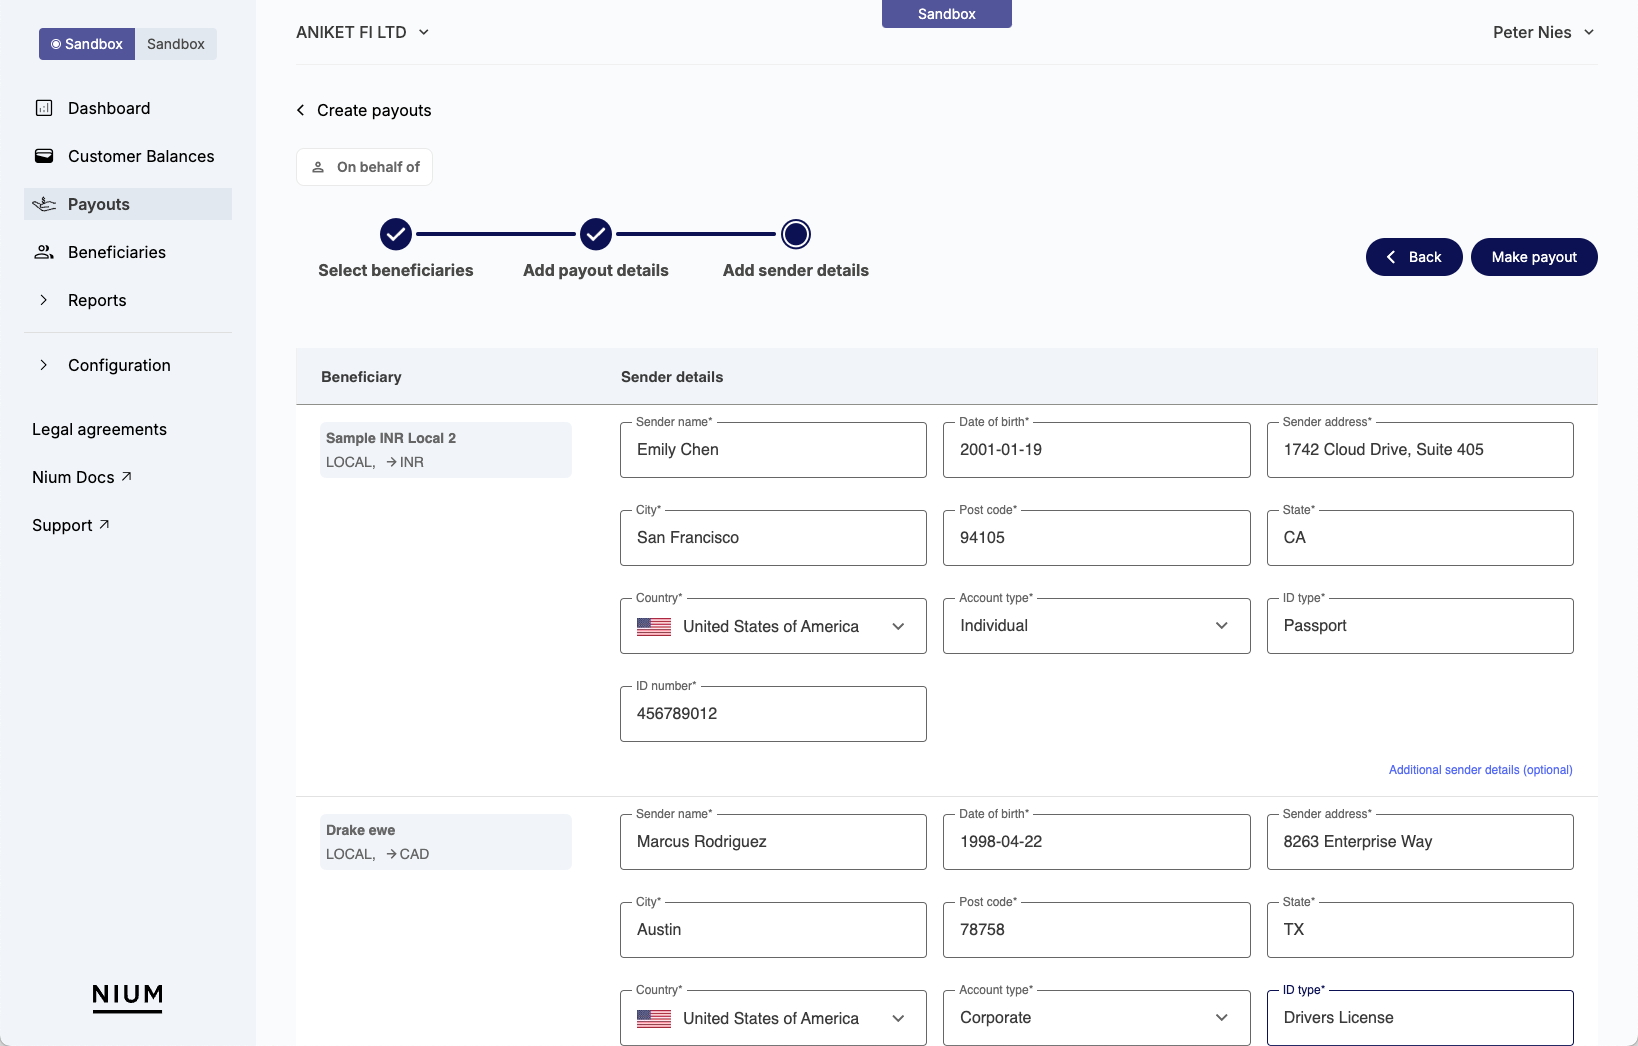
Add sender details -- This step is only applicable for on-behalf of payments.
- Add details about the sender (you or the party you're acting on behalf of).
-
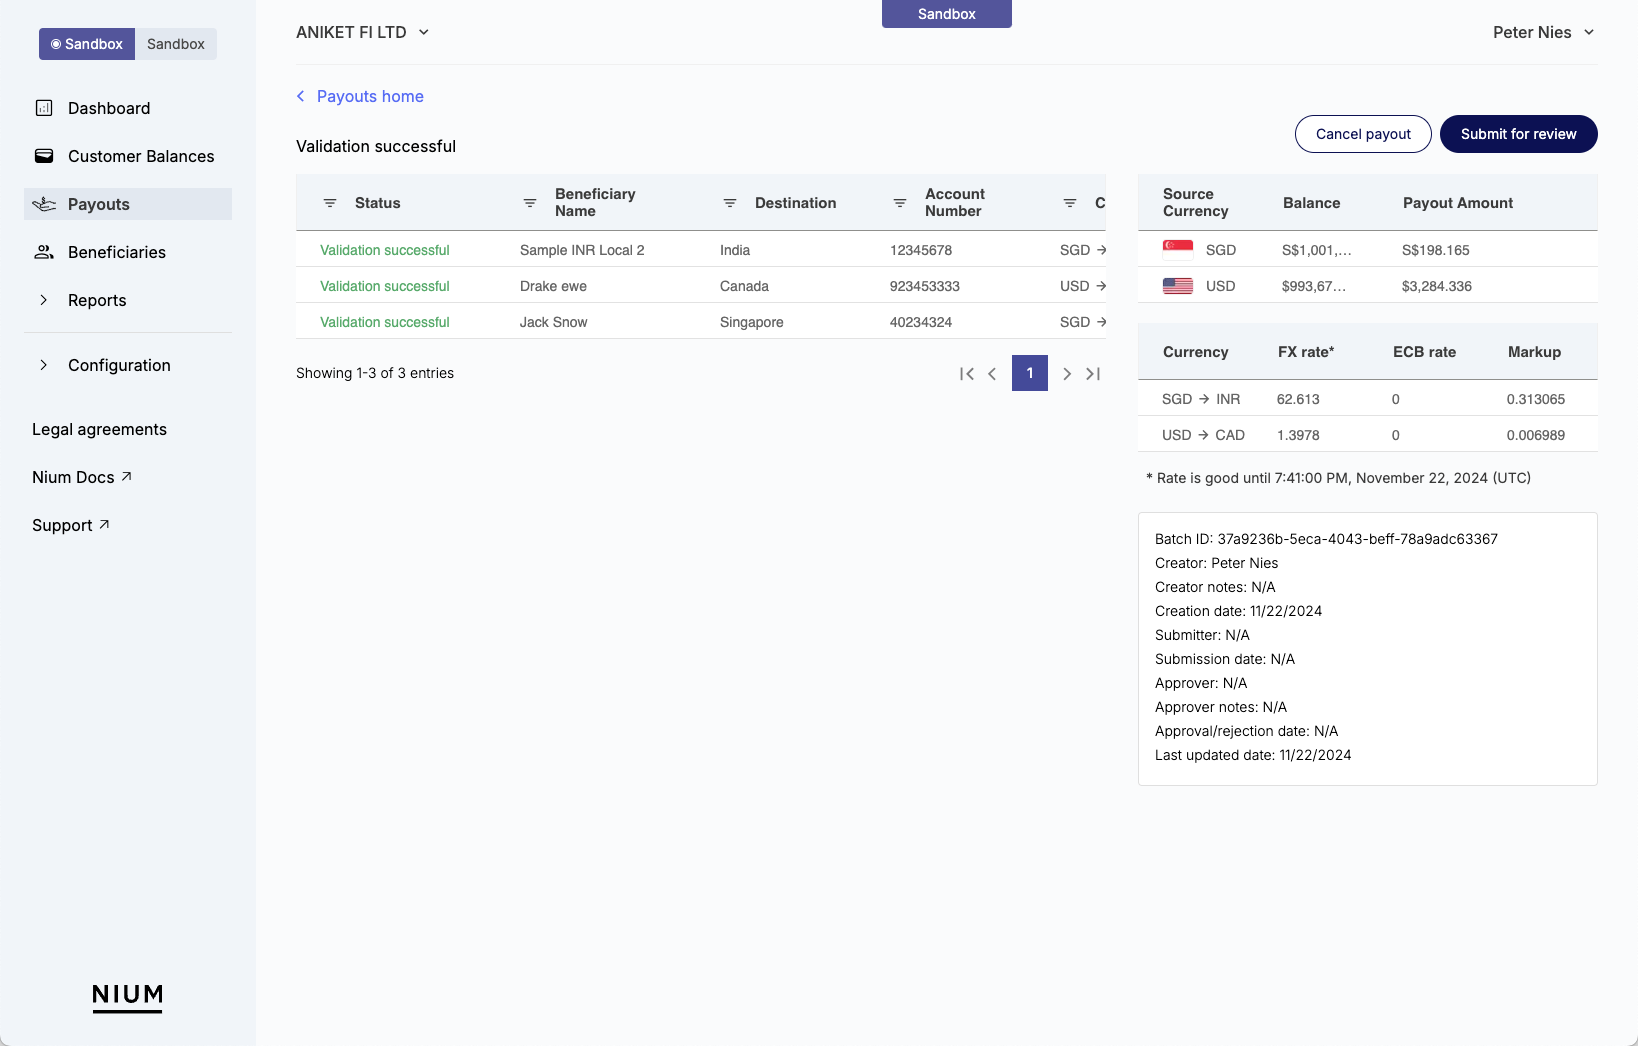
Submit for review
- Review the details and submit the payout for approval.
- Once approved, the payout will be processed.
Review the Status column to confirm if the in-line payout is available for approval from another admin or manager. Available statuses include:
- Cancelled: Payout(s) was cancelled by an admin or manager.
- Rejected: An admin or manager rejected the payout(s) when it was submitted for approval. Review Approver notes for more details on why the admin or manager rejected the payout(s).
- Submitted for payout: The payout was approved and submitted for processing.
Approve an in-line payout
In-line payouts can be approved by any client admin or manager. However, the maker of the in-line payout can't approve their own payouts.
To approve an in-line payout, log in to Nium Portal:
- Click Payouts > review the list for the payout you want to approve.
- Review the Status column to confirm the payout is available for approval and the status is Submitted for approval > Click Review and approve.
- Review the payout details page for any mistakes.
- If the details are accurate, click Approve to submit the payout(s) for processing and to create the
payouts. - If there is a mistake, click Decline to reject the in-line payout(s). To resubmit the payout(s), correct the mistake in the in-line payouts and resubmit the payout(s) for validation and approval.
- If the details are accurate, click Approve to submit the payout(s) for processing and to create the
Upload payouts
Batch payouts let you process up to 2,000 transactions in one go. This method is ideal for handling structured, high-volume payouts.
We recommend using the payout template in the Nium Portal to start creating your batch payouts CSV.
You can find this payout template by logging in to the Nium Portal and clicking New payout > Download payout template. A ZIP file will begin to download; once unzipped, you'll find two payout templates:
- Use the
payouts_template_own.csvtemplate when you check Self as the Sender of the payout. - Use the
payouts_template_onbehalf.csvtemplate when you check On behalf of as the Sender of the payout.
Note that the title of the columns in your CSV must match the titles of the columns in the template; issues can come up with approval and submission if the CSV has incorrect or mismatched column titles.
Examples of how to fill out these templates are available to download from the nium-assets repo. For more information, see Resources below.
Payouts validation sheet
The fields required to successfully create a payout change depending on factors like Destination currency, Destination country and the Payout method you're using.
To help you better understand what fields are required and optional, we have a Payouts Validation sheet available so you can confirm what fields you need to include in your batch payouts CSV.
To use the Batch Payouts Validation Sheet, filter each column for the value you'd like to use. The remaining fields highlighted in blue are required, while the rest are optional.
See Regex and Accepted Values for details on how Nium filters characters.
Create a batch payout
When your CSV is ready, you can submit it to create a batch of payouts using Nium Portal, our no-code web app.
Nium Portal
To create a batch payout, log in to Nium Portal:
- Click Payouts in the sidebar > New payout in the top right.
- Next to Sender, check if you're creating the batch payout for your Self or On behalf of another party.
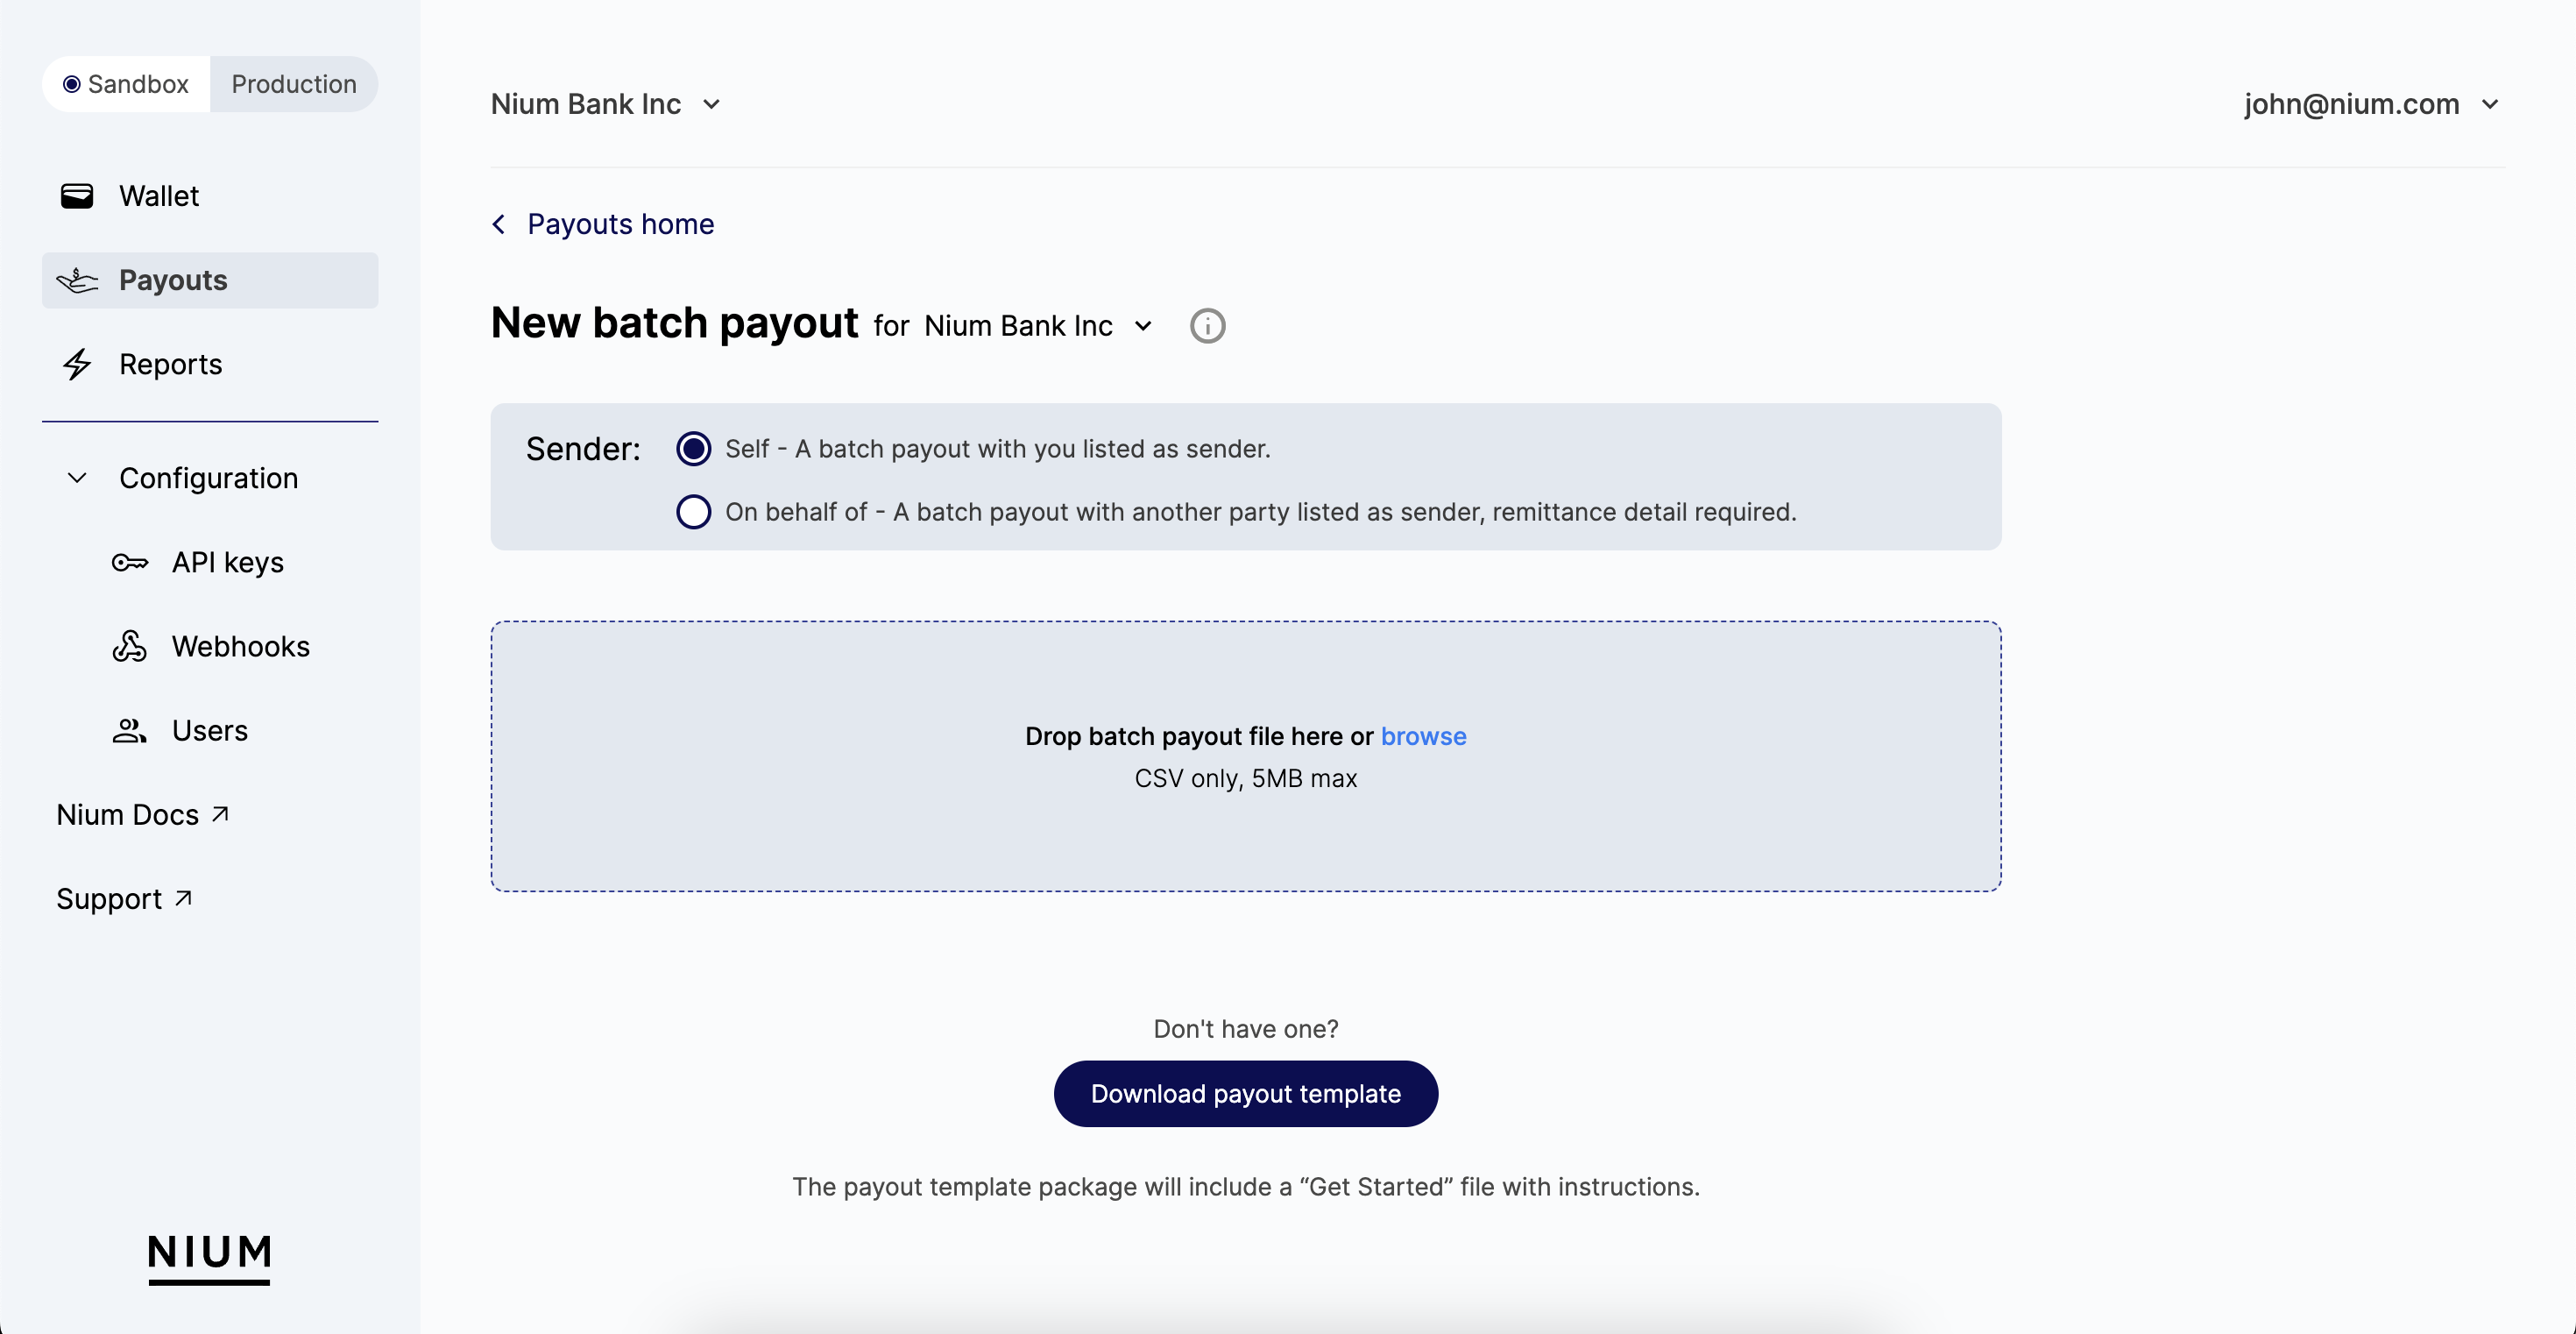
- Per the instructions in the Nium Portal, drag and drop your CSV file over the highlighted area.
- Click Upload batch payout file > You'll see the newly created batch payout at the top of the Batch payouts list.
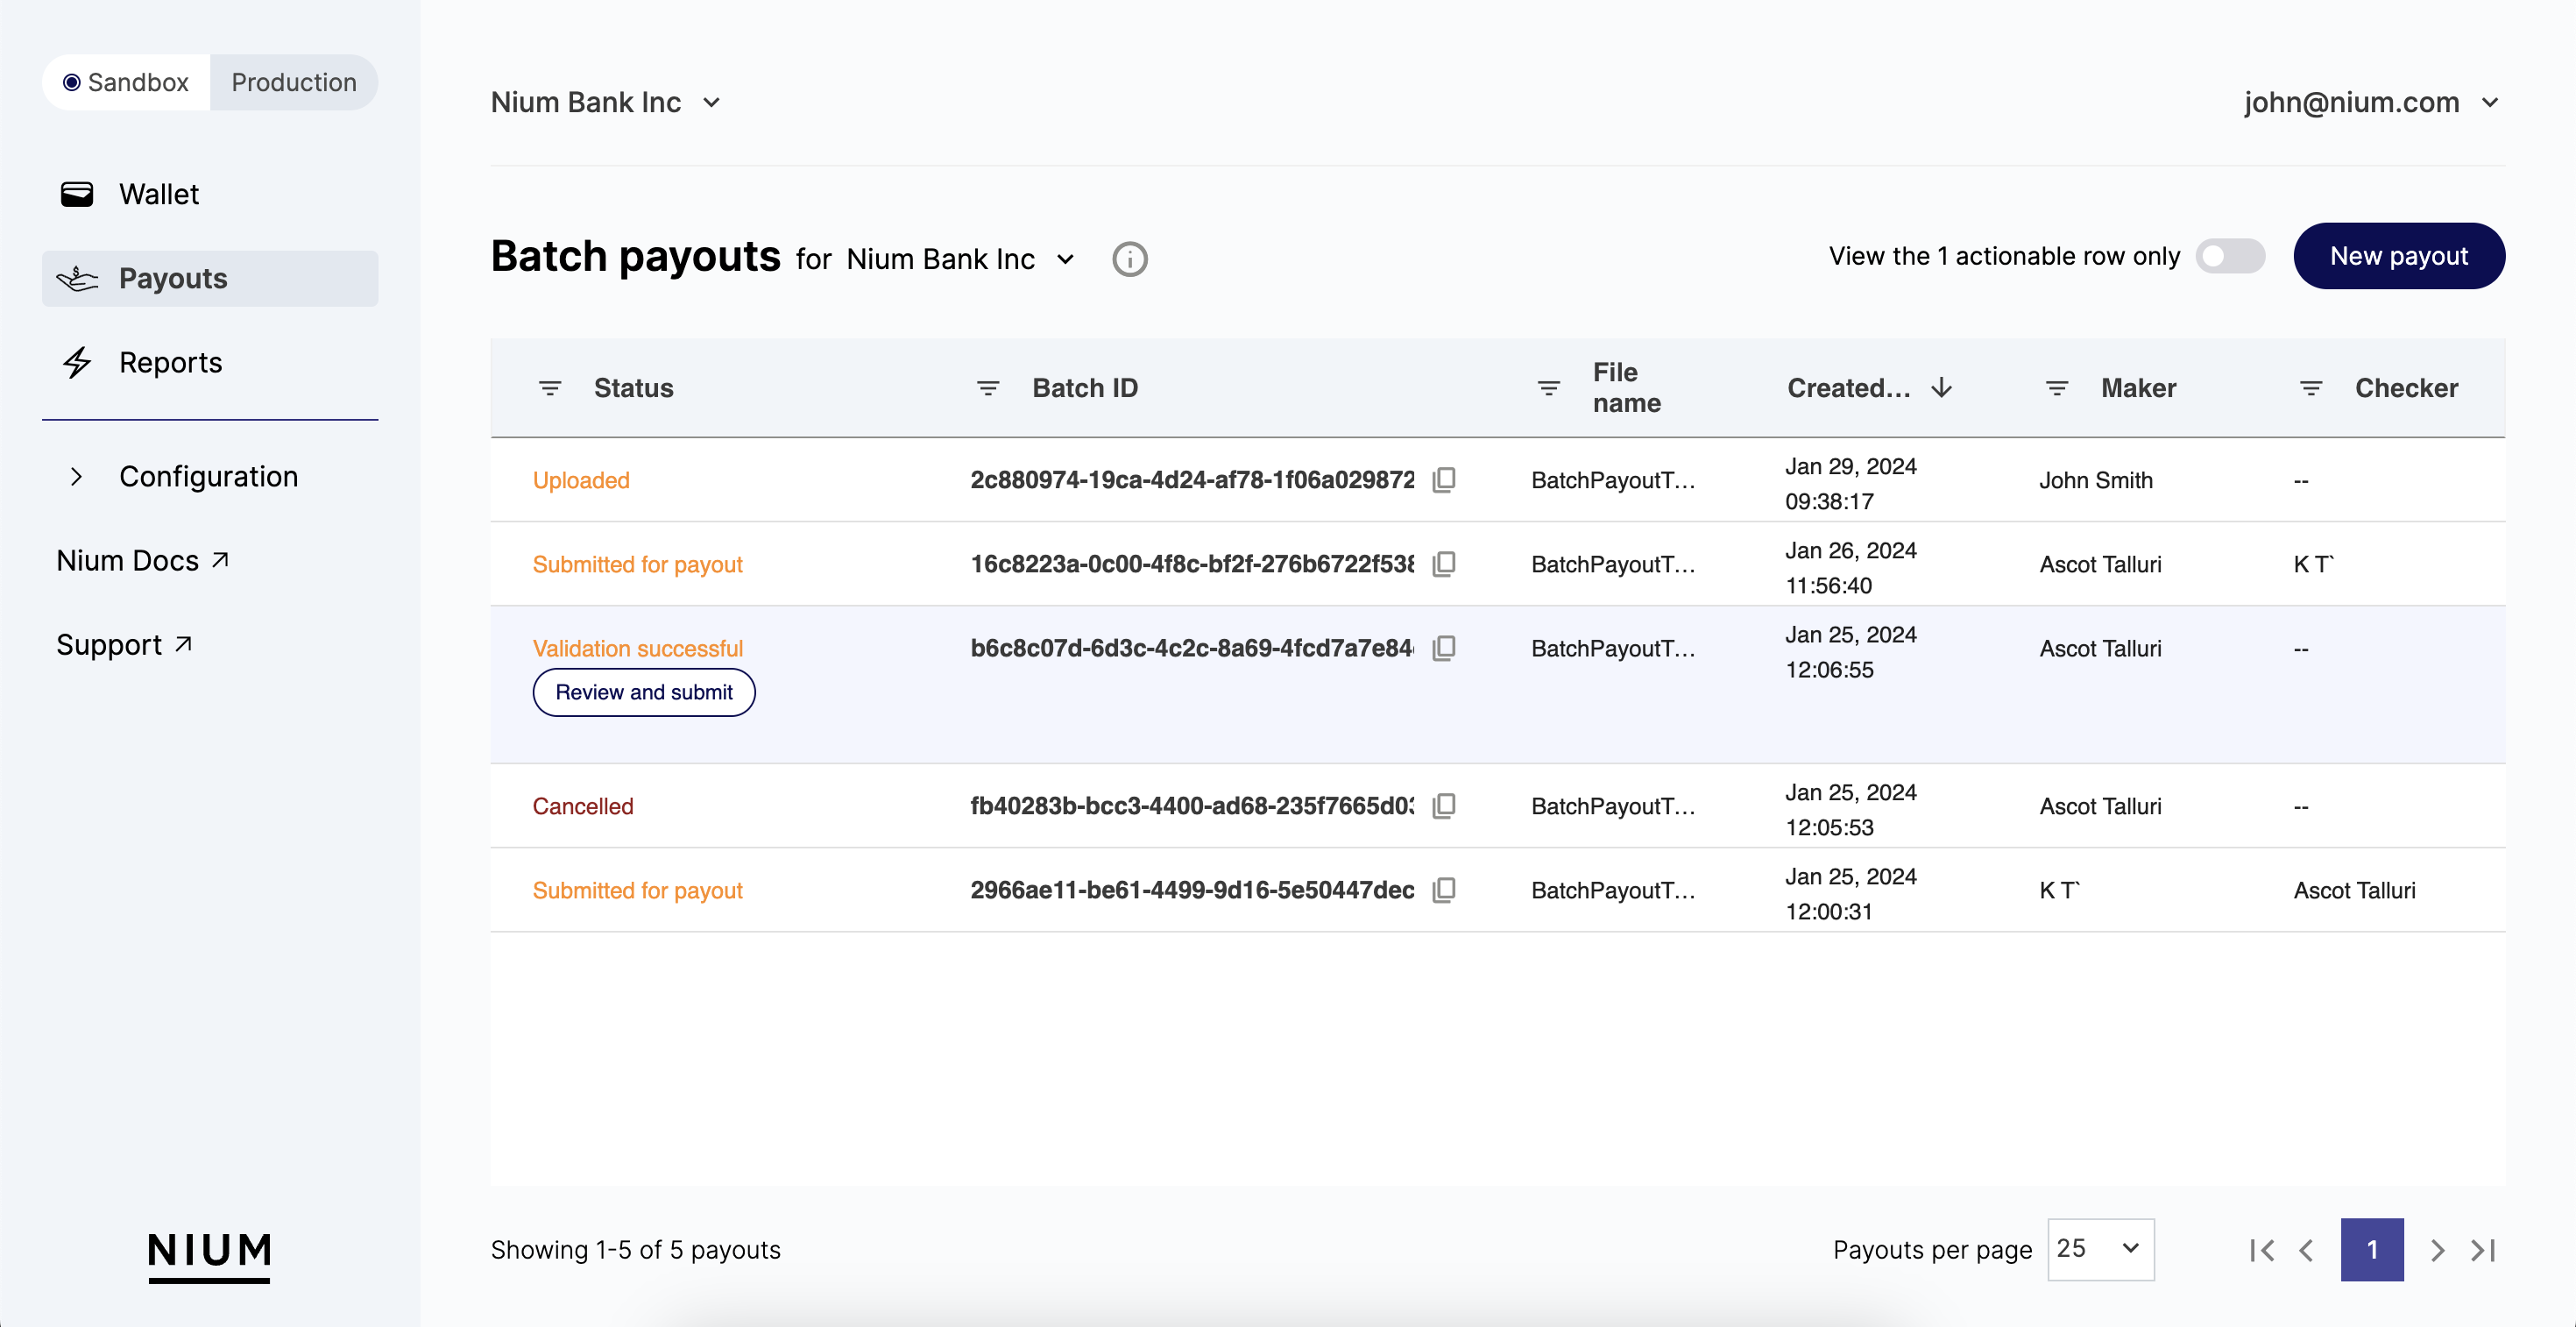
Review the Status column to confirm if the batch payout is available for approval from another admin or manager. Available statuses include:
- Cancelled: Batch payout was cancelled by an admin or manager.
- Rejected: An admin or manager rejected the batch payout when it was submitted for approval. Review Approver notes for more details on why the admin or manager rejected the payout.
- Uploaded: The CSV was successfully uploaded on behalf of another party and accepted.
- Submitted for approval: The CSV was accepted, validated, and submitted for approval. Once approved by the admin or manager (other than the maker of the batch payout), the payout details will be submitted for processing and payout creation.
- Submitted for payout: The batch payout was approved and submitted for processing.
- Validation failed: Formatting and validation issues caused the CSV to fail. Click on the individual entry for the payout to review the issues in detail and to understand what changes need to be made.
- Validation successful: The CSV was accepted and validated; the payout is ready to submit for approval.
- #/# passed validation: There are issues with some of the payouts in the CSV, but not all. Click on the individual entry for the payout to review the issues in detail and to understand what changes need to be made.
Approve a batch payout
Batch payouts can be approved by any client admin or manager. However, the maker of the batch payout can't approve their own payouts.
To approve a batch payout, log in to Nium Portal:
- Click Payouts > review the list for the payout you want to approve.
- Review the Status column to confirm the payout is available for approval and the status is Submitted for approval > Click Review and approve.
- Review the payout details page for any mistakes.
- If the details are accurate, click Approve to submit the batch for processing and to create the payouts.
- If there is a mistake, click Decline to reject the batch payout. To resubmit the payout, correct the mistake in the batch payout CSV and resubmit the batch payout for validation and approval.
Choosing Between In-Line and Upload Payouts
- Use In-Line Payouts for quick fixes, small-scale payouts, or ad-hoc transactions.
- Use Upload Payouts for high-volume or recurring payments. We recommend using Batch Payouts if you plan on creating 10 or more transactions.
Both methods are designed to make payouts efficient, flexible, and accessible to users of all technical levels.
Resources
We have a few resources available to help you create your batch payouts CSV.
Refer to the Nium Playbook for a breakdown of transaction limits for every available currency.
We also have a template available in Nium Portal or our public GitHub repo. To download the resources from our public GitHub repo:
- Open the Nium Assets repo in your preferred web browser.
- Click Code > Download ZIP.
- Unzip the ZIP file and you'll have a CSV and XLSX file.
- The
payouts_template_own.csvandpayouts_template_onbehalf.csvfile is the Payouts Template. - The
payouts_validations_fi.xlsxis the Payouts Validation sheet.
- The
The validation sheet is only required for on-behalf payments.
| Resource | Description | Steps to download |
|---|---|---|
| Payouts Template | Use this sheet as a template to create a CSV that will get approved and successfully create payouts once submitted. | Login to Nium Portal. > Click New payout > Click Download payout template. Download the relevant template file directly from the Nium Assets GitHub repo. |
| Payouts Validation Sheet | Use this sheet to understand what fields are required in your batch payouts CSV, depending on the payment corridor(s) you're using. | Login to Nium Portal. > Click New payout > Click Download payout template. Download the relevant validation file directly from the Nium Assets GitHub repo. |
| Sample Payouts - Self | Use this sheet as an example of how to fill out the Payouts Template to create a payout for yourself. | Download the sample_payout_own.csv file directly from the Nium Assets GitHub repo. |
| Sample Payouts - On behalf of | Use this sheet as an example of how to fill out the Payouts Template to create a payout on behalf of another party. | Download the sample_payout_onbehalf.csv file directly from the Nium Assets GitHub repo. |