Prerequisites
To take advantage of our Dynamic Authorization model, your system needs to respond to a request from the Nium One platform.
These following prerequisites only apply to the authorization Delegated Modeland Extended Model.
Integration
First reach out to your Nium account manager or Nium support and provide your URL [format: <your URL>/api1/v1/authorization].
Nium sends a Delegated Model request payload and receives a response payload with this URL.
Security
The API is in the HTTPS protocol. Allow list Nium's IP address to make sure only Nium is the authorized API sender. Aside from HTTPS, there are encryption keys that you and Nium need to share.
| API action | Description |
|---|---|
| API request |
|
| API response |
|
Generate PGP keys
To generate a public and private PGP key for the above requests, take the following steps. These steps generate the keys using Git Bash on Windows.
See the following table for a complete list of the commands used.
PGP commands
| Action | Command |
|---|---|
| Generate a PGP key | gpg --full-generate-key |
| List PGP secret keys | gpg --list-secret-keys |
| Export public key | gpg --output clientfile-public.key --armor --export [example.rha@gmail.com](mailto:example.rha@gmail.com) |
| Export private key | gpg --output clientfile-secret.key --armor --export-secret-key [example.rha@gmail.com](mailto:example.rha@gmail.com) |
Step 1: Use the generate PGP key command
Run the gpg---full-generate-key command.

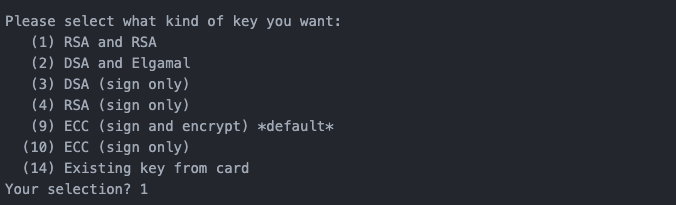
Step 2: Set the key type
Use 1 to set the type of the generated public and private key to RSA.
Step 3: Set the key length
Set the length of the PGP keys. We recommend setting the length of the keys to 2048 bits.

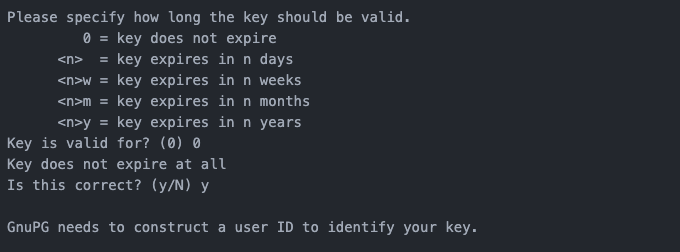
Step 4: Set expiration time
Set how many days the keys will be valid for. Nium recommends using 0 so the keys don't expire.
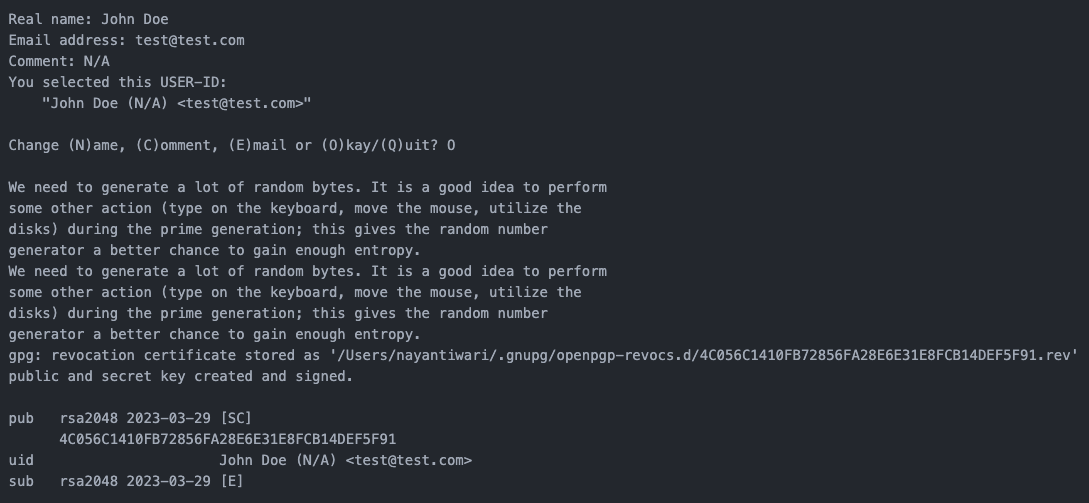
Step 5: Enter key owner details
Details requested include:
- Name of the key owner
- Email address of the key owner
- Any additional comments for your future reference
Step 6: Set a passphrase
Set a passphrase for the private PGP key.

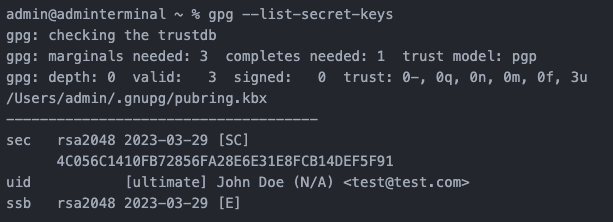
Step 7: List the key
List the generated keys using the gpg --list-secret-keys command.
Export PGP keys
Once you've generated a pair of PGP keys, take the following steps to export the keys.
Step 1: Export your public PGP key
Run the $gpg --output company-pgp-public-key.key --armor --export cards.admin@company.com command to export your public key.
Running the command creates a file in your home directory with the title company-pgp-public-key.key.

Step 2: Export your private PGP key
Run the $gpg --output company-pgp-private-key.key --armor --export-secret-key cards.admin@company.com command to begin exporting your private key.
When prompted, enter the passphrase you set to export the private key.
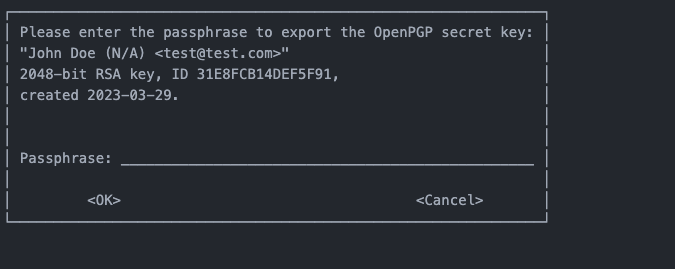
Entering your passphrase creates a file in your home directory with the title company-pgp-private-key.key.

Payload
Reach out to your Nium account manager or Nium support with your PGP keys ready to share.
Nium sends the authorization request to your integration. The request contains the transaction data and merchant data, so you can authorize or reject the request.